Using the Telnet Console
2. Configure these fields.
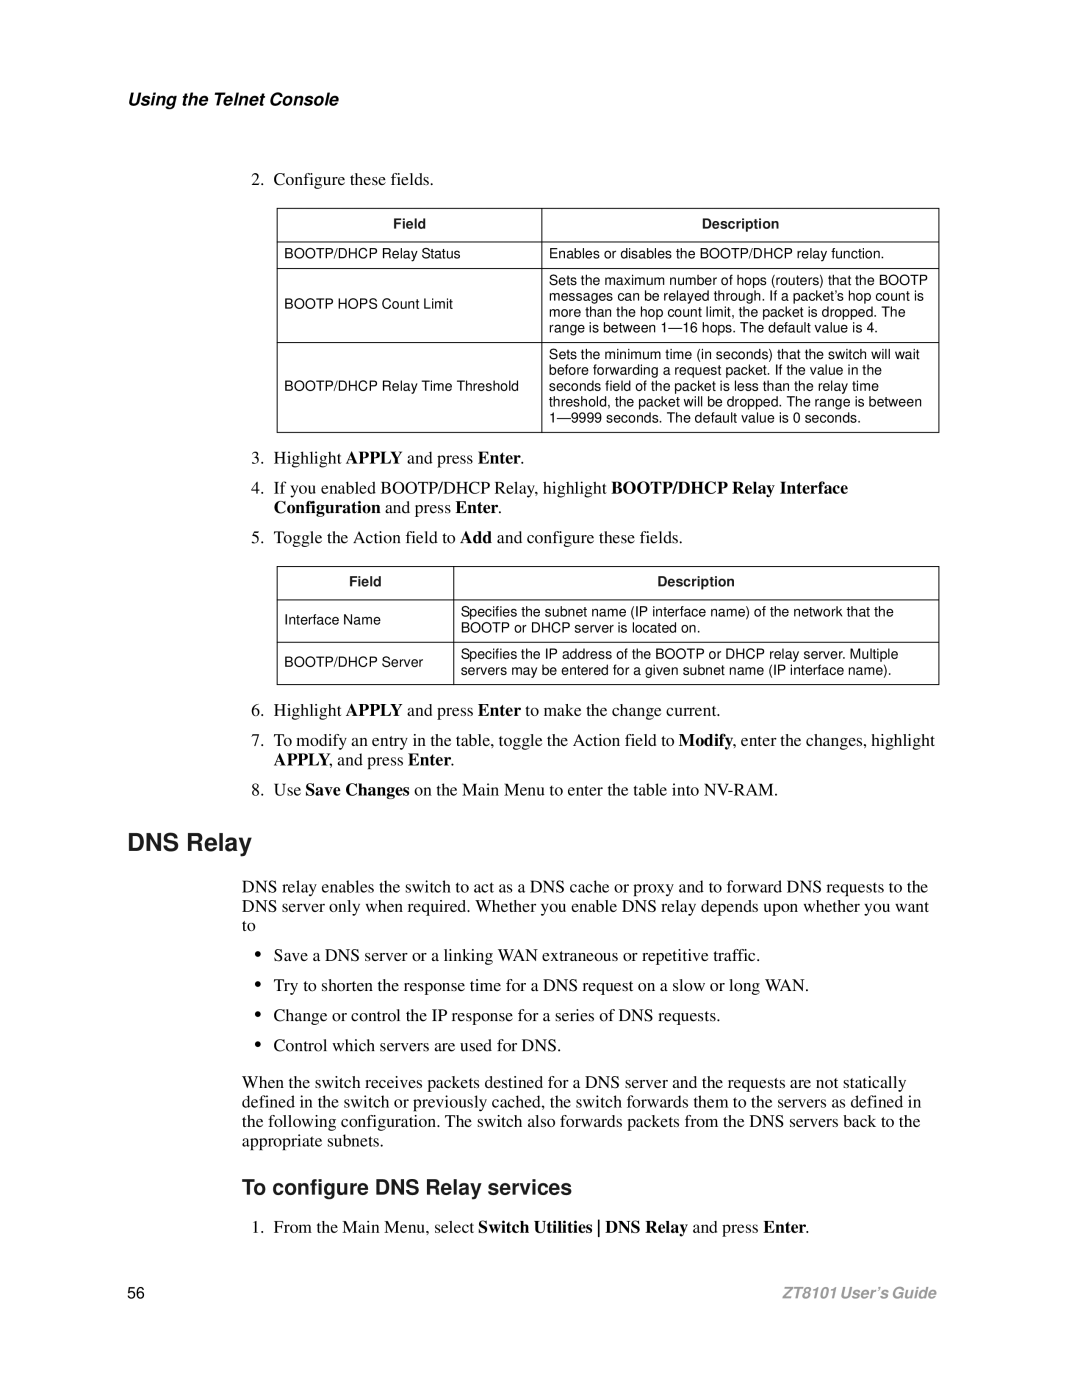
Field | Description | |
|
| |
BOOTP/DHCP Relay Status | Enables or disables the BOOTP/DHCP relay function. | |
|
| |
| Sets the maximum number of hops (routers) that the BOOTP | |
BOOTP HOPS Count Limit | messages can be relayed through. If a packet’s hop count is | |
more than the hop count limit, the packet is dropped. The | ||
| ||
| range is between 1— 16 hops. The default value is 4. | |
|
| |
| Sets the minimum time (in seconds) that the switch will wait | |
| before forwarding a request packet. If the value in the | |
BOOTP/DHCP Relay Time Threshold | seconds field of the packet is less than the relay time | |
| threshold, the packet will be dropped. The range is between | |
| 1— 9999 seconds. The default value is 0 seconds. | |
|
|
3.Highlight APPLY and press Enter.
4.If you enabled BOOTP/DHCP Relay, highlight BOOTP/DHCP Relay Interface Configuration and press Enter.
5.Toggle the Action field to Add and configure these fields.
Field | Description | |
|
| |
Interface Name | Specifies the subnet name (IP interface name) of the network that the | |
BOOTP or DHCP server is located on. | ||
| ||
|
| |
BOOTP/DHCP Server | Specifies the IP address of the BOOTP or DHCP relay server. Multiple | |
servers may be entered for a given subnet name (IP interface name). | ||
| ||
|
|
6.Highlight APPLY and press Enter to make the change current.
7.To modify an entry in the table, toggle the Action field to Modify, enter the changes, highlight APPLY, and press Enter.
8.Use Save Changes on the Main Menu to enter the table into
DNS Relay
DNS relay enables the switch to act as a DNS cache or proxy and to forward DNS requests to the DNS server only when required. Whether you enable DNS relay depends upon whether you want to
•Save a DNS server or a linking WAN extraneous or repetitive traffic.
•Try to shorten the response time for a DNS request on a slow or long WAN.
•Change or control the IP response for a series of DNS requests.
•Control which servers are used for DNS.
When the switch receives packets destined for a DNS server and the requests are not statically defined in the switch or previously cached, the switch forwards them to the servers as defined in the following configuration. The switch also forwards packets from the DNS servers back to the appropriate subnets.
To configure DNS Relay services
1. From the Main Menu, select Switch Utilities DNS Relay and press Enter.
56 | ZT8101 User’s Guide |