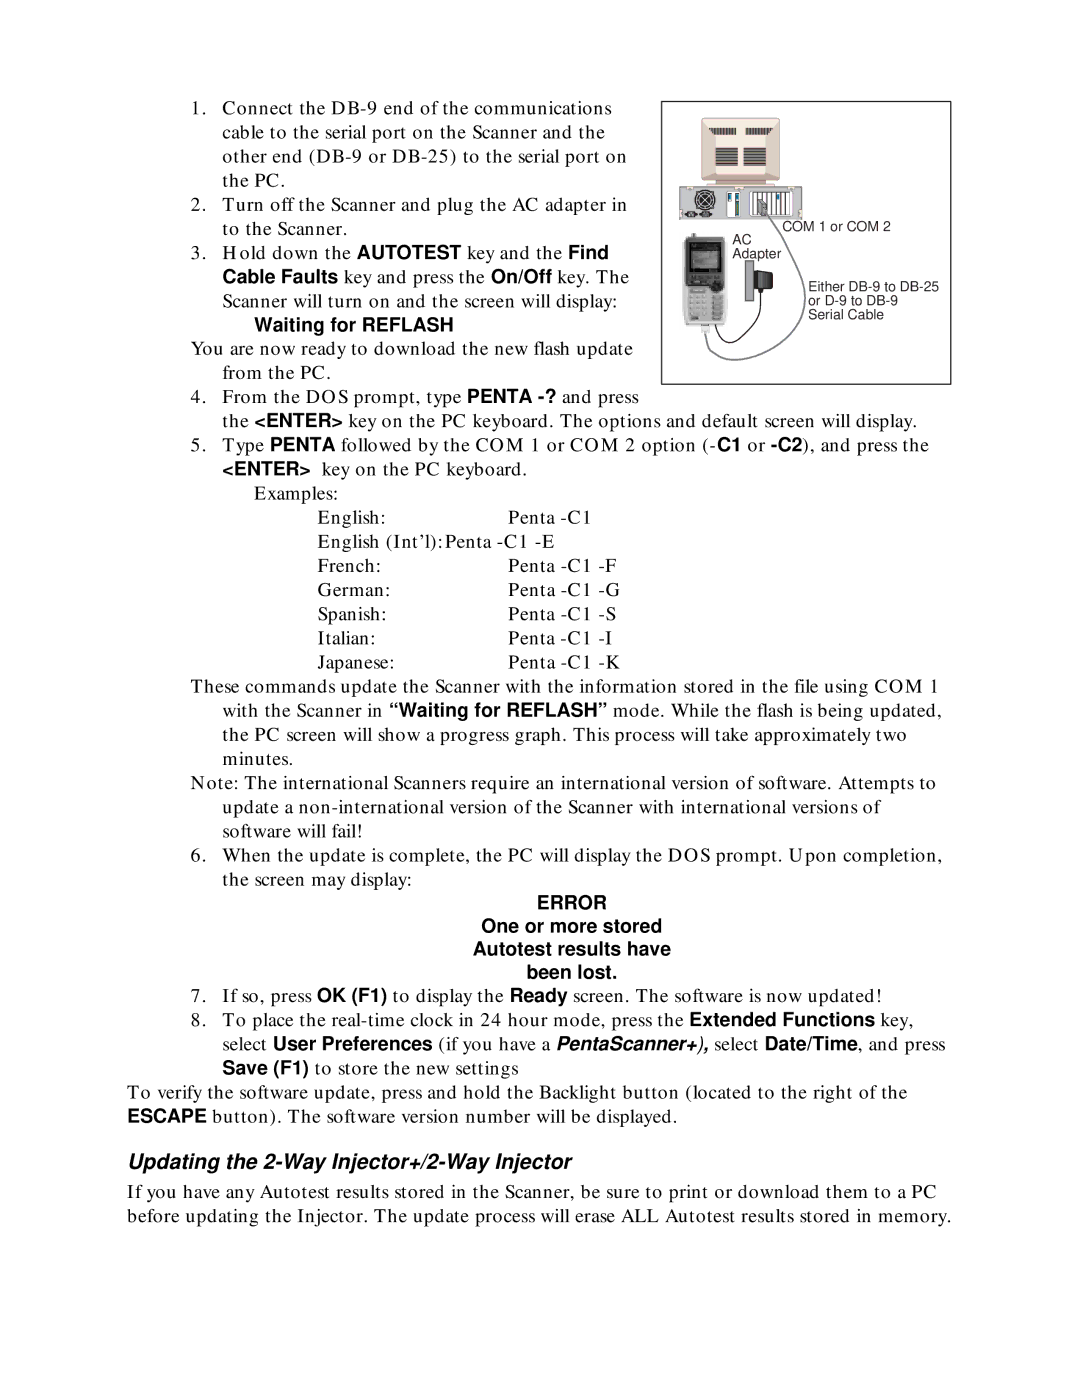
1.Connect the
2.Turn off the Scanner and plug the AC adapter in to the Scanner.
3.Hold down the AUTOTEST key and the Find Cable Faults key and press the On/Off key. The Scanner will turn on and the screen will display:
COM 1 or COM 2
AC Adapter
Waiting for REFLASH
You are now ready to download the new flash update from the PC.
4.From the DOS prompt, type PENTA
the <ENTER> key on the PC keyboard. The options and default screen will display.
5.Type PENTA followed by the COM 1 or COM 2 option
Examples:
English:Penta
French:Penta
German:Penta
Spanish:Penta
Italian:Penta
Japanese:Penta
These commands update the Scanner with the information stored in the file using COM 1 with the Scanner in “Waiting for REFLASH” mode. While the flash is being updated, the PC screen will show a progress graph. This process will take approximately two minutes.
Note: The international Scanners require an international version of software. Attempts to update a
6. When the update is complete, the PC will display the DOS prompt. Upon completion, the screen may display:
ERROR
One or more stored Autotest results have been lost.
7.If so, press OK (F1) to display the Ready screen. The software is now updated!
8.To place the
select User Preferences (if you have a PentaScanner+), select Date/Time, and press Save (F1) to store the new settings
To verify the software update, press and hold the Backlight button (located to the right of the ESCAPE button). The software version number will be displayed.
Updating the 2-Way Injector+/2-Way Injector
If you have any Autotest results stored in the Scanner, be sure to print or download them to a PC before updating the Injector. The update process will erase ALL Autotest results stored in memory.
