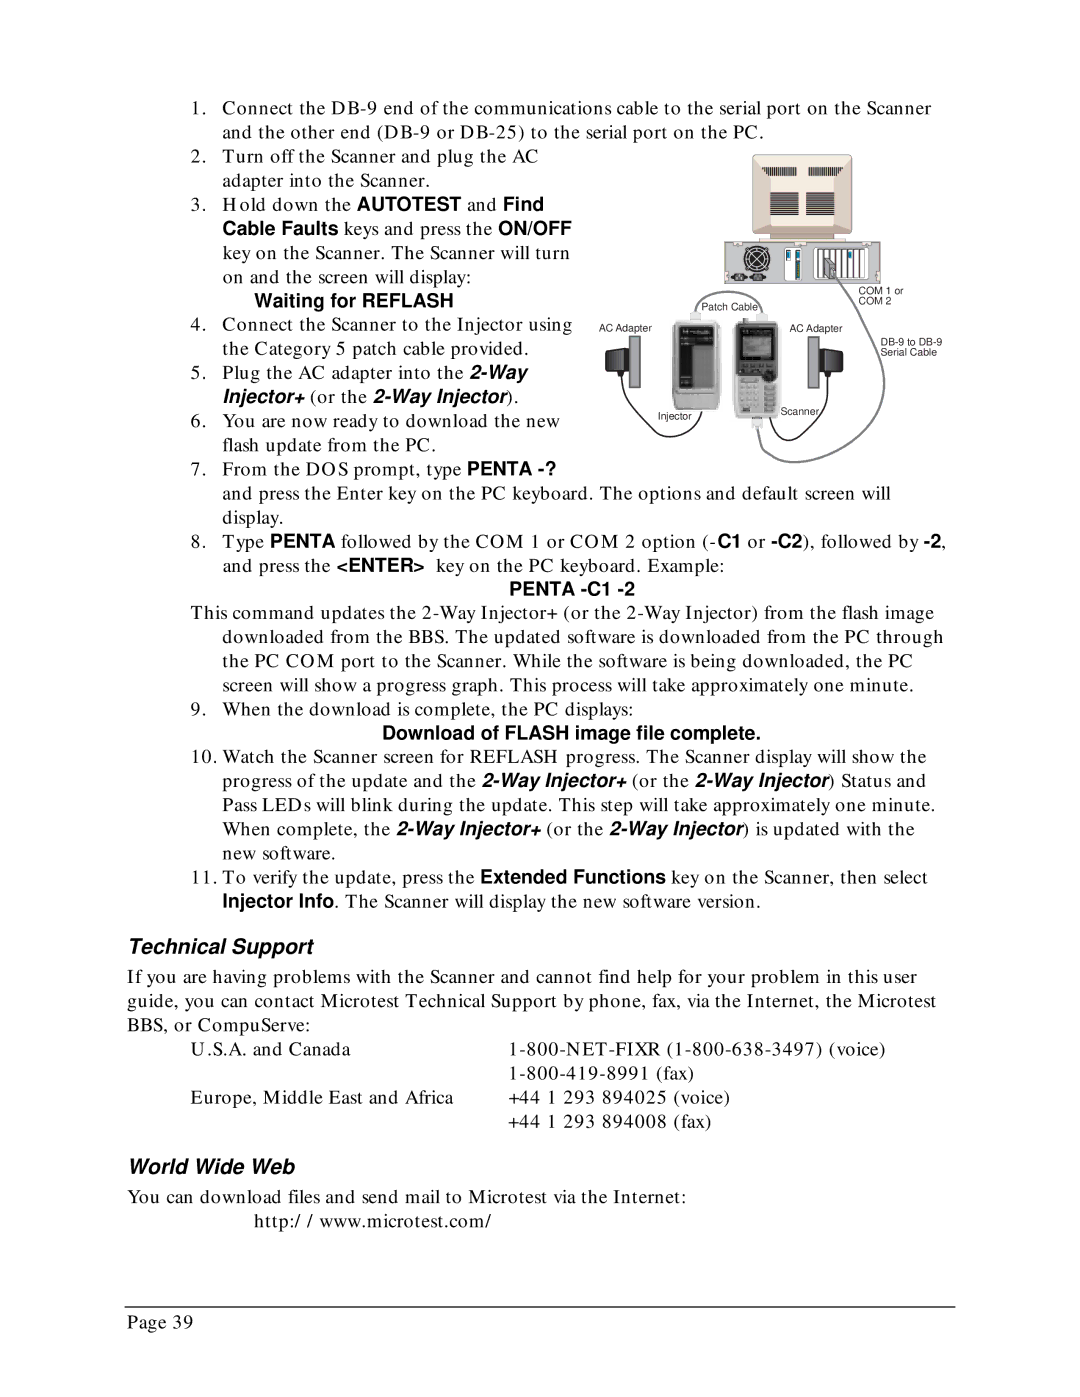
1.Connect the
2. Turn off the Scanner and plug the AC adapter into the Scanner.
3. Hold down the AUTOTEST and Find Cable Faults keys and press the ON/OFF key on the Scanner. The Scanner will turn on and the screen will display:
| Waiting for REFLASH |
| COM 1 or | |
| Patch Cable | COM 2 | ||
4. | Connect the Scanner to the Injector using AC Adapter |
| AC Adapter | |
| the Category 5 patch cable provided. |
| ||
|
| Serial Cable | ||
5. | Plug the AC adapter into the |
|
| |
| Injector+ (or the |
| Scanner | |
6. | You are now ready to download the new | Injector | ||
| ||||
|
|
flash update from the PC.
7.From the DOS prompt, type PENTA
and press the Enter key on the PC keyboard. The options and default screen will display.
8.Type PENTA followed by the COM 1 or COM 2 option
and press the <ENTER> key on the PC keyboard. Example:
PENTA -C1 -2
This command updates the
9. When the download is complete, the PC displays:
Download of FLASH image file complete.
10.Watch the Scanner screen for REFLASH progress. The Scanner display will show the progress of the update and the
11.To verify the update, press the Extended Functions key on the Scanner, then select Injector Info. The Scanner will display the new software version.
Technical Support
If you are having problems with the Scanner and cannot find help for your problem in this user guide, you can contact Microtest Technical Support by phone, fax, via the Internet, the Microtest BBS, or CompuServe:
U.S.A. and Canada
Europe, Middle East and Africa
World Wide Web
You can download files and send mail to Microtest via the Internet:
http://www.microtest.com/
Page 39
