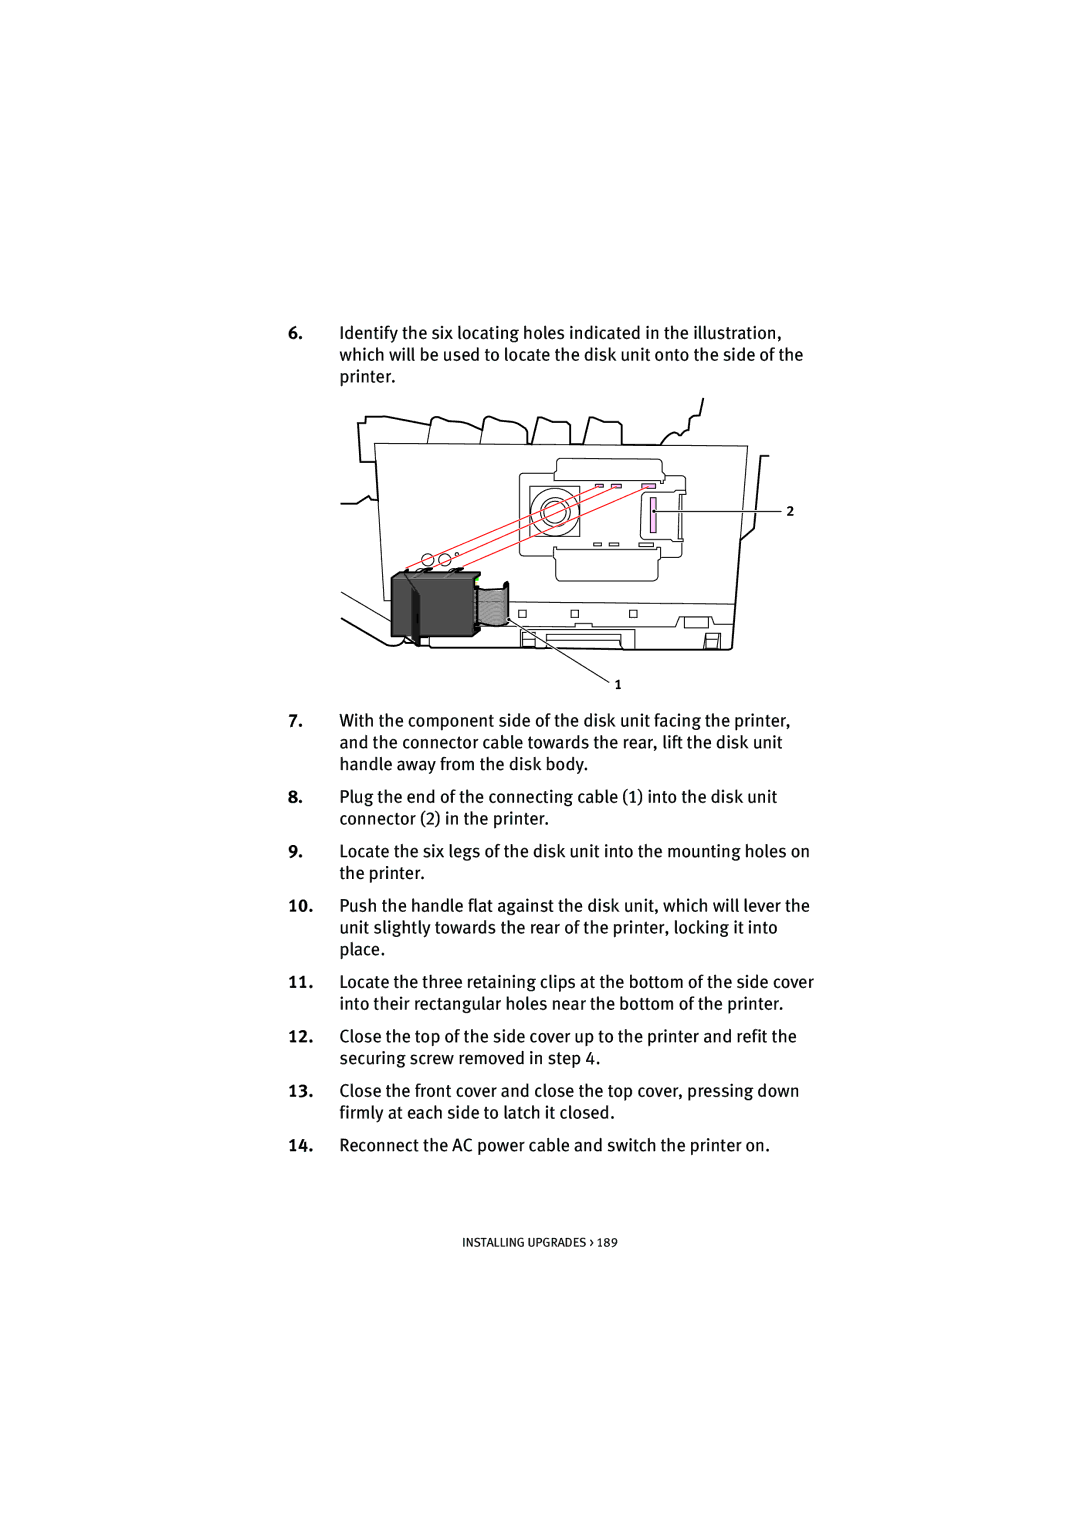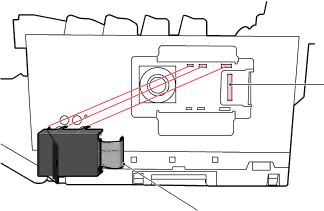
6.Identify the six locating holes indicated in the illustration, which will be used to locate the disk unit onto the side of the printer.
2
1
7.With the component side of the disk unit facing the printer, and the connector cable towards the rear, lift the disk unit handle away from the disk body.
8.Plug the end of the connecting cable (1) into the disk unit connector (2) in the printer.
9.Locate the six legs of the disk unit into the mounting holes on the printer.
10.Push the handle flat against the disk unit, which will lever the unit slightly towards the rear of the printer, locking it into place.
11.Locate the three retaining clips at the bottom of the side cover into their rectangular holes near the bottom of the printer.
12.Close the top of the side cover up to the printer and refit the securing screw removed in step 4.
13.Close the front cover and close the top cover, pressing down firmly at each side to latch it closed.
14.Reconnect the AC power cable and switch the printer on.