Advanced
Taking Pictures using the Built-in Flash
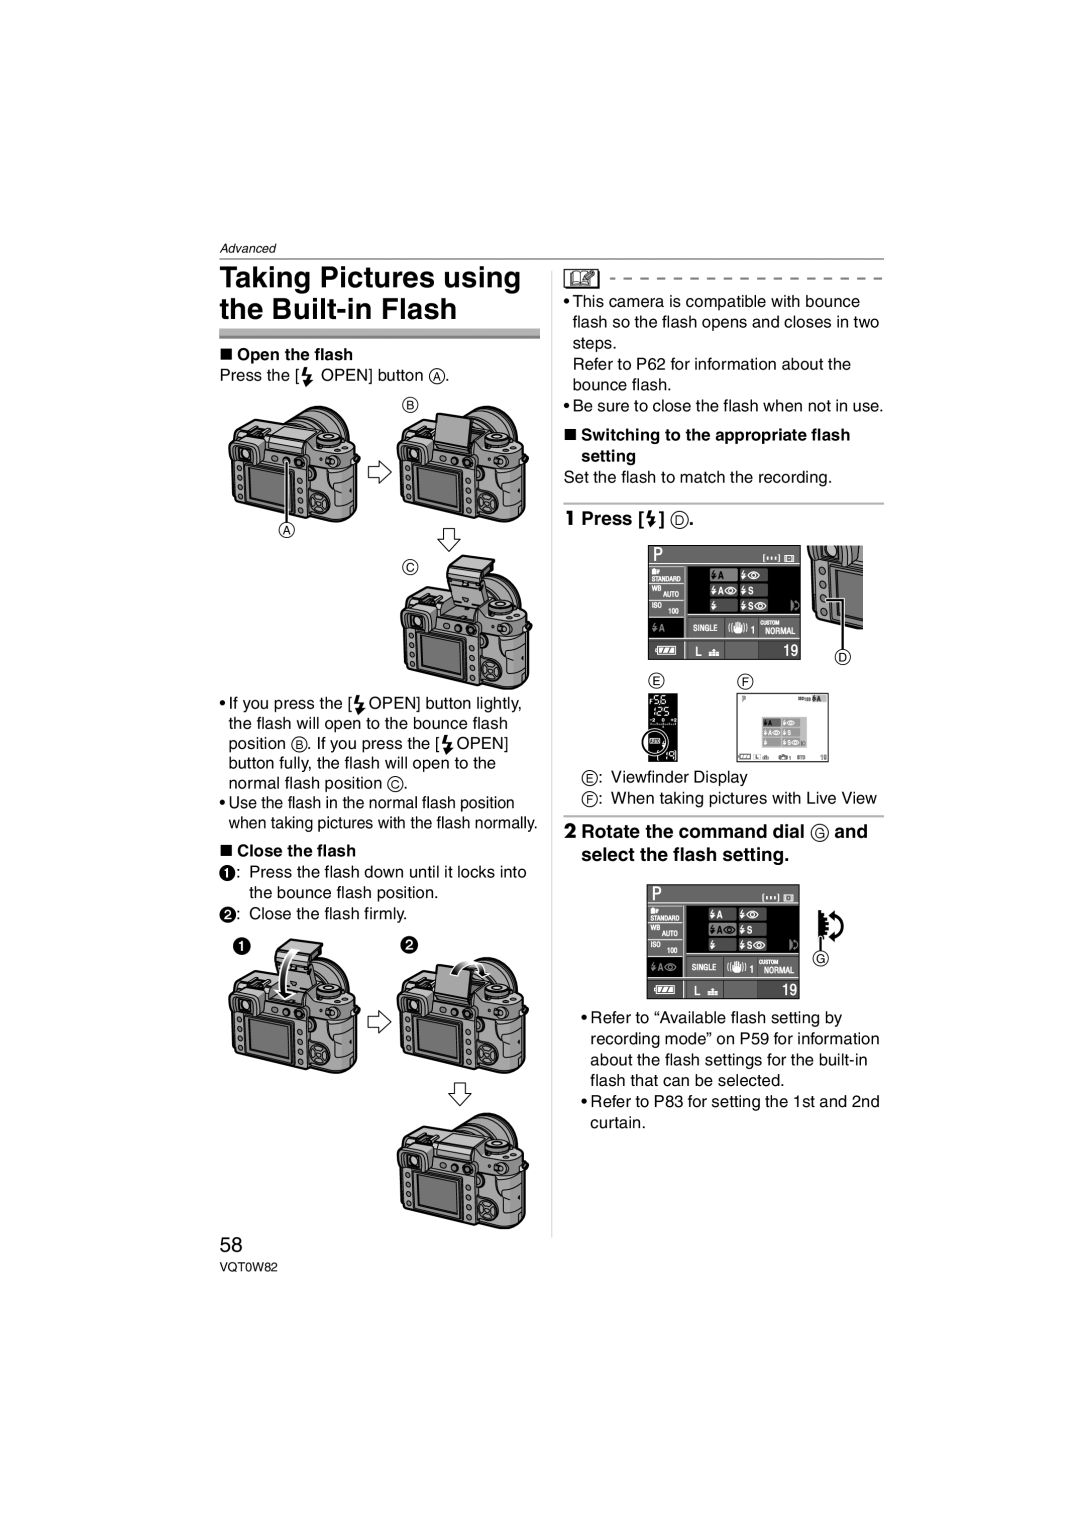
∫Open the flash
Press the [ ![]() OPEN] button A.
OPEN] button A.
B
A
C
•If you press the [![]() OPEN] button lightly, the flash will open to the bounce flash
OPEN] button lightly, the flash will open to the bounce flash
position B. If you press the [![]() OPEN] button fully, the flash will open to the normal flash position C.
OPEN] button fully, the flash will open to the normal flash position C.
•Use the flash in the normal flash position when taking pictures with the flash normally.
∫Close the flash
1: Press the flash down until it locks into the bounce flash position.
2: Close the flash firmly.
58
•This camera is compatible with bounce flash so the flash opens and closes in two steps.
Refer to P62 for information about the bounce flash.
•Be sure to close the flash when not in use.
∫Switching to the appropriate flash setting
Set the flash to match the recording.
1Press [ ] D.
] D.
P |
|
|
|
STANDARD |
|
|
|
WB |
|
|
|
AUTO |
|
|
|
ISO |
|
|
|
100 |
|
|
|
| SINGLE | CUSTOM |
|
| NORMAL |
| |
|
|
| |
|
| 19 | D |
|
|
| |
E | F |
|
|
| P | ISO100 |
|
AUTO |
|
|
|
|
| STD | 19 |
E: Viewfinder Display
F: When taking pictures with Live View
2 Rotate the command dial G and select the flash setting.
P
STANDARD
WB |
|
|
AUTO |
|
|
ISO |
|
|
100 |
| G |
SINGLE | CUSTOM | |
NORMAL |
| |
|
| |
| 19 |
|
•Refer to “Available flash setting by recording mode” on P59 for information about the flash settings for the
•Refer to P83 for setting the 1st and 2nd curtain.
VQT0W82
