7.
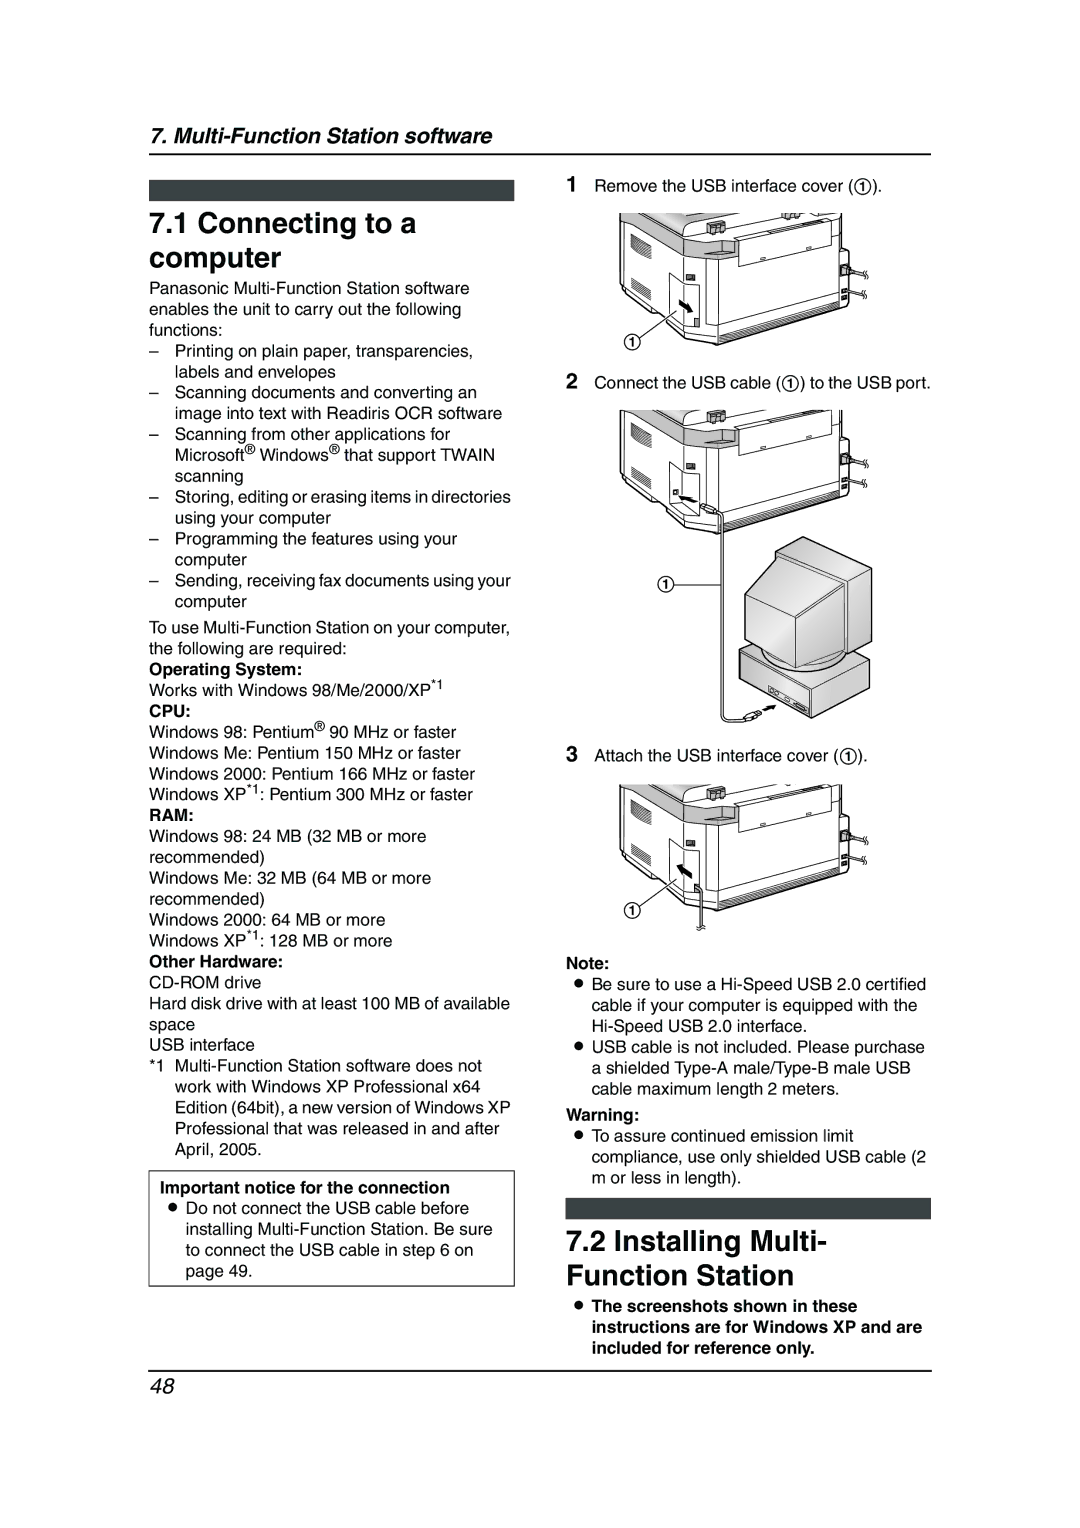
1 Remove the USB interface cover (1).
7.1Connecting to a computer
Panasonic
–Printing on plain paper, transparencies, labels and envelopes
–Scanning documents and converting an image into text with Readiris OCR software
–Scanning from other applications for Microsoft® Windows® that support TWAIN scanning
–Storing, editing or erasing items in directories using your computer
–Programming the features using your computer
–Sending, receiving fax documents using your computer
To use
Operating System:
Works with Windows 98/Me/2000/XP*1
CPU:
Windows 98: Pentium® 90 MHz or faster
Windows Me: Pentium 150 MHz or faster
Windows 2000: Pentium 166 MHz or faster
Windows XP*1: Pentium 300 MHz or faster
RAM:
Windows 98: 24 MB (32 MB or more recommended)
Windows Me: 32 MB (64 MB or more recommended)
Windows 2000: 64 MB or more
Windows XP*1: 128 MB or more
Other Hardware:
Hard disk drive with at least 100 MB of available space
USB interface
*1
Important notice for the connection
LDo not connect the USB cable before installing
1
2Connect the USB cable (1) to the USB port.
1
3Attach the USB interface cover (1).
1
Note:
LBe sure to use a
Hi-Speed USB 2.0 interface.
LUSB cable is not included. Please purchase a shielded
Warning:
LTo assure continued emission limit compliance, use only shielded USB cable (2 m or less in length).
7.2Installing Multi- Function Station
LThe screenshots shown in these instructions are for Windows XP and are included for reference only.
48