Using the remote control unit
Loading batteries
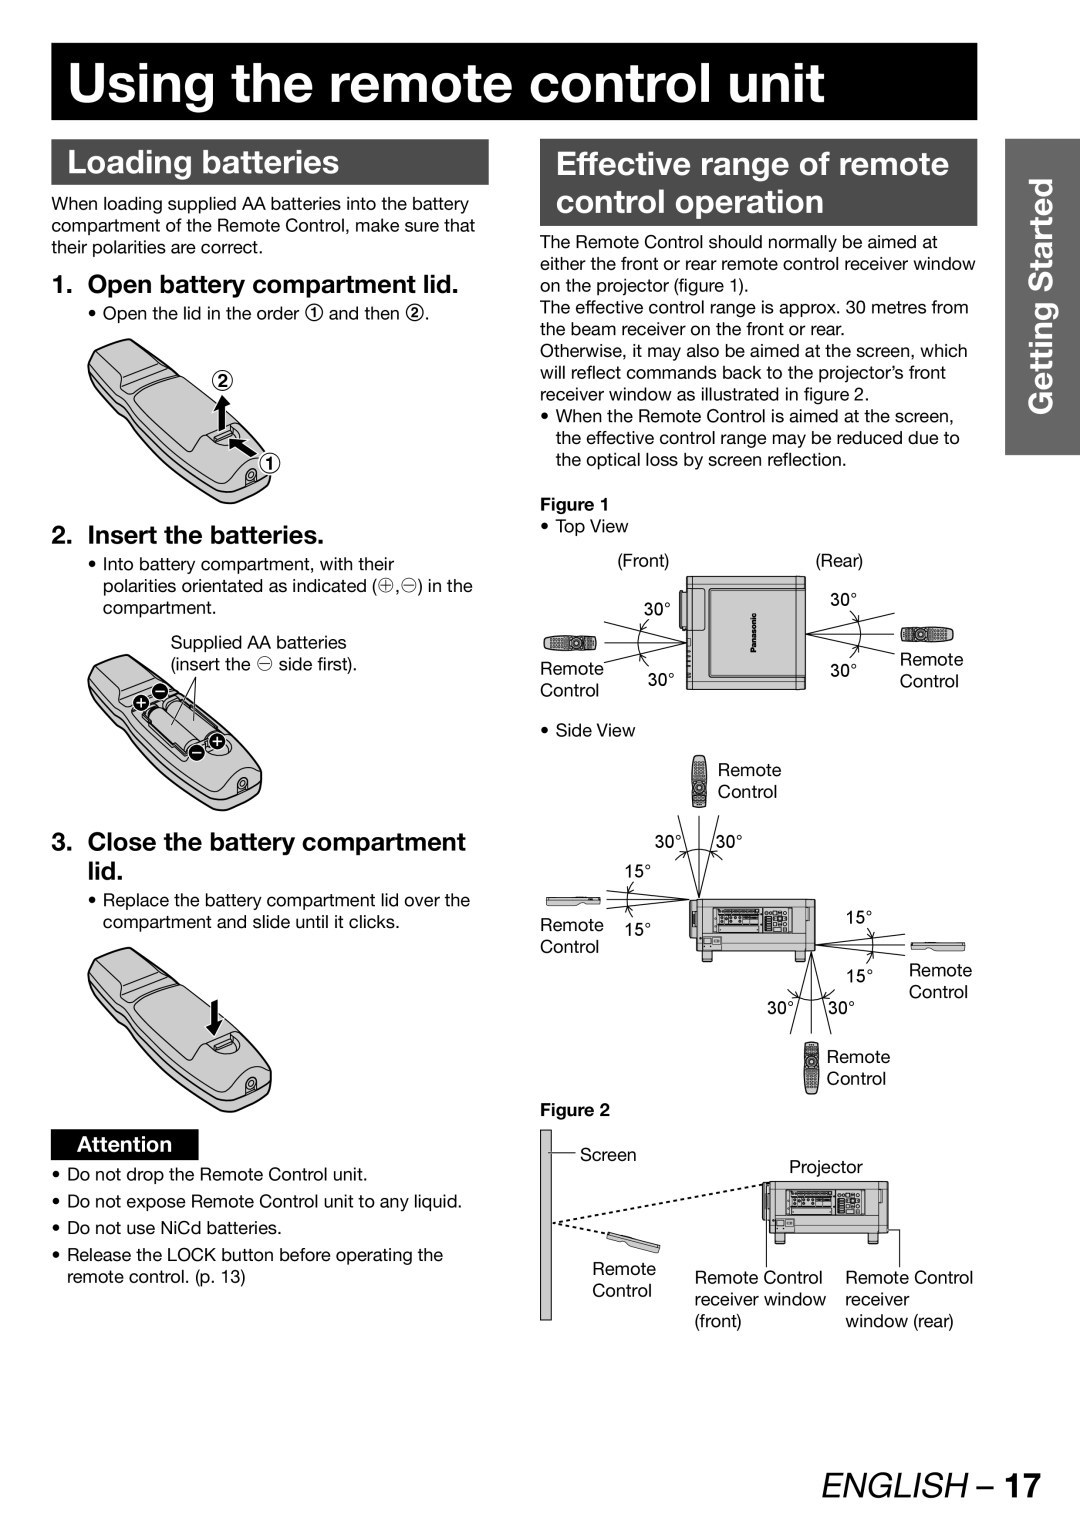
When loading supplied AA batteries into the battery compartment of the Remote Control, make sure that their polarities are correct.
1.Open battery compartment lid.
• Open the lid in the order 1 and then 2.
$
#
2.Insert the batteries.
•Into battery compartment, with their polarities orientated as indicated (⊕,⊖) in the compartment.
Supplied AA batteries
![]() (insert the ⊖ side first).
(insert the ⊖ side first).
Effective range of remote
control operation
The Remote Control should normally be aimed at either the front or rear remote control receiver window on the projector (figure 1).
The effective control range is approx. 30 metres from the beam receiver on the front or rear.
Otherwise, it may also be aimed at the screen, which will reflect commands back to the projector’s front receiver window as illustrated in figure 2.
•When the Remote Control is aimed at the screen, the effective control range may be reduced due to the optical loss by screen reflection.
Figure 1 |
|
|
| |
• Top View |
|
| ||
| (Front) | (Rear) |
| |
| 30° | 30° |
| |
|
|
| ||
Remote | 30° | 30° | Remote | |
Control | ||||
Control |
| |||
|
|
| ||
Getting Started
3.Close the battery compartment lid.
•Replace the battery compartment lid over the compartment and slide until it clicks.
Attention
• Do not drop the Remote Control unit. |
• Do not expose Remote Control unit to any liquid. |
• Do not use NiCd batteries. |
• Release the LOCK button before operating the |
• Side View
30°
15°
Remote 15°
Control
Figure 2
Screen
Remote
Control
30°
| 15° |
|
| 15° | Remote |
30° | 30° | Control |
|
![]()
![]()
![]() Remote
Remote
![]() Control
Control
Projector
remote control. (p. 13) |
Remote | Remote Control | Remote Control | |
Control | |||
receiver window | receiver | ||
| |||
| (front) | window (rear) |