Adjusting the picture (continued)
AUTO IRIS (Automatic aperture |
|
|
|
|
|
|
|
| |||||||
| Setting the system selector | ||||||||||||||
adjustment) |
|
|
|
|
|
|
|
|
|
|
|
| |||
|
|
| This enables the projector to automatically recognize | ||||||||||||
|
|
|
|
|
| ||||||||||
| OFF (No automatic |
| 1 (Low) |
| input signals. Furthermore, if unstable signals are | ||||||||||
| adjustment) |
|
| ||||||||||||
|
|
|
| input, the system format can be selected manually. | |||||||||||
|
|
|
|
|
| ||||||||||
|
|
|
|
|
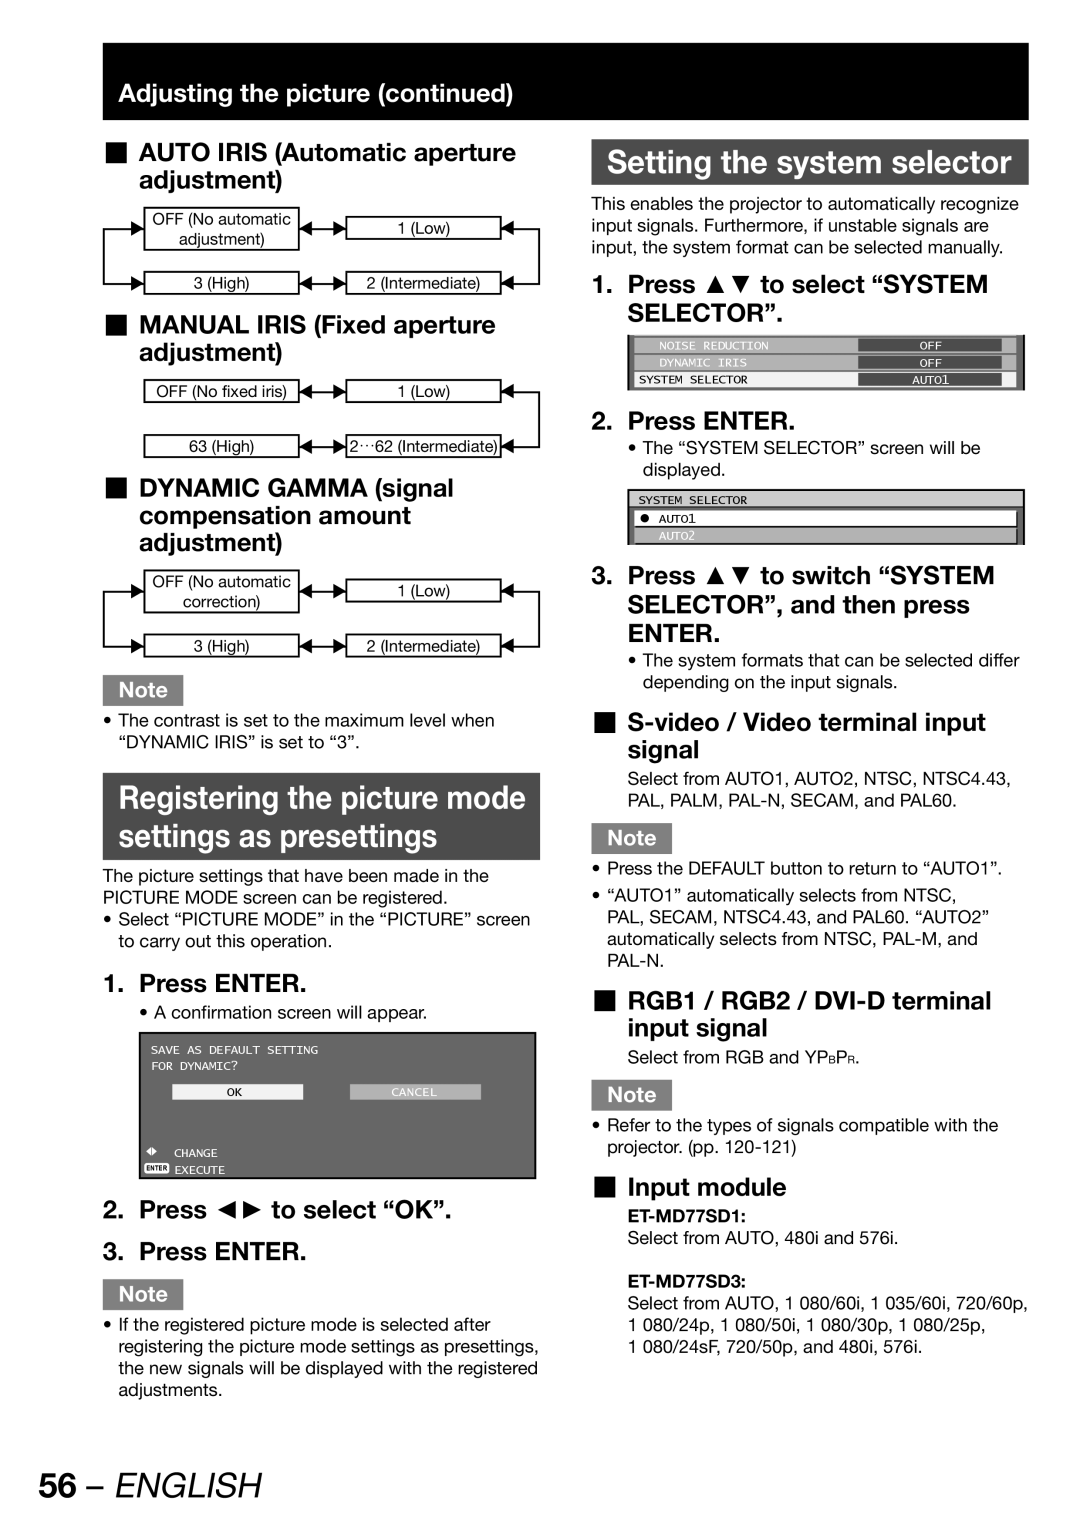
| 1. Press ▲▼ to select “SYSTEM | |||||||||
|
| 3 (High) |
| 2 (Intermediate) |
| ||||||||||
|
|
|
| ||||||||||||
MANUAL IRIS (Fixed aperture |
|
|
| SELECTOR”. |
|
|
| ||||||||
|
|
|
|
| |||||||||||
|
|
|
|
|
|
|
|
| |||||||
adjustment) |
|
|
|
|
|
| NOISE REDUCTION |
| OFF |
|
| ||||
|
|
|
|
|
| DYNAMIC IRIS |
| OFF |
|
| |||||
|
|
|
|
|
|
|
|
| SYSTEM SELECTOR |
| AUTO1 |
|
| ||
| OFF (No fixed iris) |
| 1 (Low) |
| 2. |
| Press ENTER. |
|
|
|
| ||||
|
|
|
|
|
|
| |||||||||
|
|
|
|
|
|
|
|
|
| ||||||
|
|
|
|
|
|
|
|
|
| ||||||
|
| 63 (High) |
| 2…62 (Intermediate) |
|
|
| • The “SYSTEM SELECTOR” screen will be | |||||||
|
|
|
| ||||||||||||
DYNAMIC GAMMA (signal |
|
|
| displayed. |
|
|
| ||||||||
|
|
|
|
|
|
| |||||||||
|
|
| SYSTEM SELECTOR |
|
|
| |||||||||
compensation amount |
|
|
| C AUTO1 |
|
|
| ||||||||
adjustment) |
|
|
|
|
|
| AUTO2 |
|
|
| |||||
|
|
| 3. Press ▲▼ to switch “SYSTEM | ||||||||||||
|
|
|
|
| |||||||||||
| OFF (No automatic |
|
|
| |||||||||||
|
| 1 (Low) |
| ||||||||||||
| correction) |
|
|
|
| SELECTOR”, and then press | |||||||||
|
|
|
|
|
| ||||||||||
|
|
|
|
|
|
|
| ENTER. |
|
|
| ||||
|
| 3 (High) |
| 2 (Intermediate) |
|
|
|
| |||||||
|
|
|
|
|
| • The system formats that can be selected differ | |||||||||
|
|
|
|
|
|
|
| ||||||||
|
|
|
|
|
|
|
| depending on the input signals. |
|
|
| ||||
Note |
|
|
|
|
|
|
| ||||||||
• The contrast is set to the maximum level when | | ||||||||||||||
|
|
|
|
|
|
|
|
| |||||||
“DYNAMIC IRIS” is set to “3”. |
|
| signal |
|
|
| |||||||||
|
|
|
|
|
|
|
|
|
|
| |||||
|
|
|
|
|
|
|
| Select from AUTO1, AUTO2, NTSC, NTSC4.43, | |||||||
Registering the picture mode | |||||||||||||||
|
| PAL, PALM, | |||||||||||||
settings as presettings |
|
|
|
|
|
|
|
| |||||||
| Note |
|
|
|
|
| |||||||||
|
|
|
|
|
|
|
|
|
|
|
|
|
|
| |
The picture settings that have been made in the PICTURE MODE screen can be registered.
•Select “PICTURE MODE” in the “PICTURE” screen to carry out this operation.
•Press the DEFAULT button to return to “AUTO1”.
•“AUTO1” automatically selects from NTSC, PAL, SECAM, NTSC4.43, and PAL60. “AUTO2” automatically selects from NTSC,
1.Press ENTER.
• A confirmation screen will appear.
SAVE AS DEFAULT SETTING
FOR DYNAMIC?
OKCANCEL
CHANGE
ENTER EXECUTE
2.Press ◄► to select “OK”.
3.Press ENTER.
Note
•If the registered picture mode is selected after registering the picture mode settings as presettings, the new signals will be displayed with the registered adjustments.
RGB1 / RGB2 /
input signal
Select from RGB and YPBPR.
Note
•Refer to the types of signals compatible with the projector. (pp.
Input module
Select from AUTO, 480i and 576i.
ET-MD77SD3:
Select from AUTO, 1 080/60i, 1 035/60i, 720/60p, 1 080/24p, 1 080/50i, 1 080/30p, 1 080/25p,
1 080/24sF, 720/50p, and 480i, 576i.