Procedure of lamp unit replacement
1.Turn the main power OFF, following the procedures described in “Powering up the projector” (p. 36) and “Powering off the projector” (p. 37), disconnect the power plug from the AC power source, and wait for one hour or more. Then check that the lamp unit has cooled down.
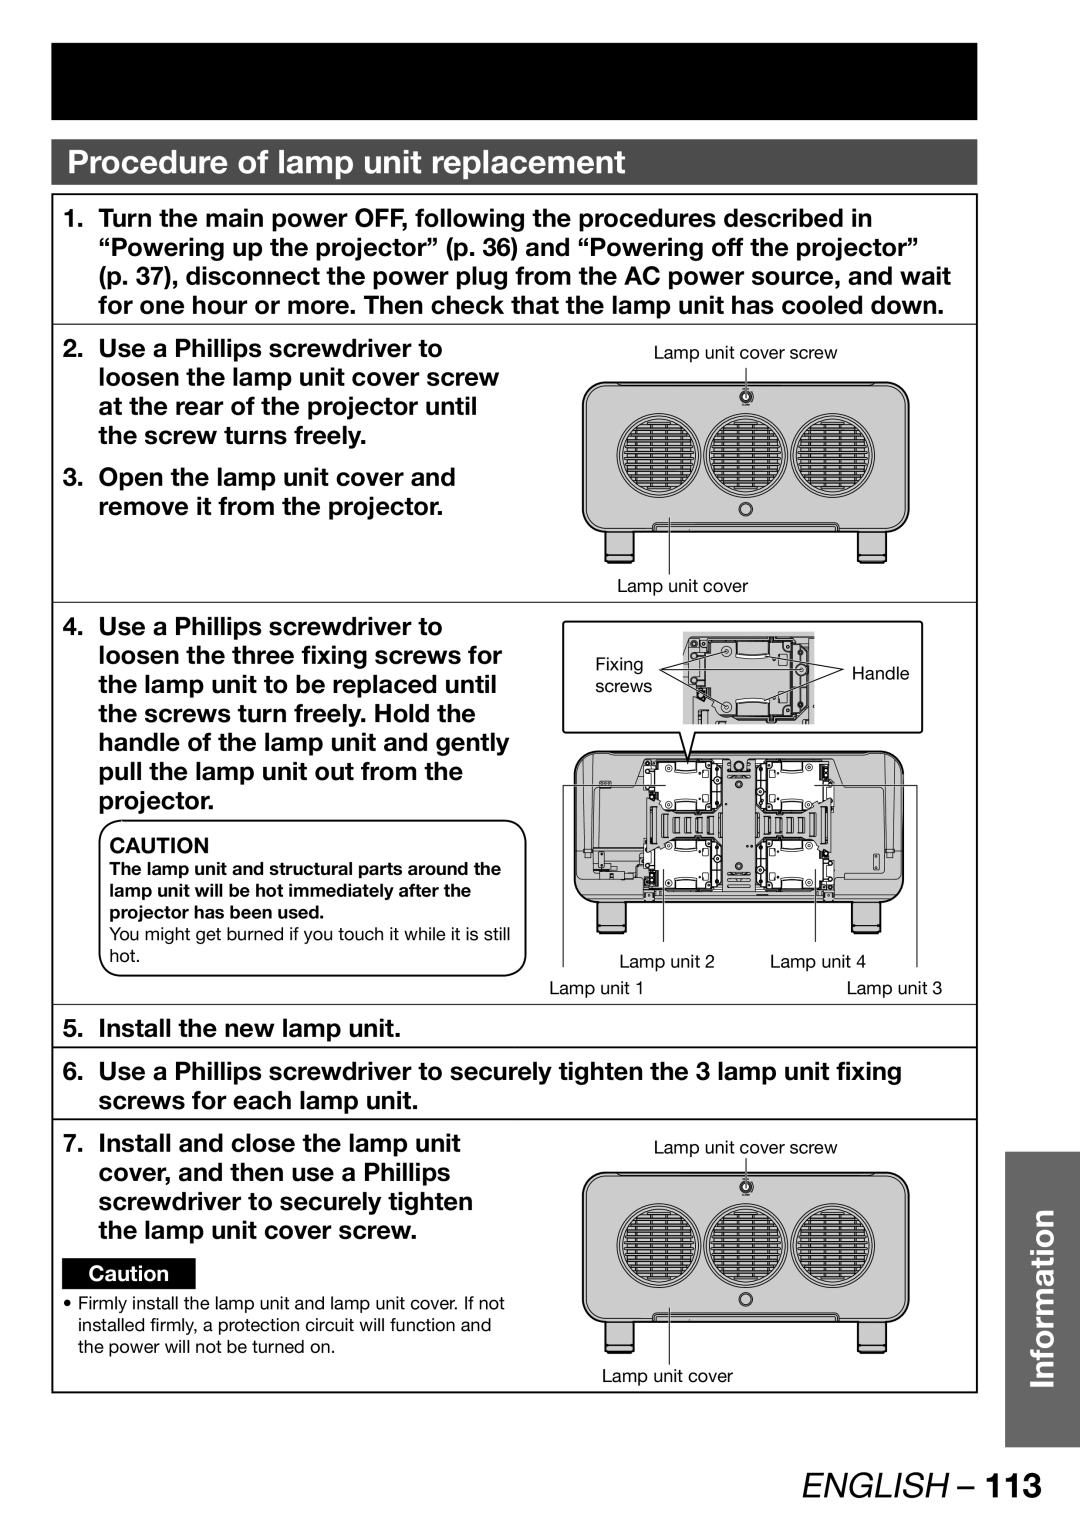
2. Use a Phillips screwdriver to | Lamp unit cover screw |
loosen the lamp unit cover screw |
|
at the rear of the projector until |
|
the screw turns freely. |
|
3. Open the lamp unit cover and remove it from the projector.
| Lamp unit cover |
| |
4. Use a Phillips screwdriver to |
|
| |
loosen the three fixing screws for | Fixing | Handle | |
the lamp unit to be replaced until | screws | ||
| |||
the screws turn freely. Hold the |
|
| |
handle of the lamp unit and gently |
|
| |
pull the lamp unit out from the |
|
| |
projector. |
|
| |
CAUTION |
|
| |
The lamp unit and structural parts around the |
|
| |
lamp unit will be hot immediately after the |
|
| |
projector has been used. |
|
| |
You might get burned if you touch it while it is still |
|
| |
hot. | Lamp unit 2 | Lamp unit 4 | |
| Lamp unit 1 | Lamp unit 3 |
5.Install the new lamp unit.
6.Use a Phillips screwdriver to securely tighten the 3 lamp unit fixing screws for each lamp unit.
7.Install and close the lamp unit cover, and then use a Phillips screwdriver to securely tighten the lamp unit cover screw.
Caution
•Firmly install the lamp unit and lamp unit cover. If not installed firmly, a protection circuit will function and the power will not be turned on.
Lamp unit cover screw
Lamp unit cover
Information