COMSPHERE 3000 Series Carrier
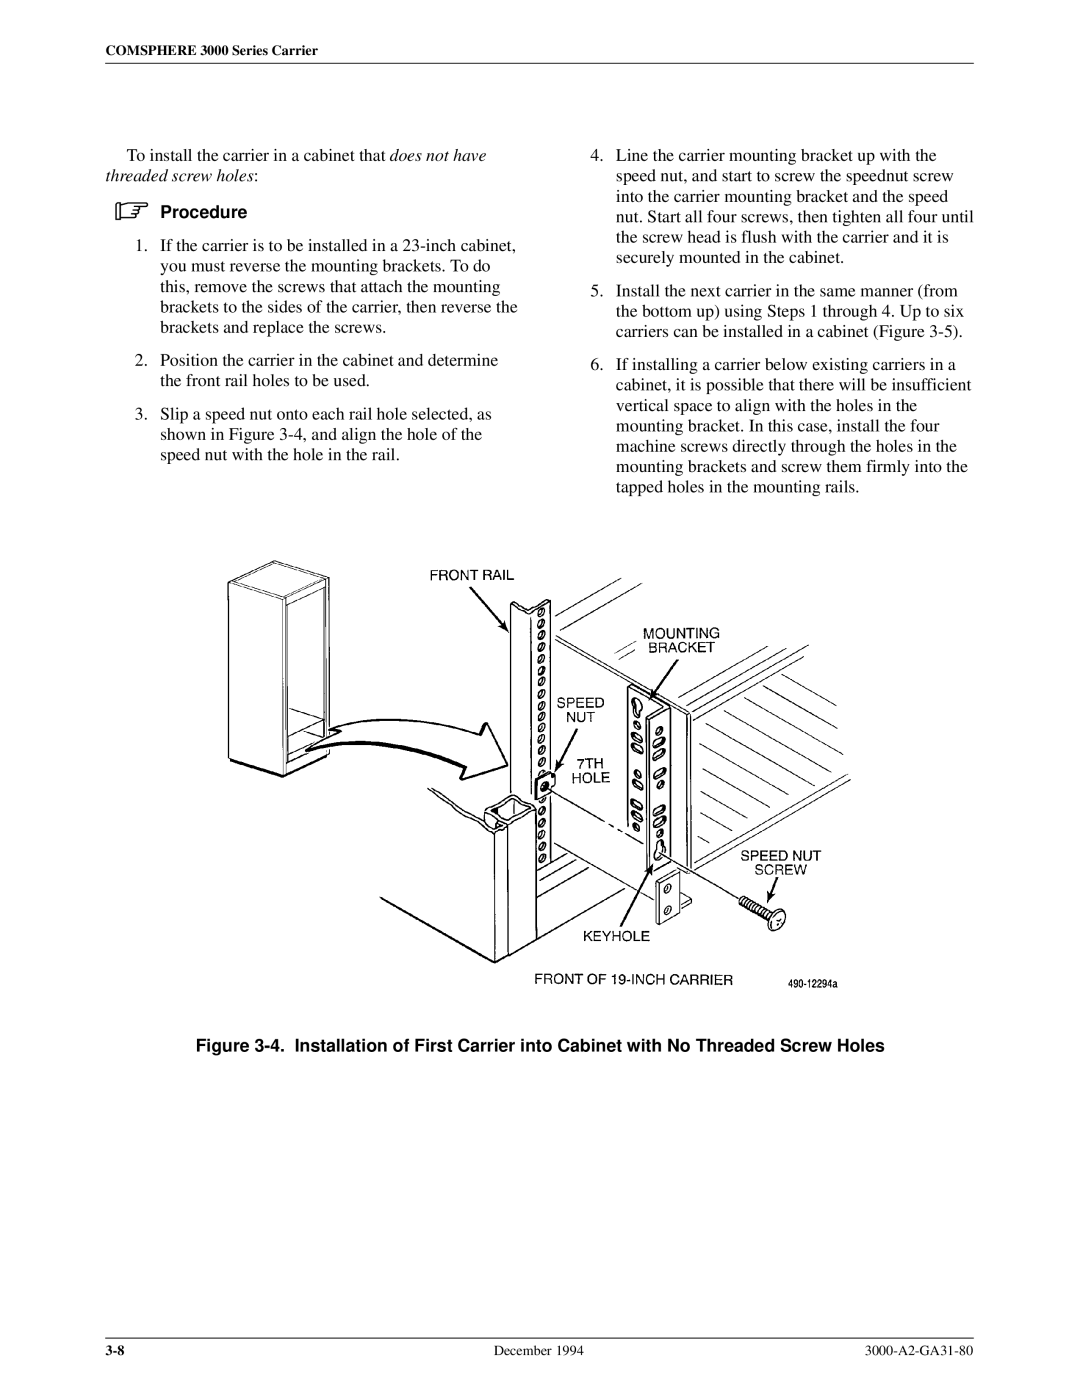
To install the carrier in a cabinet that does not have threaded screw holes:
.Procedure
1.If the carrier is to be installed in a
2.Position the carrier in the cabinet and determine the front rail holes to be used.
3.Slip a speed nut onto each rail hole selected, as shown in Figure
4.Line the carrier mounting bracket up with the speed nut, and start to screw the speednut screw into the carrier mounting bracket and the speed nut. Start all four screws, then tighten all four until the screw head is flush with the carrier and it is securely mounted in the cabinet.
5.Install the next carrier in the same manner (from the bottom up) using Steps 1 through 4. Up to six carriers can be installed in a cabinet (Figure
6.If installing a carrier below existing carriers in a cabinet, it is possible that there will be insufficient vertical space to align with the holes in the mounting bracket. In this case, install the four machine screws directly through the holes in the mounting brackets and screw them firmly into the tapped holes in the mounting rails.
Figure 3-4. Installation of First Carrier into Cabinet with No Threaded Screw Holes
December 1994 |