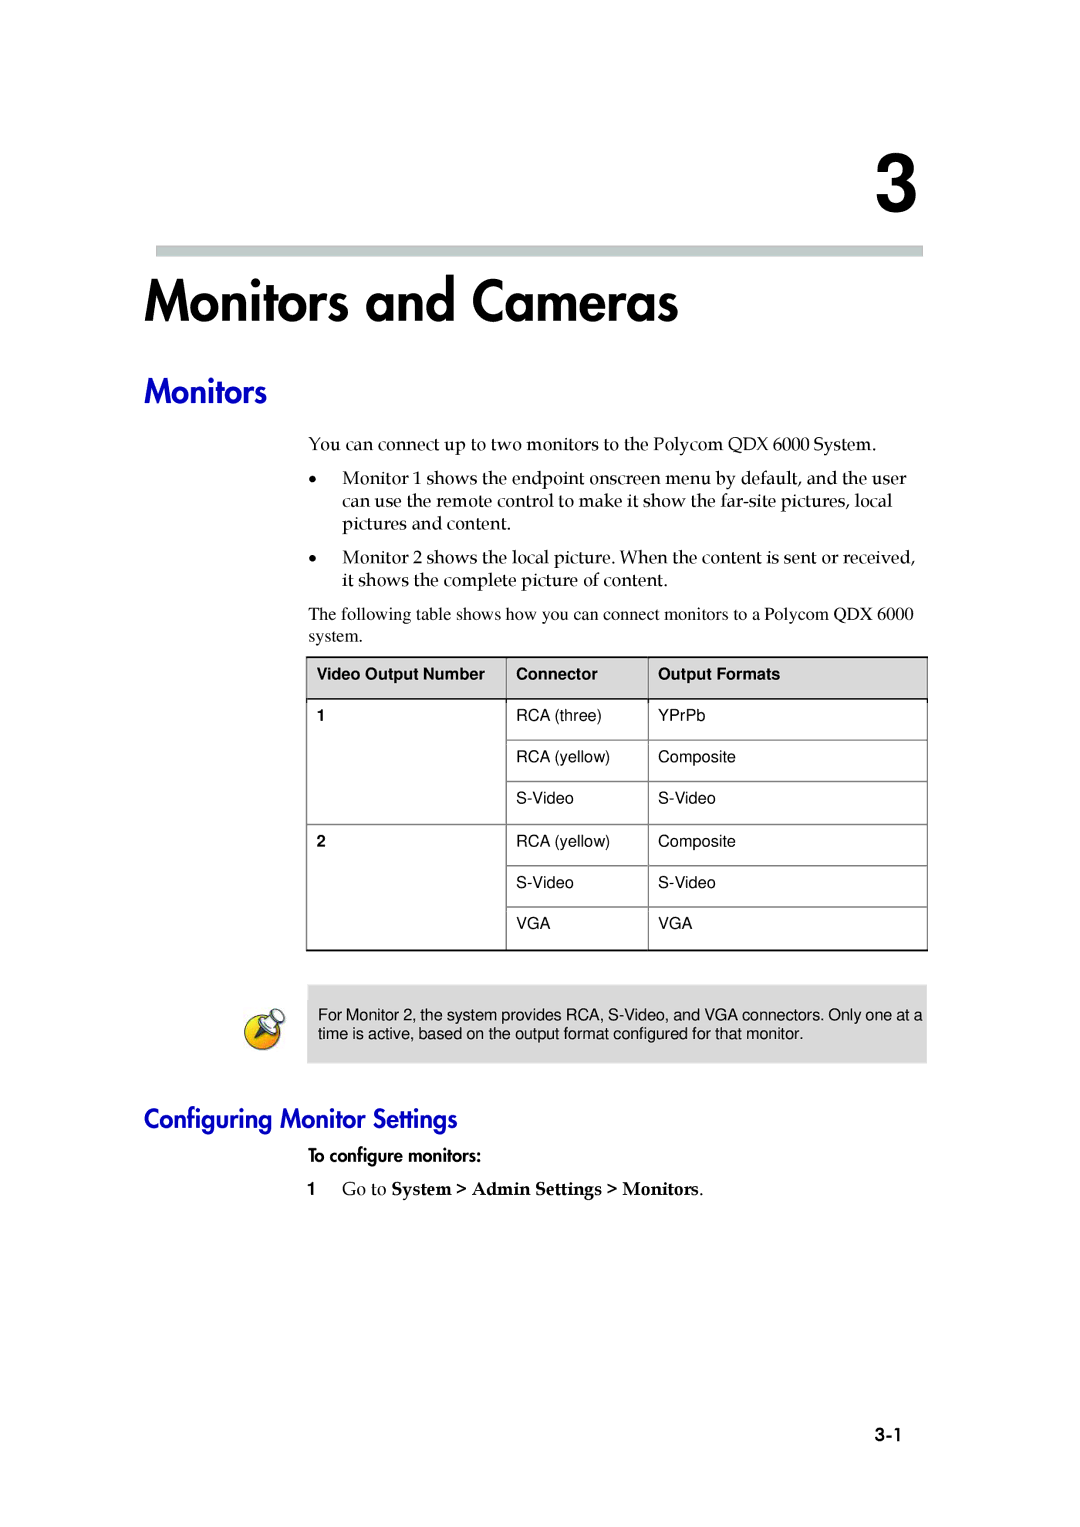
Version
Administrator’s Guide for Polycom QDX 6000 Systems
product pic here
Patent Information
Trademark Information
Administrator’s Guide for Polycom QDX 6000 Systems
About This Guide
Contents
Configuring Content Sharing···········································
Statistics and Diagnostics ·······················································
Creating a Customized Software Update Package ···················13-2
Introducing the Polycom QDX System
Setting Up Your System Hardware
Positioning the System
Configuring with the Setup Wizard
Powering On and Off
Administrator’s Guide for Polycom QDX 6000 Systems
remote control to enter text just like you can with a cell phone
For more information, refer to Managing the System Remotely
1 Go to System Admin Settings LAN Properties
Connecting to the LAN
Configuring LAN Properties
Networks
Networks
3 Select and configure these settings
1 Go to System Admin Settings Network IP H.323 Settings
Configuring IP Settings
Specifying H.323 Settings
Configuring the System to Use a Gatekeeper
1 Go to System Admin Settings Network IP Quality of Service
Specifying Quality of Service
Firewall Settings
Configuring the System for Use with a Firewall or NAT
1 Go to System Admin Settings Network IP Firewall
H.460 NAT Firewall Traversal
1 Go to System Admin Settings Network Call Preference
Configuring Call Preferences
1 Go to System Admin Settings Network IP Firewall
2 Select Enable H.460 Firewall Traversal
3 Select to go to the Preferred Speeds screens and configure these settings
1 Go to System Admin Settings Monitors
Configuring Monitor Settings
Monitors and Cameras
Monitors
Managing User Access to Settings and Features
2 Configure these settings on the Monitors screen
To change the screen layout
Adjusting Screen Layout
Effect Example
Layout Feature
Specifying, Showing and Turning Off the PIP
Adjusting the Monitors Color Balance, Sharpness, and Brightness
1 Go to System Diagnostics Video
― Display Time in a Call described on page
Connecting Cameras
Preventing Monitor Burn-In
― Display Icons in a Call described on page
To configure camera and video settings
Configuring Camera Settings and Video Quality Options
1 Go to System Admin Settings Cameras
Specifies the aspect ratio used by the Polycom
Configuring Advanced Polycom EagleEye Camera Settings
4 Go to Admin Settings Cameras 5 Click Advanced
Specifies the communication protocol for the camera
To store a preset
Configuring Camera Presets
4 Go to Admin Settings Cameras
Monitors and Cameras
3-10
3-11
1 Press Preset on the remote control
Microphones
Microphones and Speakers
Polycom Microphone Lights
1 Go to System Admin Settings Audio Audio Settings
Configuring Audio Settings
Setting the Speaker Volume
Speakers
Go to System Diagnostics Audio Audio Meter
Audio meter
Configuring Content Display with People+Content IP
Content and Captions
Sharing content
Configuring Content Sharing
Configuring Meeting Captions
Configuring Captions
1 Go to System Utilities Meeting Caption
To configure the rolling caption
Configuring Rolling Captions
1 Go to System Utilities Rolling Caption
Calling and Answering
Configuring Call Settings
To configure call settings
Managing Directories with the Polycom QDX 6000 Web Interface
Configuring Directory Settings
3 Go to Admin Settings General Settings System Settings
To download a Polycom QDX 6000 system directory to your computer
Configuring the Global Directory
To configure the directory server settings
1 Go to System Admin Settings Global Services Directory Servers
To configure remote control behavior
Configuring Remote Control Behavior
2 Configure these settings on the Remote Control screen
1 Go to System Admin Settings General Settings Date and Time
Setting Date, Time, and Language
System Location and Appearance
1 Go to System Admin Settings General Settings Language
Customizing the Home Screen
To design the home screen
Adding Marquee Text
Displaying Speed Dial Sites
Adding Screen Saver Text
Screen Savers
4 Click Utilities Screen Saver and enter
To upload a screen saver logo
Adding a Screen Saver Logo
1 Go to System Admin Settings General Settings Security
Configuring Security Options
Security
To set passwords and security options
To set or change the remote access password
Setting the Room and Remote Access Passwords
To set or change the room password
1 Go to System Admin Settings General Settings Security
2 Go to System Diagnostics Reset System
Managing User Access to Settings and Features
1 Go to System Admin Settings General Settings Security
2 Select Use Room Password for Remote Access
1 Go to System Admin Settings General Settings Security
Configuring Security Mode
2 Enable Security Mode
Administrator’s Guide for Polycom QDX 6000 Systems
Enabling AES Encryption
To enable AES encryption
1 Go to System Admin Settings General Settings Security
Monitoring a Rooms or Call with the Polycom QDX 6000 Web Interface
Using the Polycom QDX 6000 Web Interface
Accessing the Polycom QDX 6000 Web Interface
Managing the System Remotely
To view a room or call
Managing System Profiles with the Polycom QDX 6000 Web Interface
To enable room and call monitoring
1 Go to System Admin Settings General Settings Security
4 Go to Utilities Profile Center
Sending a Message
4 Go to Diagnostics Send a Message
3 Go to Utilities Profile Center
Setting Up SNMP
Go to System Diagnostics
Statistics and Diagnostics
Accessing the Diagnostics Screens
System Status
Statistics and Diagnostics
Call statistics
10-2
If the test is successful, the Polycom QDX 6000 system lists
Network
Video
10-3
Audio
Reset System
10-4
10-5
Recent Calls
Call Detail Report CDR
Go to System Admin Settings Network Recent Calls
The following table describes the data fields in the CDR
Information in the CDR
10-6
Data
based on round-trip delay, calculated from sample tests done
H.323 call based on round-trip delay, calculated from sample
10-7
4 Click Diagnostics System Log View Logs
System Logs
Call Detail Report Archives
Viewing System Logs
4 Click Diagnostics System Log System Log Settings
System Log Settings
Downloading System Logs
4 Click Diagnostics System Log Download Logs
1 Go to System Admin Settings Network Call Preference
Troubleshooting
Enabling Basic Mode
Placing a Test Call
4 Select Enable Basic Mode
General Troubleshooting
Power and Start-up
3 Go to Admin Settings Network Call Preference
11-3
Controls
11-4
Access to Screens and Systems
Mode
your network. This is especially true with the addresses
Calling
not operating or is not configured
11-5
The monitor screen remains
Displays
11-6
Screen is blank start music
press the number of the camera you wish
Cameras
11-7
A background with less motion provides a
microphone, and check the Far Site Audio meter on
Audio
To make sure that the remote control can work well
11-8
Corrective Action
Symptom
Problem
11-9
and noise suppression features
Symptom
Problem
1 Go to System Admin Settings Cameras
Go to System Admin Settings LAN
Error Indications
Symptom
Problem
Input or Output
System Back Panel View and Cables
System Back Panel View
Input or Output
12-2
System Cables
Logo File Requirements
Logo Customization
Customizable Logos
Software Needed
Uploading Your Customized Software Update Package
Creating a Customized Software Update Package
13-2
13-3
Install a standard Polycom software update package
14-1
Upgrading System Software
Upgrading System Software by PC
Get Endpoint Information
14-2
Rescue Mode
15-1
Regulatory Notices
Important Safeguards
Electrical Specifications
UNAUTHORIZED PRODUCT MODIFICATION OR ALTERATION
15-2
USA and Canadian Regulatory Notices
15-3
EU Regulatory Notices
15-4
Plug Acts as Disconnect Device
15-5