Unit 3: Interface Specifications
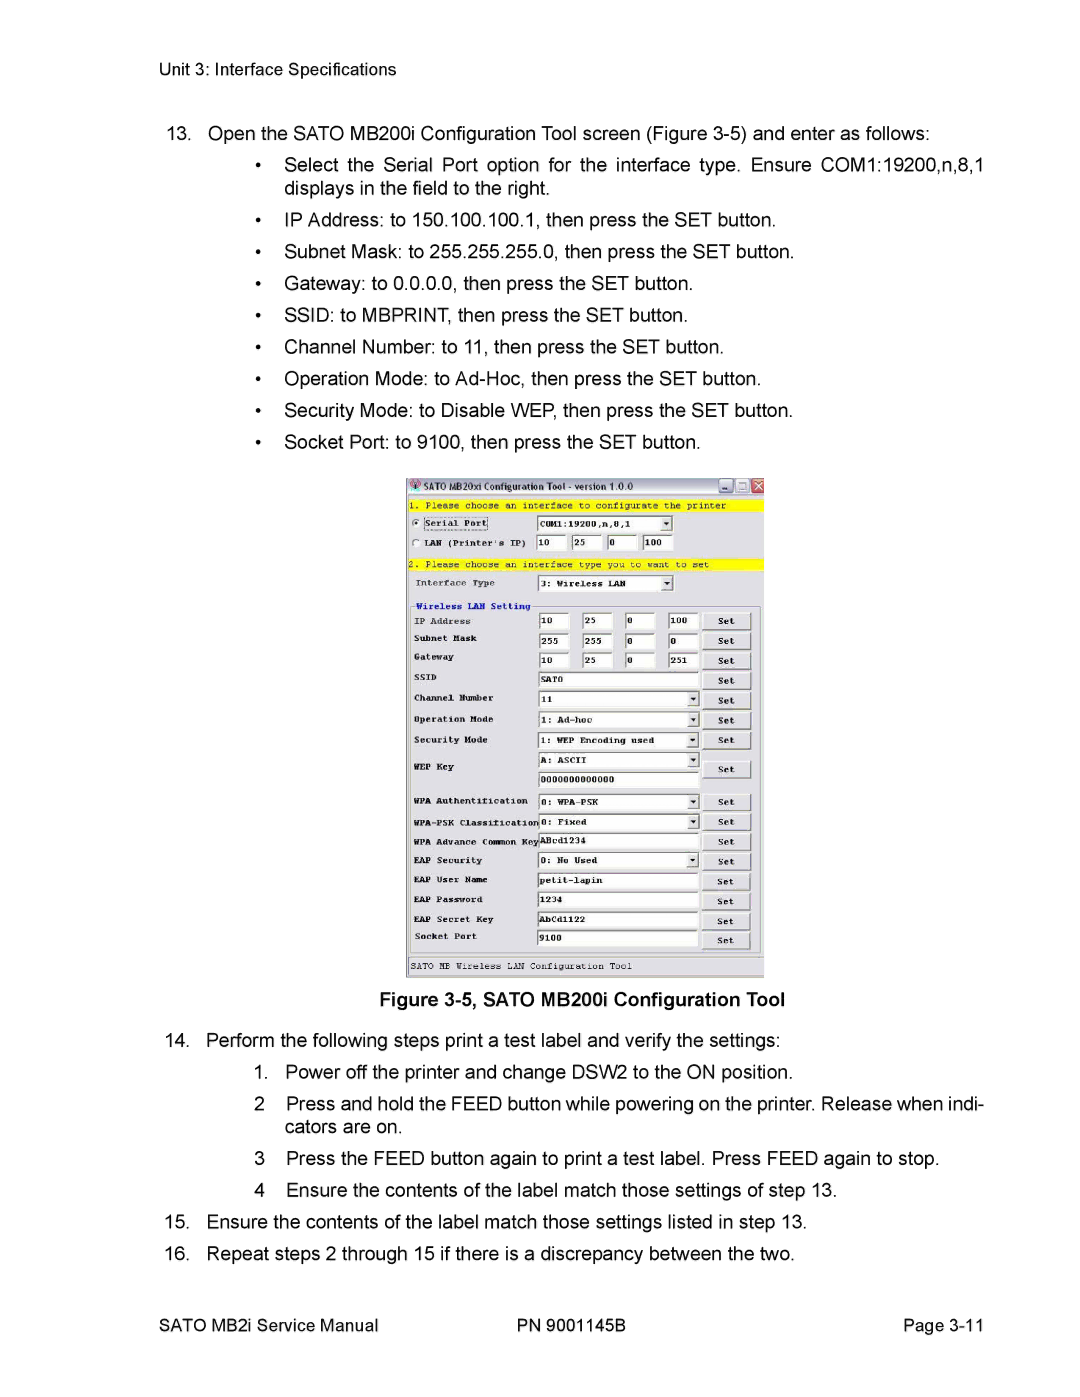
13.Open the SATO MB200i Configuration Tool screen (Figure
•Select the Serial Port option for the interface type. Ensure COM1:19200,n,8,1 displays in the field to the right.
•IP Address: to 150.100.100.1, then press the SET button.
•Subnet Mask: to 255.255.255.0, then press the SET button.
•Gateway: to 0.0.0.0, then press the SET button.
•SSID: to MBPRINT, then press the SET button.
•Channel Number: to 11, then press the SET button.
•Operation Mode: to
•Security Mode: to Disable WEP, then press the SET button.
•Socket Port: to 9100, then press the SET button.
Figure 3-5, SATO MB200i Configuration Tool
14.Perform the following steps print a test label and verify the settings:
1.Power off the printer and change DSW2 to the ON position.
2Press and hold the FEED button while powering on the printer. Release when indi- cators are on.
3Press the FEED button again to print a test label. Press FEED again to stop.
4Ensure the contents of the label match those settings of step 13.
15.Ensure the contents of the label match those settings listed in step 13.
16.Repeat steps 2 through 15 if there is a discrepancy between the two.
SATO MB2i Service Manual | PN 9001145B | Page |
