SATO 200i manual 8a, Eye-Mark Sensor Replacement, 8b, Eye-Mark Sensor Replacement

Models: 200i

1 84
Download 84 pages 4.45 Kb
Page 68
Image 68
EYE-MARK SENSOR REPLACEMENT

Unit 7: Replacement Procedures

EYE-MARK SENSOR REPLACEMENT

1Switch off the printer and remove power supply.

2Remove the front and left housing covers

NOTE: Figure 9-1 of the Charts & Diagrams unit provides guidance on housing cover removal.

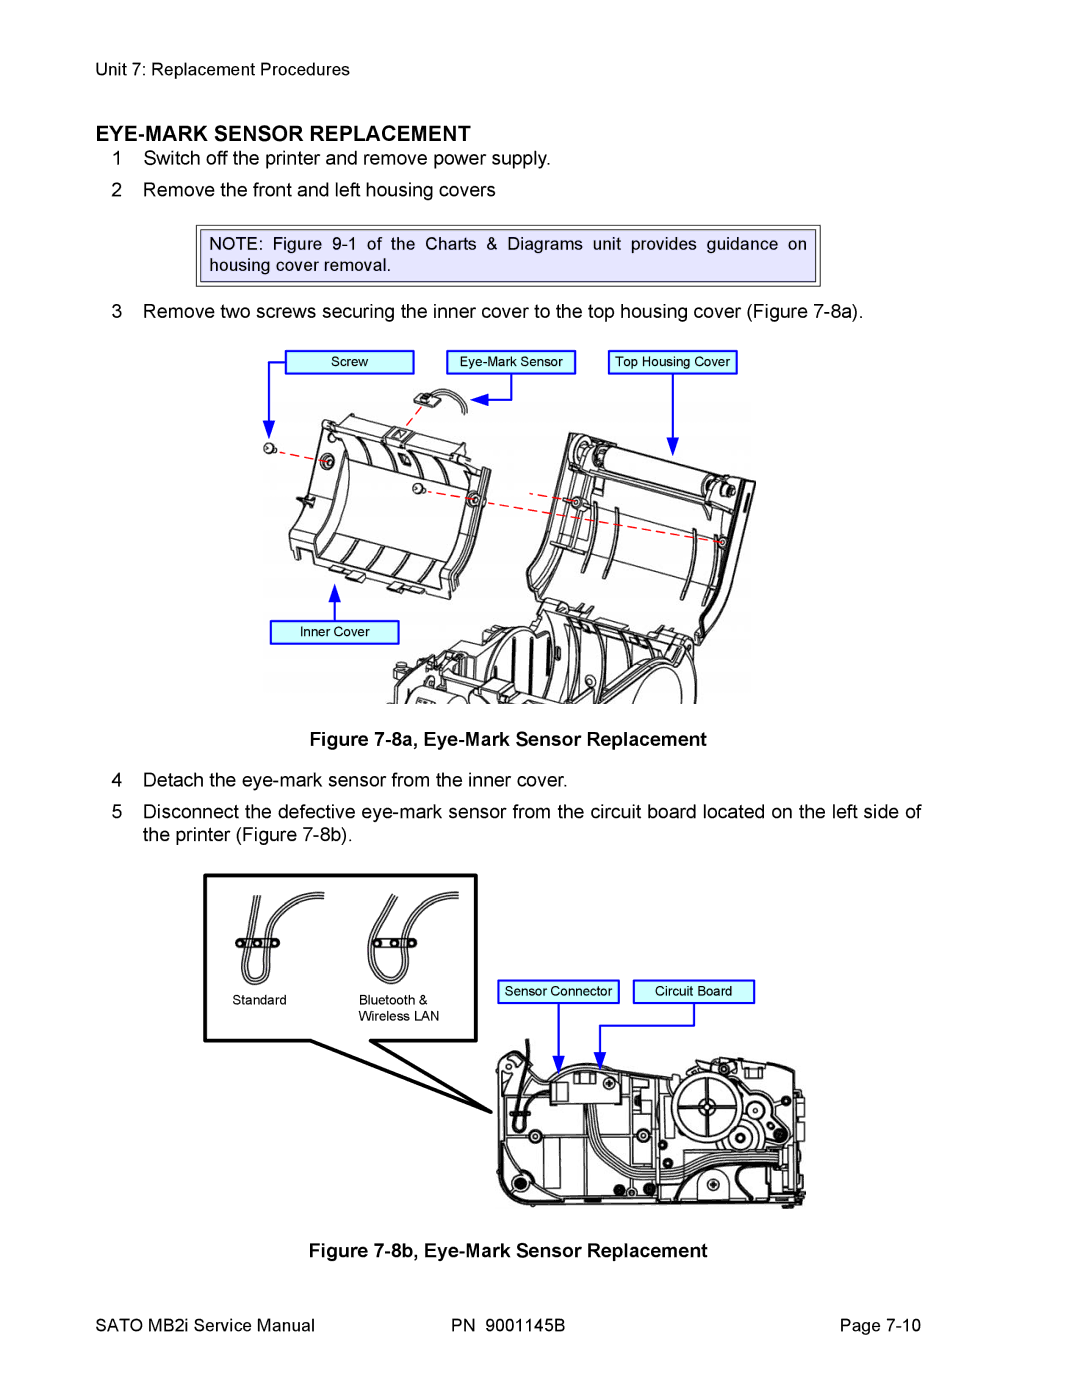
3 Remove two screws securing the inner cover to the top housing cover (Figure 7-8a).

Screw

Eye-Mark Sensor

Top Housing Cover

Inner Cover

Figure 7-8a, Eye-Mark Sensor Replacement

4Detach the eye-mark sensor from the inner cover.

5Disconnect the defective eye-mark sensor from the circuit board located on the left side of the printer (Figure 7-8b).

Standard

Bluetooth &


Wireless LAN

Sensor Connector

Circuit Board

Figure 7-8b, Eye-Mark Sensor Replacement

SATO MB2i Service Manual

PN 9001145B

Page 7-10

Page 68
Image 68
SATO 200i manual 8a, Eye-Mark Sensor Replacement, 8b, Eye-Mark Sensor Replacement