Unit 7: Replacement Procedures
PANEL & LCD BOARD REPLACEMENT
1Switch off the printer and remove power supply or battery.
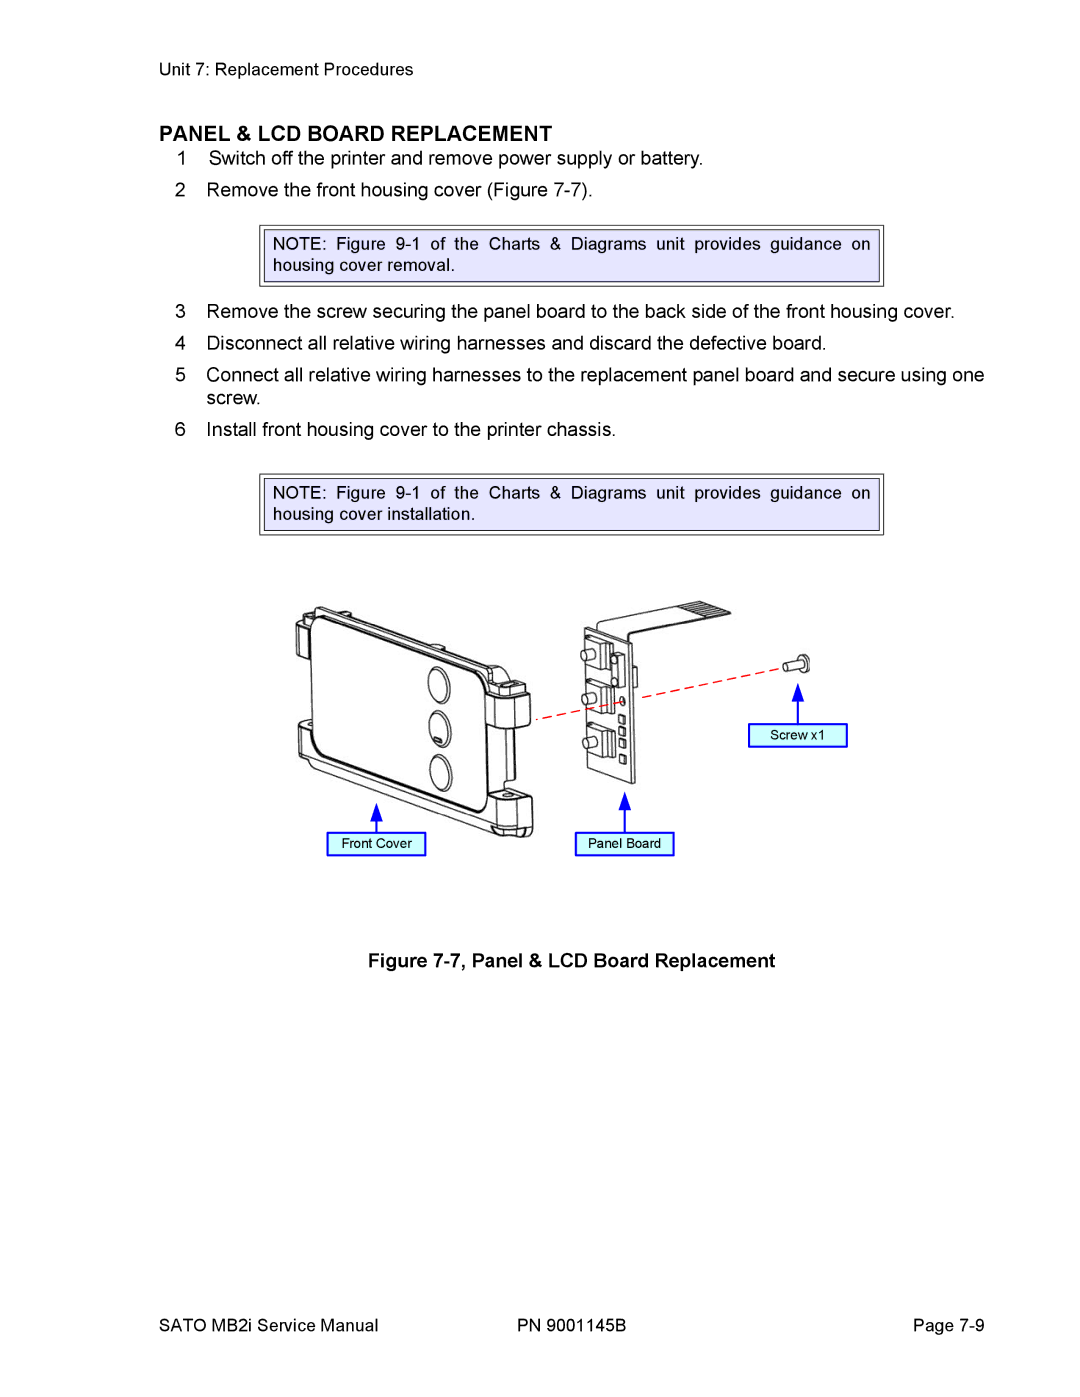
2 Remove the front housing cover (Figure
NOTE: Figure
3Remove the screw securing the panel board to the back side of the front housing cover.
4Disconnect all relative wiring harnesses and discard the defective board.
5Connect all relative wiring harnesses to the replacement panel board and secure using one screw.
6Install front housing cover to the printer chassis.
NOTE: Figure
Screw x1
Front Cover
Panel Board
Figure 7-7, Panel & LCD Board Replacement
SATO MB2i Service Manual | PN 9001145B | Page |
