Unit 7: Replacement Procedures
4Remove one screw securing the defective sensor to the printer chassis.
5Remove two screws securing the main circuit board to the printer chassis.
6Withdraw the main circuit board from the printer chassis and disconnect the defective
7Connect the replacement
8Secure the main circuit board to the to the printer chassis using two screws.
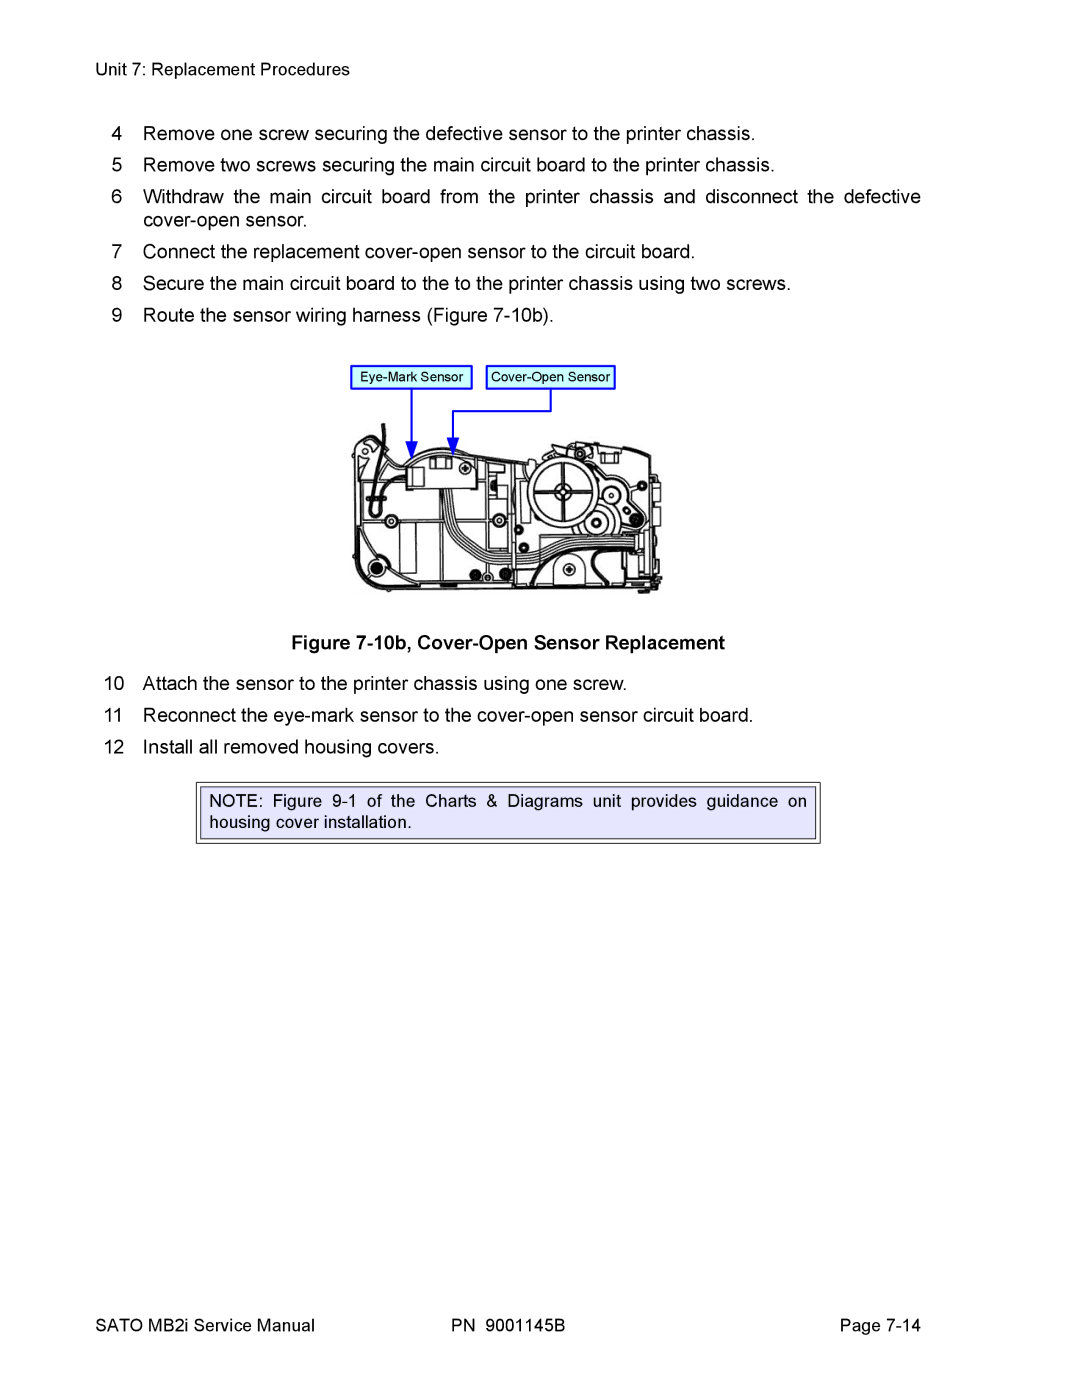
9Route the sensor wiring harness (Figure
![]()
![]()
Figure 7-10b, Cover-Open Sensor Replacement
10Attach the sensor to the printer chassis using one screw.
11Reconnect the
12Install all removed housing covers.
NOTE: Figure
SATO MB2i Service Manual | PN 9001145B | Page |