Unit 3: Interface Specifications
14.Alter the following fields as necessary:
•IP Address: Change to 150.100.100.11 .
•Subnet Mask: 255.255.255.0 (should always be the same)
15.Click on the OK button to exit the Internet Protocol (TCP/IP) screen.
16.When the Wireless Network Connection Properties screen (Figure
17.To test the
1.Access Control Panel/MB200i Print Driver/Printer and Faxes, then click on MB200i Printer Driver.
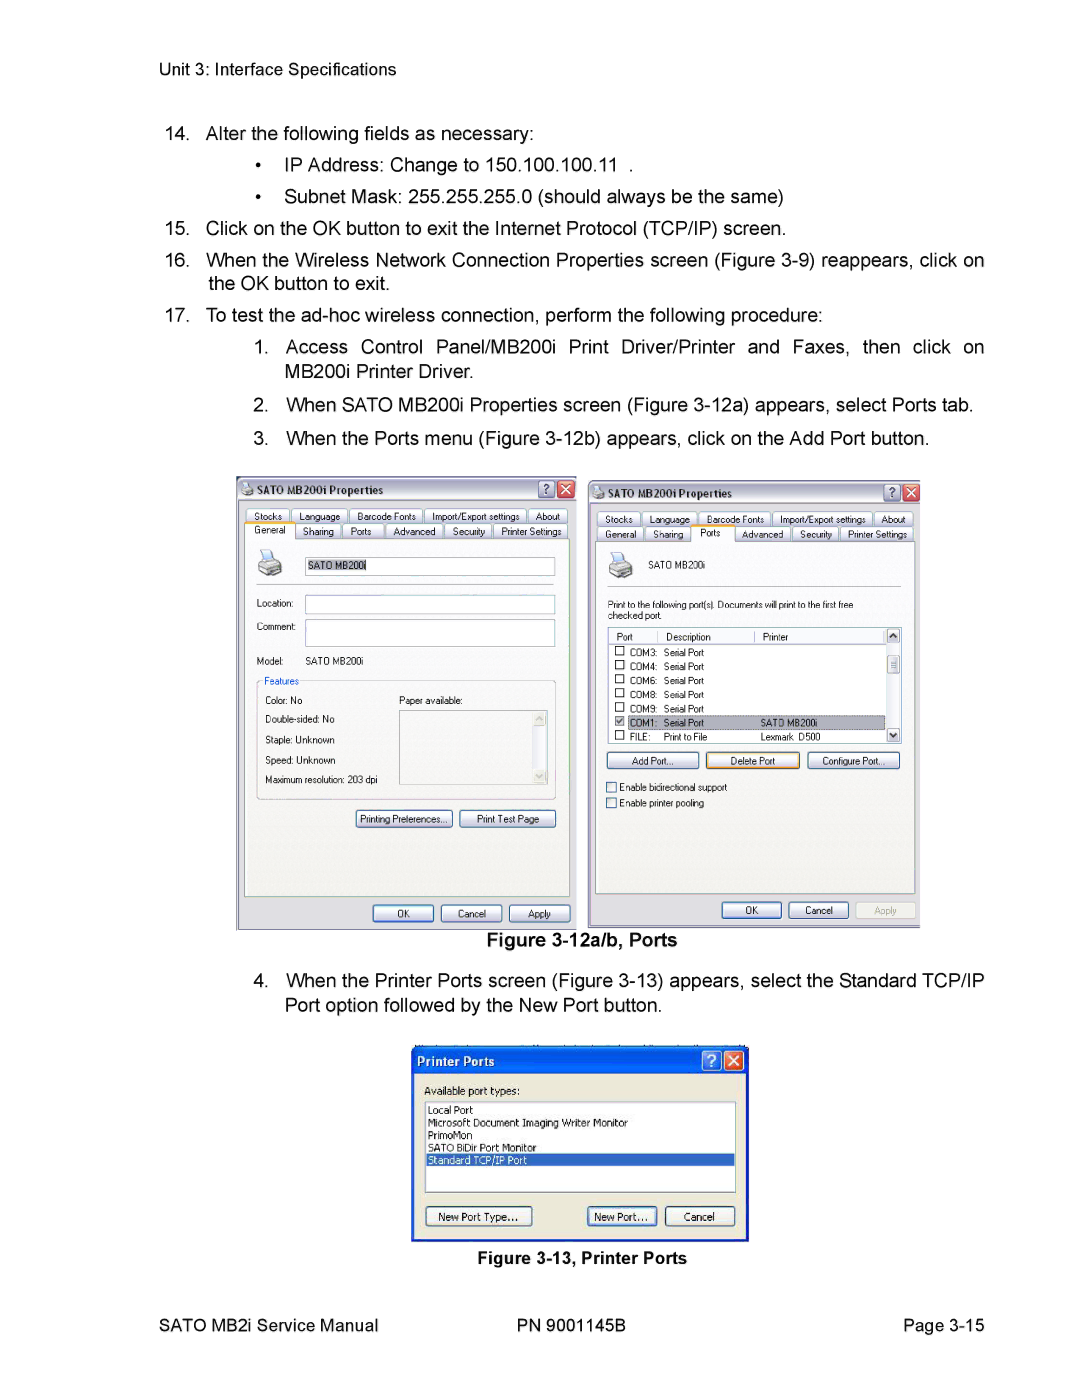
2.When SATO MB200i Properties screen (Figure
3.When the Ports menu (Figure
Figure 3-12a/b, Ports
4.When the Printer Ports screen (Figure
Figure 3-13, Printer Ports
SATO MB2i Service Manual | PN 9001145B | Page |