Unit 7: Replacement Procedures
REPLACEMENT PROCEDURES
This unit contains
PRINT HEAD REPLACEMENT
If the print head becomes damaged or worn, it can be easily removed and replaced without having to make critical adjustments.
1Switch off the printer and remove power supply or battery.
2 Perform a Factory Test Print and check the head counter.
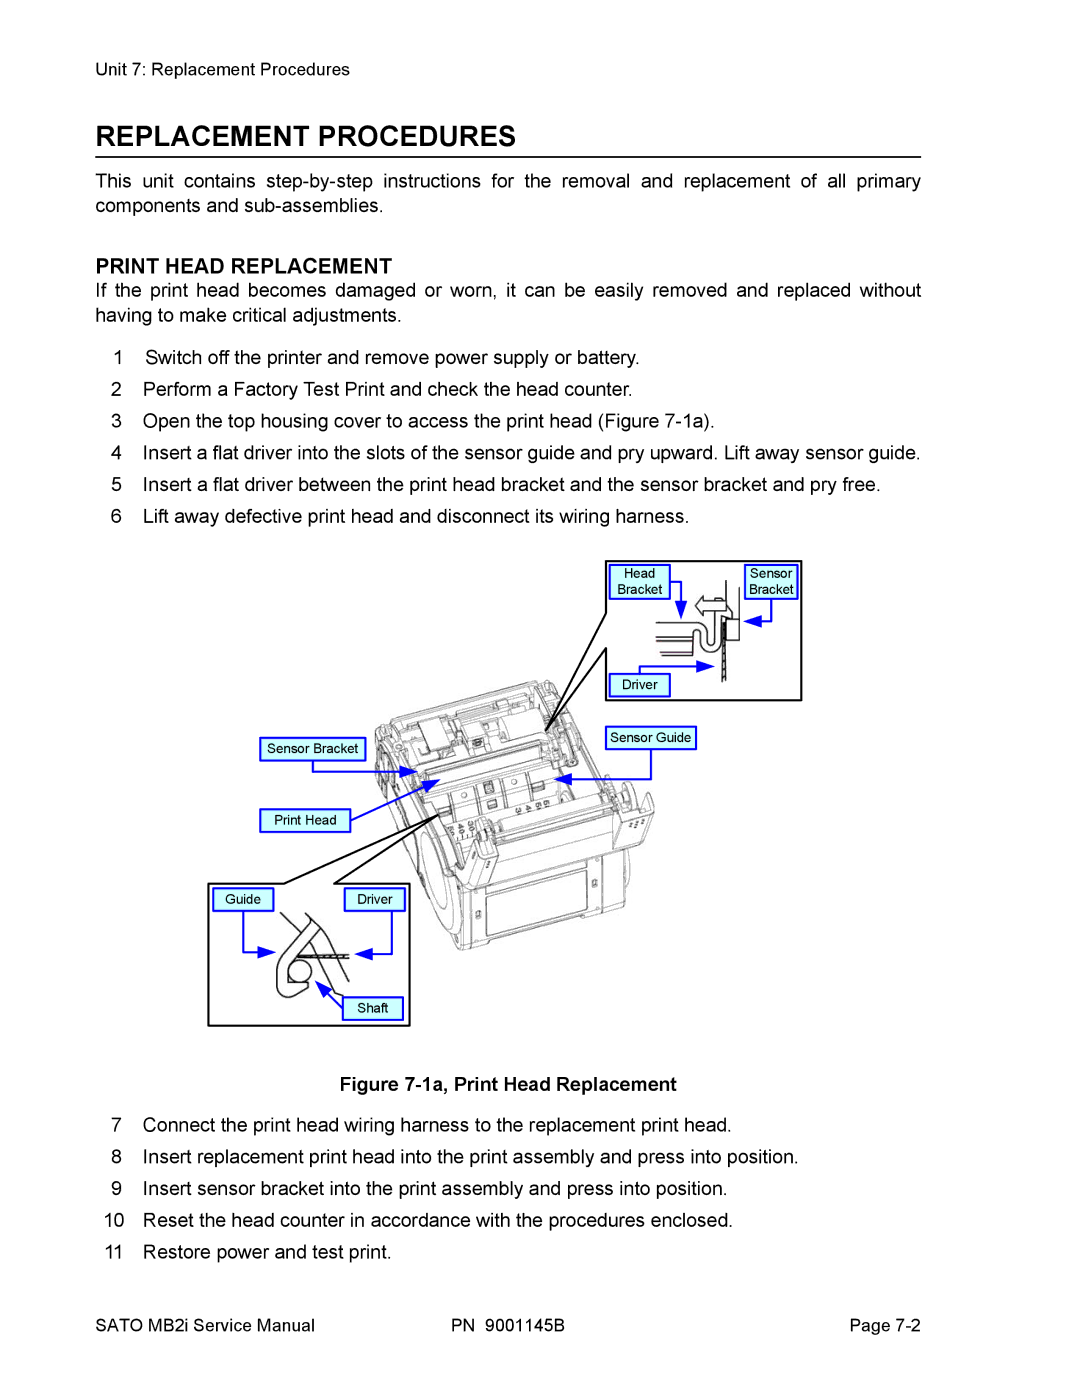
3 Open the top housing cover to access the print head (Figure
4 Insert a flat driver into the slots of the sensor guide and pry upward. Lift away sensor guide. 5 Insert a flat driver between the print head bracket and the sensor bracket and pry free.
6 Lift away defective print head and disconnect its wiring harness.
Sensor Bracket
Head |
Bracket |
Driver |
Sensor Guide
Sensor |
Bracket |
Print Head
Guide |
Driver |
Shaft |
Figure 7-1a, Print Head Replacement
7Connect the print head wiring harness to the replacement print head.
8Insert replacement print head into the print assembly and press into position.
9Insert sensor bracket into the print assembly and press into position.
10Reset the head counter in accordance with the procedures enclosed.
11Restore power and test print.
SATO MB2i Service Manual | PN 9001145B | Page |