SECTION 1 - GENERAL INFORMATION
1-6 Printer Setup
Loading Ribbon (Continued)
10.Turn the
11.Lower the print head and press it down firmly until it locks closed on both sides.
12.Close the top case.
13.Wait until the Ready Indicator glows green and press the FEED button to feed a label or to resume printing.
14.If the printer feeds out 7 inches of label and stops, and the indicator glows red, recalibrate for the media installed. See calibration.
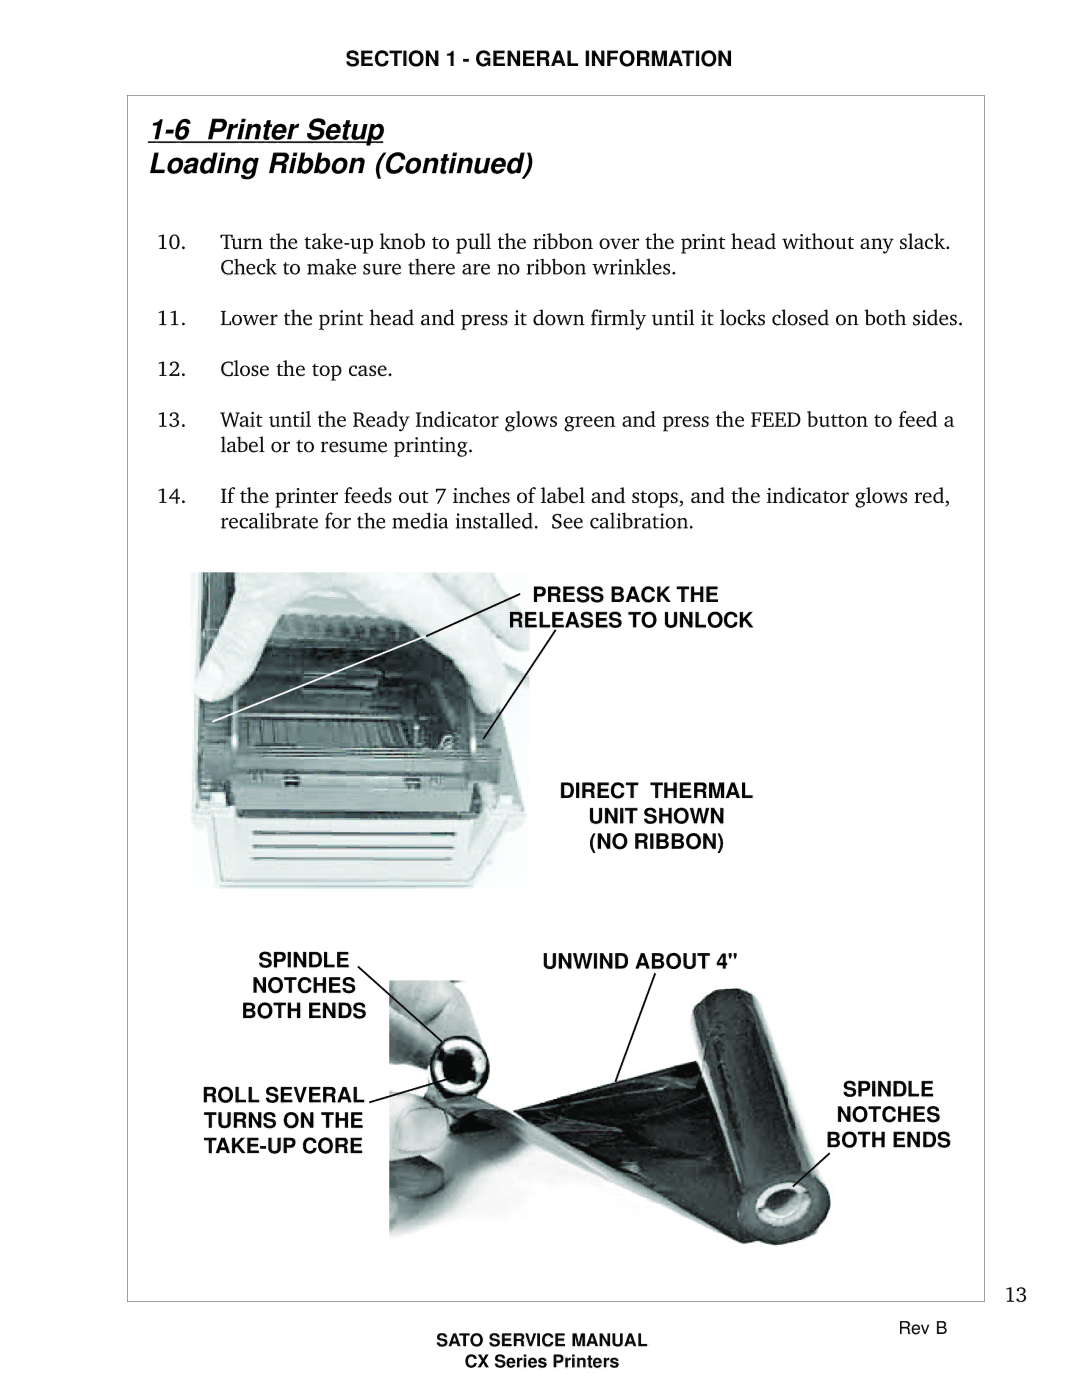
SPINDLE
NOTCHES
BOTH ENDS
ROLL SEVERAL ![]() TURNS ON THE
TURNS ON THE
PRESS BACK THE RELEASES TO UNLOCK
DIRECT THERMAL
UNIT SHOWN
(NO RIBBON)
UNWIND ABOUT 4"
SPINDLE
NOTCHES
BOTH ENDS
13
SATO SERVICE MANUAL
CX Series Printers
Rev B
