SATO CX200 manual Chassis, Including the Front Case Removal/Replacement, To remove the chassis

Models: CX200

1 55
Download 55 pages 28.53 Kb
Page 39
Image 39
3-4 Chassis, Including the Front Case Removal/Replacement

3-4 Chassis, Including the Front Case Removal/Replacement

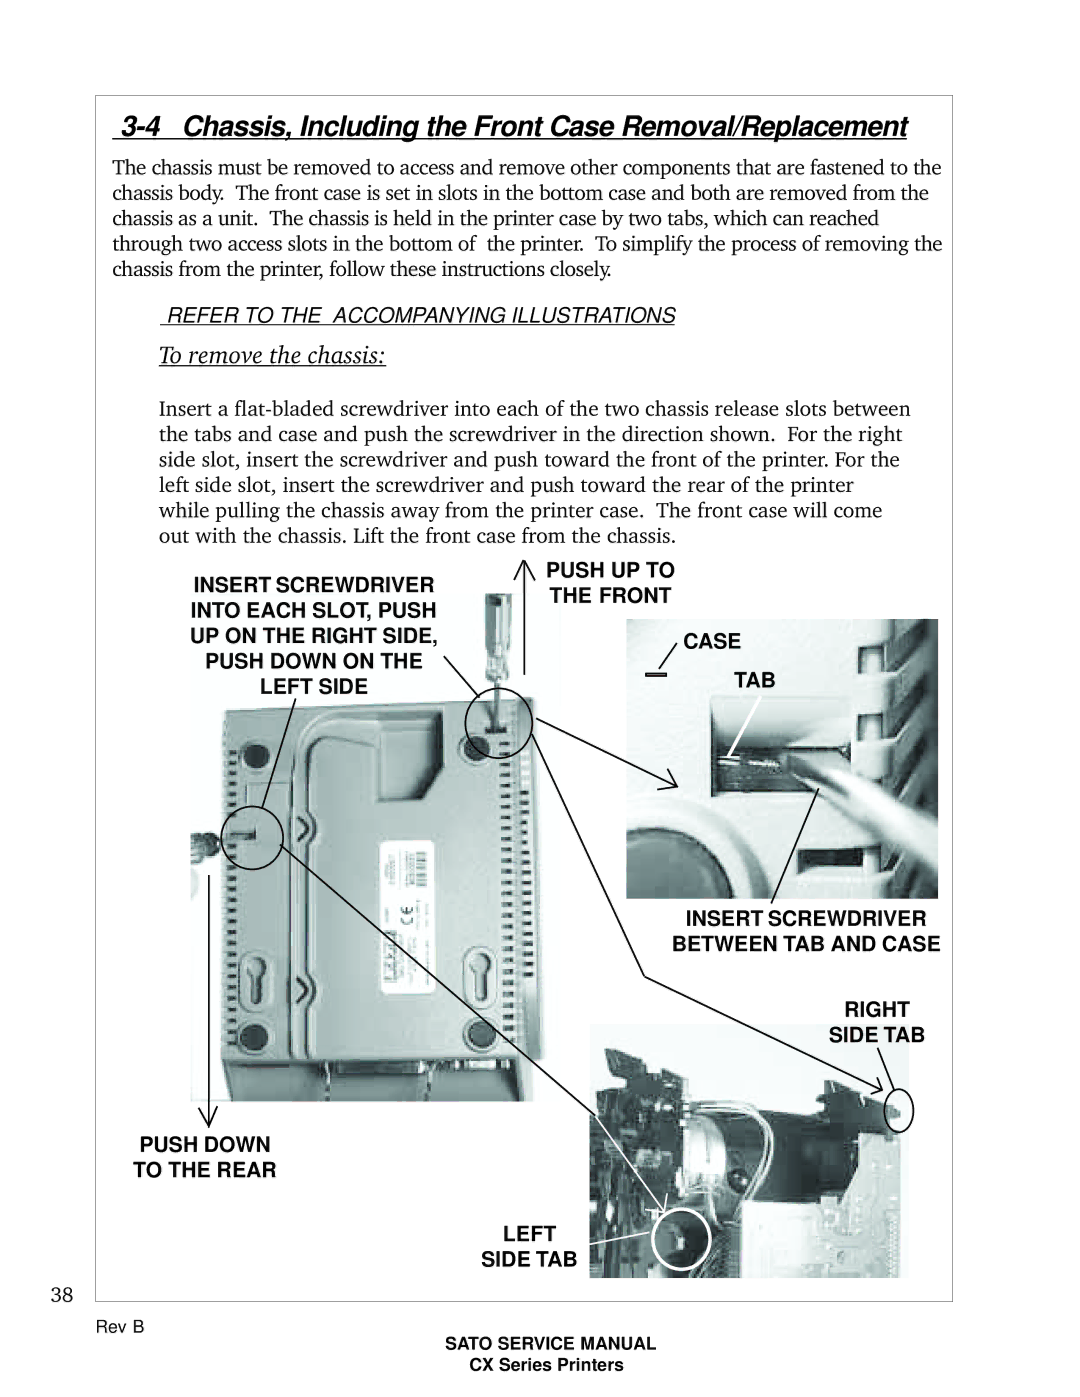
The chassis must be removed to access and remove other components that are fastened to the chassis body. The front case is set in slots in the bottom case and both are removed from the chassis as a unit. The chassis is held in the printer case by two tabs, which can reached through two access slots in the bottom of the printer. To simplify the process of removing the chassis from the printer, follow these instructions closely.

REFER TO THE ACCOMPANYING ILLUSTRATIONS

To remove the chassis:

Insert a flat-bladed screwdriver into each of the two chassis release slots between the tabs and case and push the screwdriver in the direction shown. For the right side slot, insert the screwdriver and push toward the front of the printer. For the left side slot, insert the screwdriver and push toward the rear of the printer while pulling the chassis away from the printer case. The front case will come out with the chassis. Lift the front case from the chassis.

38

INSERT SCREWDRIVER INTO EACH SLOT, PUSH UP ON THE RIGHT SIDE, PUSH DOWN ON THE LEFT SIDE

PUSH DOWN

TO THE REAR

PUSH UP TO

THE FRONT

CASE

TAB

INSERT SCREWDRIVER

BETWEEN TAB AND CASE

RIGHT

SIDE TAB

LEFT

SIDE TAB

Rev B

SATO SERVICE MANUAL

CX Series Printers

Page 39
Image 39
SATO CX200 manual Chassis, Including the Front Case Removal/Replacement, To remove the chassis, Push Down To The Rear