20
1-7 Printer Test and Calibration
Change RS232 Settings (Continued)
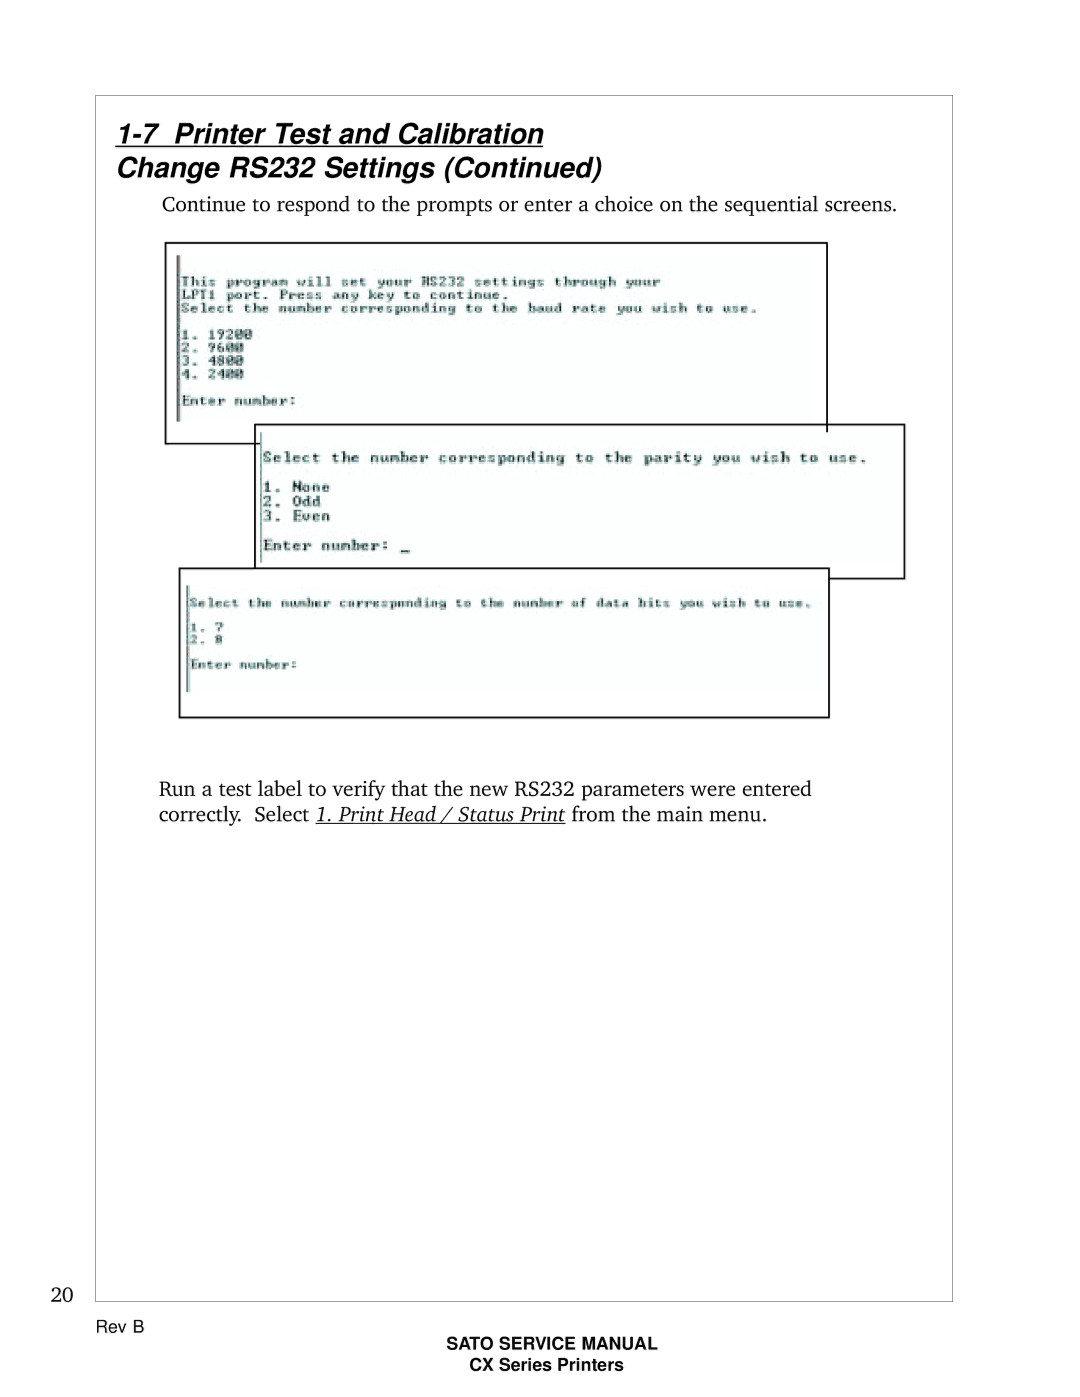
Continue to respond to the prompts or enter a choice on the sequential screens.
Run a test label to verify that the new RS232 parameters were entered correctly. Select 1. Print Head / Status Print from the main menu.
Rev B
SATO SERVICE MANUAL
CX Series Printers