40
3-5 Platen Removal/Replacement
REFER TO THE ACCOMPANYING ILLUSTRATIONS
Platen removal:
1.Raise the top case.
2.Press the two print head release latches back to release the print head, then lift the print head until it is fully raised and latched in the open position.
3.Insert a
4.Repeat steps 2 and 3 using the slot on the left side of the front case. This will release the left end of the platen.
5.Lift the platen clear of the chassis.
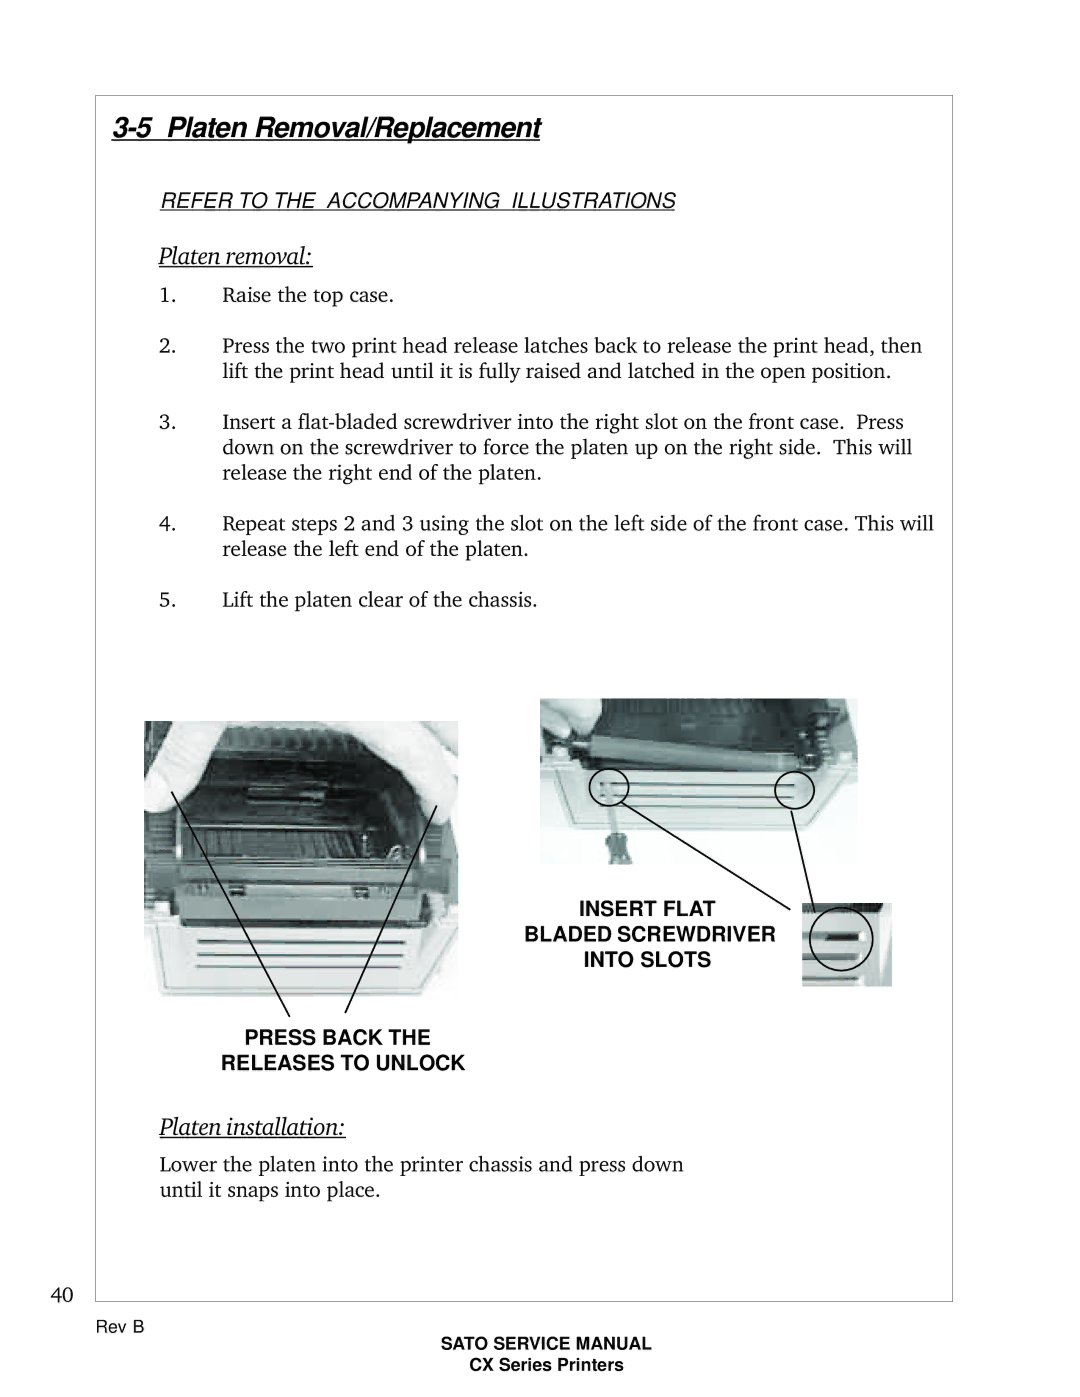
INSERT FLAT
BLADED SCREWDRIVER
INTO SLOTS
PRESS BACK THE
RELEASES TO UNLOCK
Platen installation:
Lower the platen into the printer chassis and press down until it snaps into place.
Rev B
SATO SERVICE MANUAL
CX Series Printers