3-4 Chassis, Including Front Case Removal/Replacement (Continued)
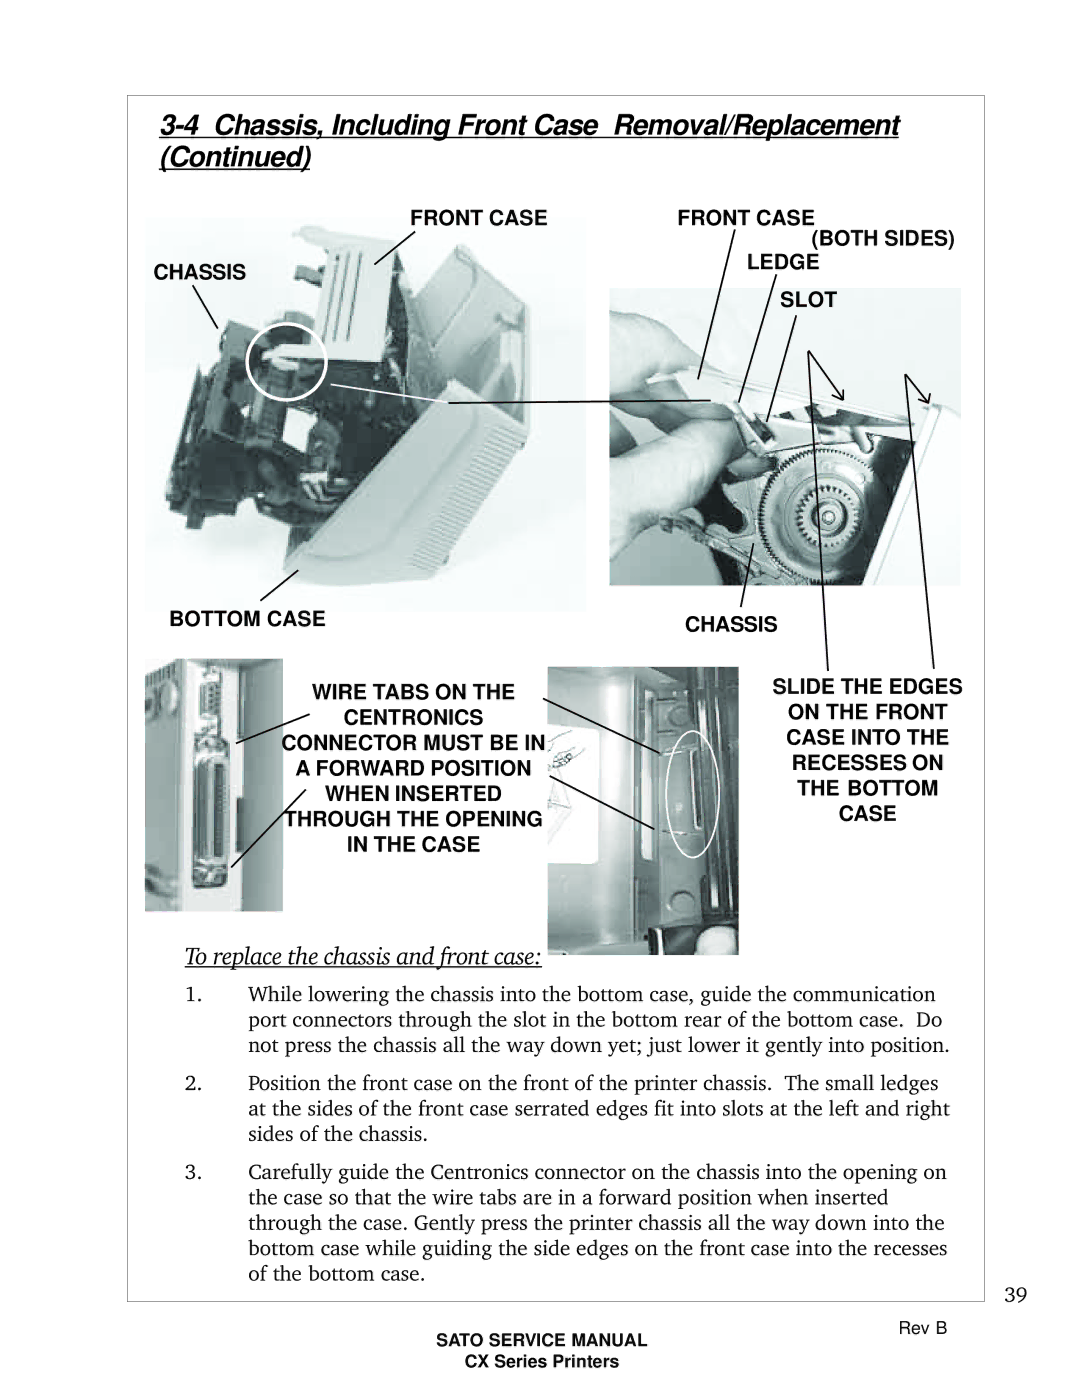
FRONT CASE | FRONT CASE |
| (BOTH SIDES) |
CHASSIS | LEDGE |
| |
| SLOT |
BOTTOM CASE
WIRE TABS ON THE
CENTRONICS
CONNECTOR MUST BE IN
A FORWARD POSITION
WHEN INSERTED
THROUGH THE OPENING
IN THE CASE
To replace the chassis and front case:
CHASSIS
SLIDE THE EDGES
ON THE FRONT
CASE INTO THE
RECESSES ON
THE BOTTOM
CASE
1.While lowering the chassis into the bottom case, guide the communication port connectors through the slot in the bottom rear of the bottom case. Do not press the chassis all the way down yet; just lower it gently into position.
2.Position the front case on the front of the printer chassis. The small ledges at the sides of the front case serrated edges fit into slots at the left and right sides of the chassis.
3.Carefully guide the Centronics connector on the chassis into the opening on the case so that the wire tabs are in a forward position when inserted through the case. Gently press the printer chassis all the way down into the bottom case while guiding the side edges on the front case into the recesses of the bottom case.
39
SATO SERVICE MANUAL
CX Series Printers
Rev B