3-6 Print Head Removal/Replacement
REFER TO THE ACCOMPANYING ILLUSTRATIONS
Print head removal:
1.Raise the top case.
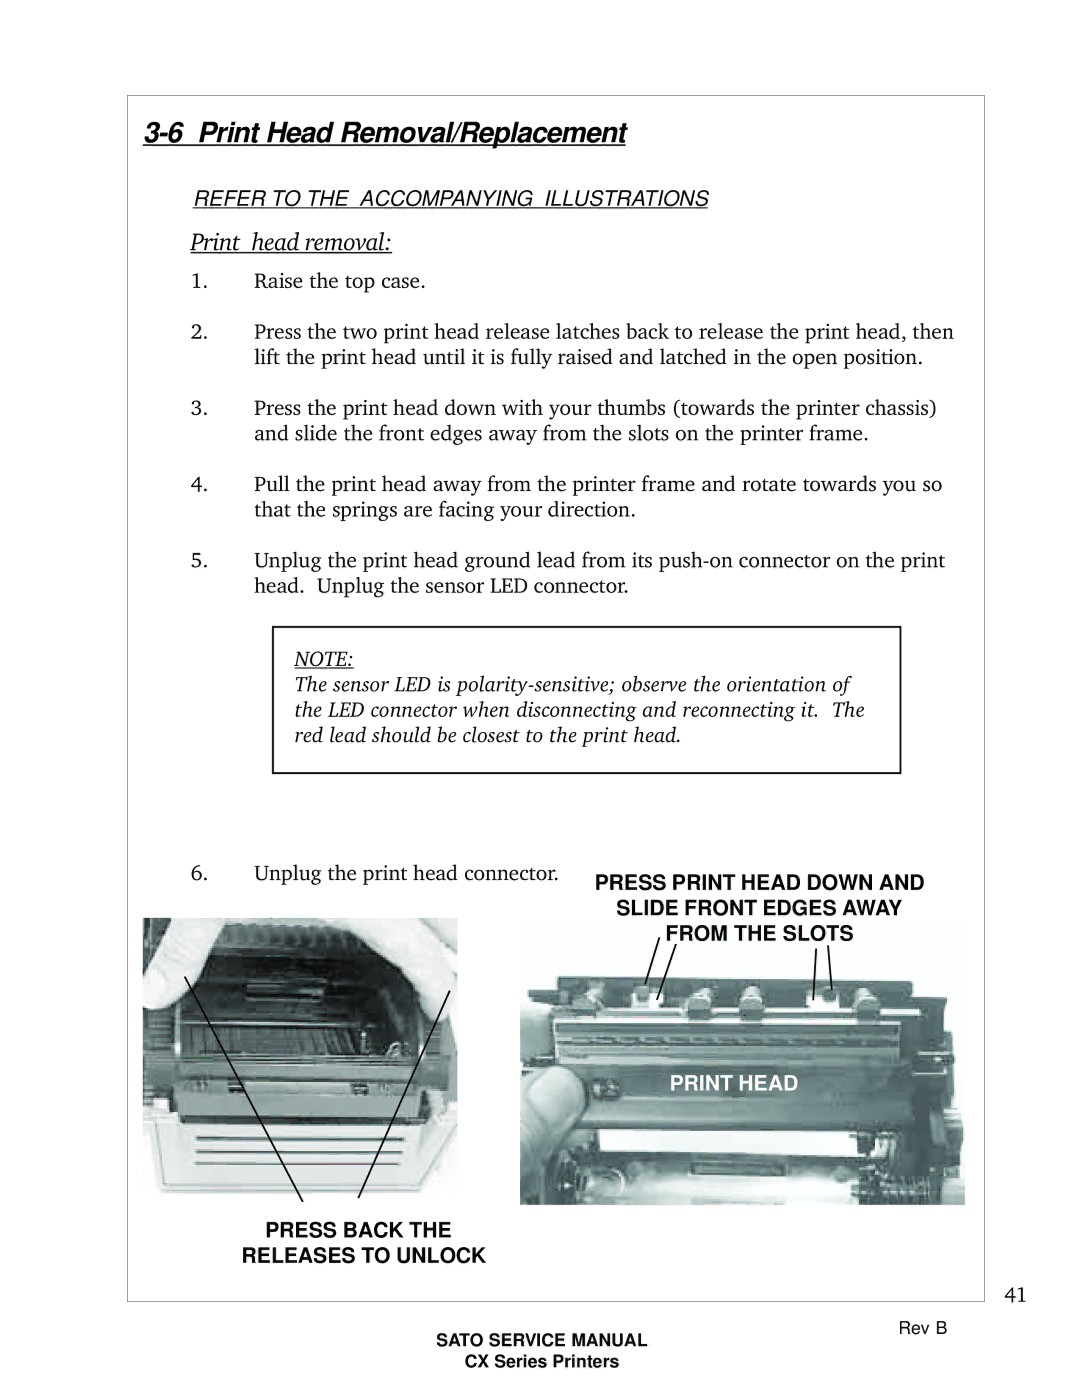
2.Press the two print head release latches back to release the print head, then lift the print head until it is fully raised and latched in the open position.
3.Press the print head down with your thumbs (towards the printer chassis) and slide the front edges away from the slots on the printer frame.
4.Pull the print head away from the printer frame and rotate towards you so that the springs are facing your direction.
5.Unplug the print head ground lead from its
NOTE:
The sensor LED is
6. Unplug the print head connector. | PRESS PRINT HEAD DOWN AND |
| |
| SLIDE FRONT EDGES AWAY |
| FROM THE SLOTS |
PRINT HEAD
PRESS BACK THE
RELEASES TO UNLOCK
41
SATO SERVICE MANUAL
CX Series Printers
Rev B