3-9 Motor Removal/Replacement
REFER TO THE ACCOMPANYING ILLUSTRATIONS
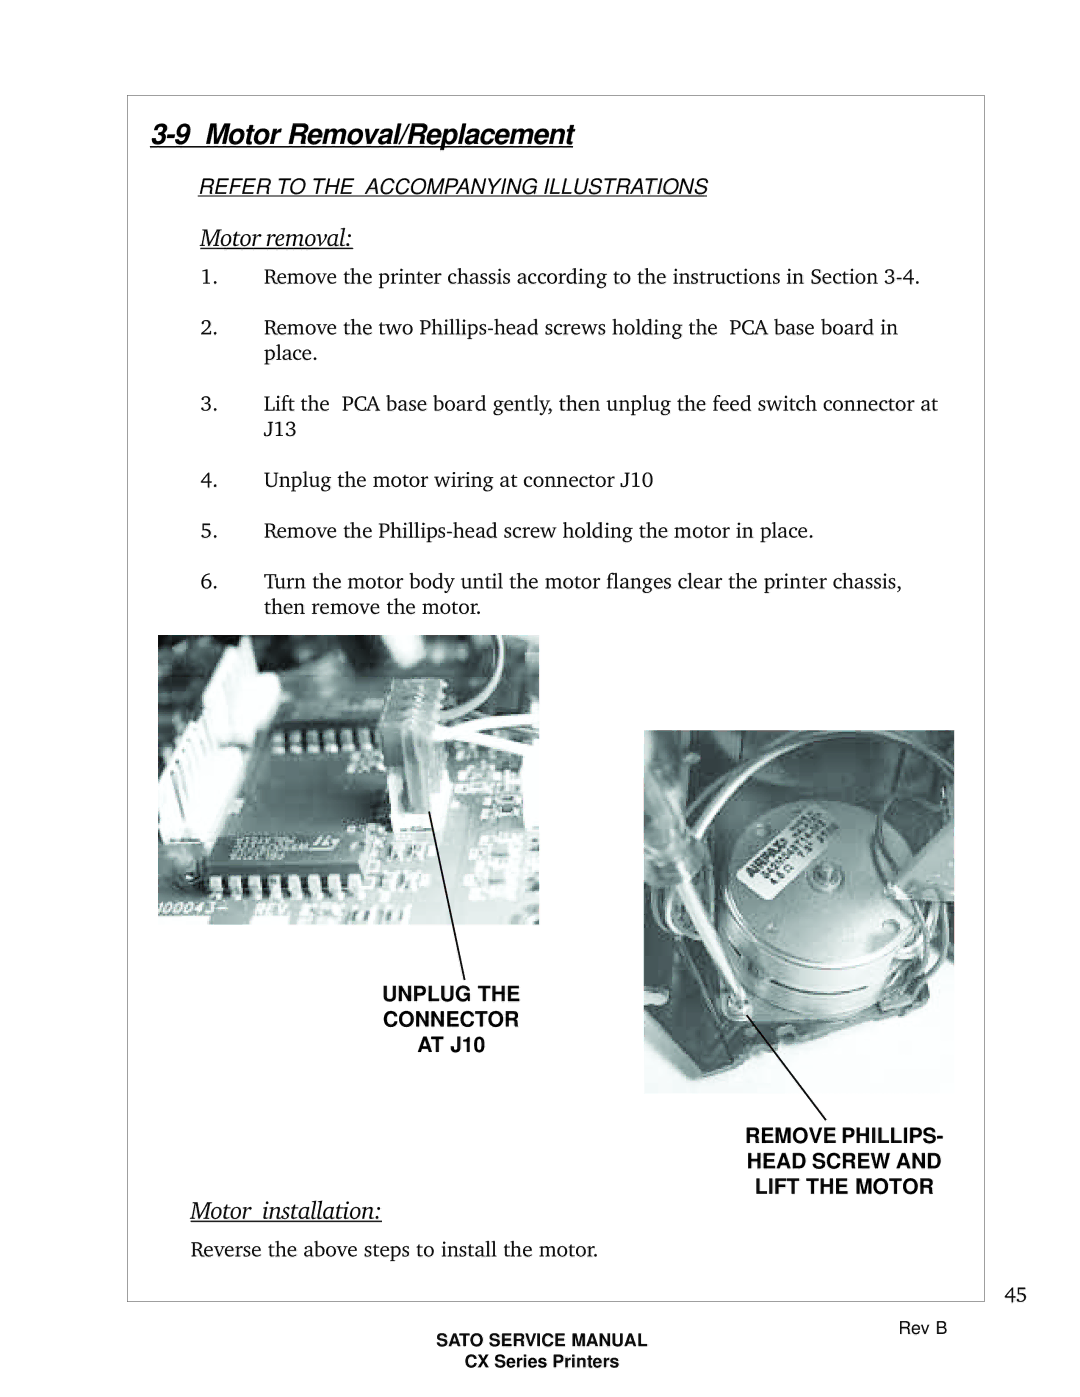
Motor removal:
1.Remove the printer chassis according to the instructions in Section
2.Remove the two
3.Lift the PCA base board gently, then unplug the feed switch connector at J13
4.Unplug the motor wiring at connector J10
5.Remove the
6.Turn the motor body until the motor flanges clear the printer chassis, then remove the motor.
UNPLUG THE
CONNECTOR
AT J10
REMOVE PHILLIPS-
HEAD SCREW AND
LIFT THE MOTOR
Motor installation:
Reverse the above steps to install the motor.
45
SATO SERVICE MANUAL
CX Series Printers
Rev B