*If you want to set the alarm 15 minutes before the schedule’s starting time, skip step 4 above and press [2nd] [ALARM].
*Note that the alarm ![]() symbol is different from the bell which appears at the bottom of the display to indicate that any alarm already marked as set throughout the Organizer will sound at the designated time.
symbol is different from the bell which appears at the bottom of the display to indicate that any alarm already marked as set throughout the Organizer will sound at the designated time.
5.Move to the DESCRIPTION field and type Lunch with Sally.
6.Press [ENTER].
To set an alarm for any entry that has already been stored, display the entry in Edit mode and enter the desired alarm time in the alarm field or press [2nd] [ALARM] to set the alarm 15 minutes before the entry’s starting time.
If the start time of a Schedule entry is before 0:14 and [2nd] [ALARM] are pressed, 0:00 will be set as the alarm time automatically.
Clearing a set alarm
To clear an alarm that has been set for a Schedule entry, display the entry in Edit mode, then press [2nd] [ALARM].
Split Screen Mode
The Split Screen function is available in the Schedule and To Do applications. Once this function is selected, a calendar will be shown on the left of the screen to enable user to choose a schedule date or a due date easily.
Selecting the Split Screen Mode
1.Press [MENU] in Schedule or To Do application to open Schedule menu or To Do menu.
2.Select SPLIT SCREEN ON. ( ![]() indicates that the option iscurrentlyset.)
indicates that the option iscurrentlyset.)
The Split Screen function is on and a calendar is shown on the left of the screen if [NEW] is pressed. After pressing [2nd] [ ![]() ], the Schedule Index of the selected month will be shown.
], the Schedule Index of the selected month will be shown.
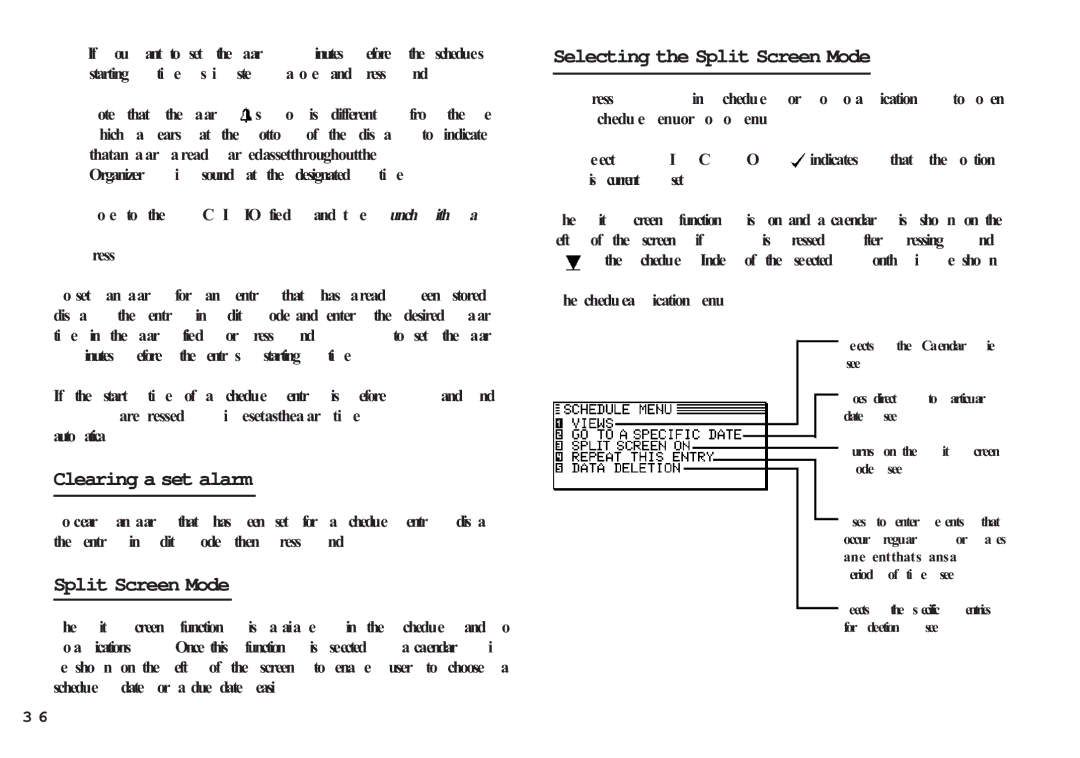
The Schedule application menu
Selects the Calendar view (see p.32)
Goesdirectlytoparticular date. (see p.33)
Turns on the Split Screen
Mode. (see p.36)
Uses to enter events that occur regularly, or makes an event that spans a period of time (see p.34)
Selectsthespecificentries for deletion (see p.27)
3 6