Assigning due dates to entries
A To Do entry must be given a due date (or month) so the Organizer knows how to classify it and the Calendar knows when it becomes due. The due date can be entered either by typing in the actual date, or by selecting the date from the
Enter the following information:
Description | Sales report |
Due Date | Sept 10, 1998. |
In the To Do application:
1.Press [NEW].
2.Type Sales Report.
3.Move to the DUE DATE field. Enter the due date in the order of the month, day, year. Type 09101998, or press
[ ![]() ], use [PREV] and [NEXT] to display September 1998, then use [
], use [PREV] and [NEXT] to display September 1998, then use [ ![]() ] [
] [ ![]() ] [
] [ ![]() ] [
] [ ![]() ] and to move to the 10th of the month.
] and to move to the 10th of the month.
4.Press [ENTER].
*At index view, a ! mark will be displayed beside an overdue entry (ie. an entry for which the due date has passed).
Checking off completed entries
Once you have reached a target you set for yourself, it is a good idea to check off the entry as completed so that you can concentrate on things still to be done.
This operation can be done in the To Do application, which lets you check off a task that you have completed before its due date.
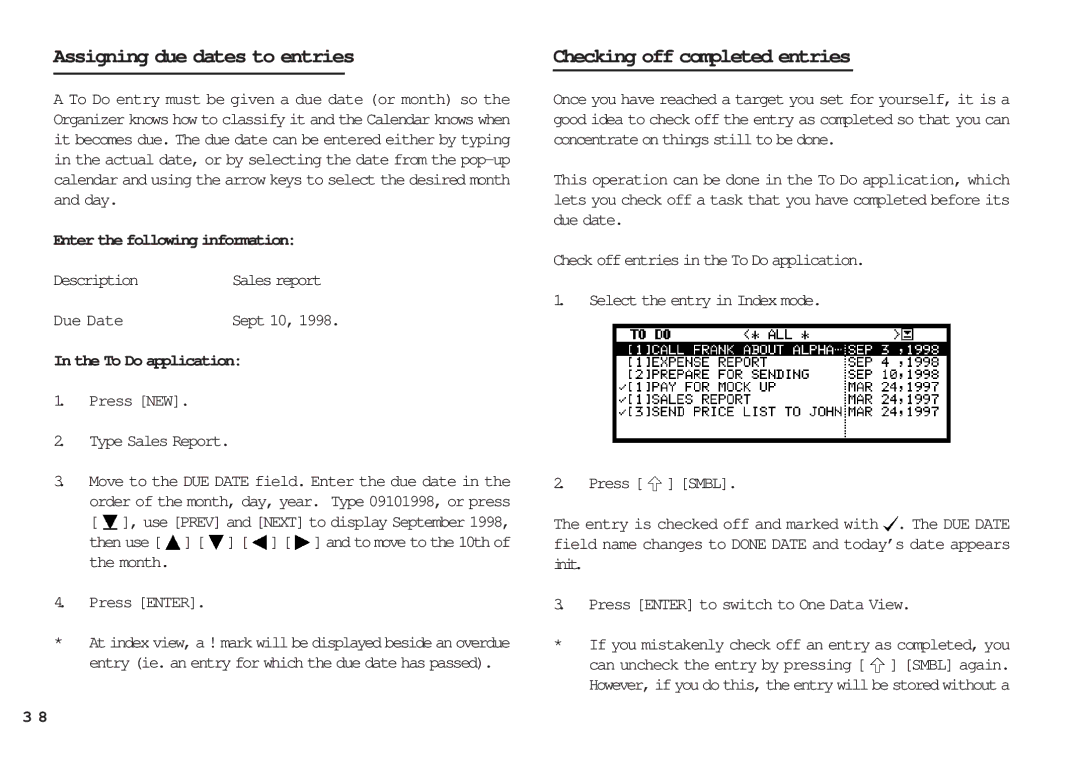
Check off entries in the To Do application.
1.Select the entry in Index mode.
2.Press [ ![]() ] [SMBL].
] [SMBL].
The entry is checked off and marked with ![]() . The DUE DATE field name changes to DONE DATE and today’s date appears init.
. The DUE DATE field name changes to DONE DATE and today’s date appears init.
3.Press [ENTER] to switch to One Data View.
*If you mistakenly check off an entry as completed, you can uncheck the entry by pressing [ ![]() ] [SMBL] again. However, if you do this, the entry will be stored without a
] [SMBL] again. However, if you do this, the entry will be stored without a
3 8