6.2TROUBLESHOOTING
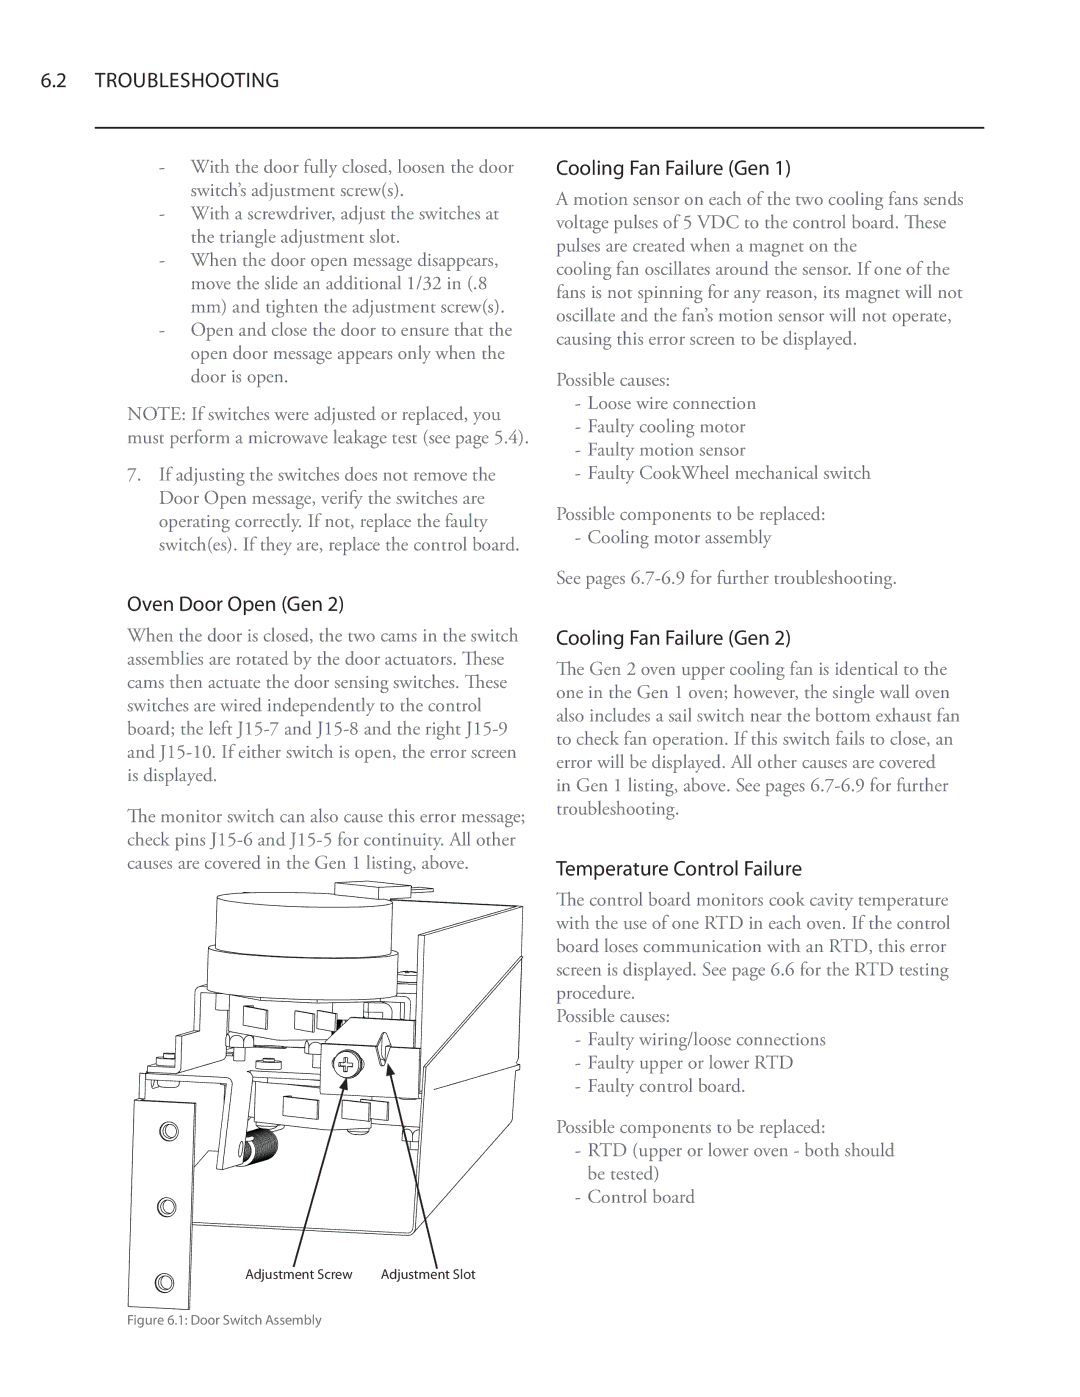
-With the door fully closed, loosen the door switch’s adjustment screw(s).
-With a screwdriver, adjust the switches at the triangle adjustment slot.
-When the door open message disappears, move the slide an additional 1/32 in (.8 mm) and tighten the adjustment screw(s).
-Open and close the door to ensure that the open door message appears only when the door is open.
NOTE: If switches were adjusted or replaced, you must perform a microwave leakage test (see page 5.4).
7.If adjusting the switches does not remove the Door Open message, verify the switches are operating correctly. If not, replace the faulty switch(es). If they are, replace the control board.
Cooling Fan Failure (Gen 1)
A motion sensor on each of the two cooling fans sends voltage pulses of 5 VDC to the control board. These pulses are created when a magnet on the
cooling fan oscillates around the sensor. If one of the fans is not spinning for any reason, its magnet will not oscillate and the fan’s motion sensor will not operate, causing this error screen to be displayed.
Possible causes:
-Loose wire connection
-Faulty cooling motor
-Faulty motion sensor
-Faulty CookWheel mechanical switch
Possible components to be replaced: - Cooling motor assembly
See pages
Oven Door Open (Gen 2)
When the door is closed, the two cams in the switch assemblies are rotated by the door actuators. These cams then actuate the door sensing switches. These switches are wired independently to the control board; the left
The monitor switch can also cause this error message; check pins
Cooling Fan Failure (Gen 2)
The Gen 2 oven upper cooling fan is identical to the one in the Gen 1 oven; however, the single wall oven also includes a sail switch near the bottom exhaust fan to check fan operation. If this switch fails to close, an error will be displayed. All other causes are covered in Gen 1 listing, above. See pages
Temperature Control Failure
The control board monitors cook cavity temperature with the use of one RTD in each oven. If the control board loses communication with an RTD, this error screen is displayed. See page 6.6 for the RTD testing procedure.
Possible causes:
-Faulty wiring/loose connections
-Faulty upper or lower RTD
-Faulty control board.
Possible components to be replaced:
-RTD (upper or lower oven - both should be tested)
-Control board
Adjustment Screw | Adjustment Slot |
