SCANNING FROM ONETOUCH

50

The Storage Options Tab (Archive)

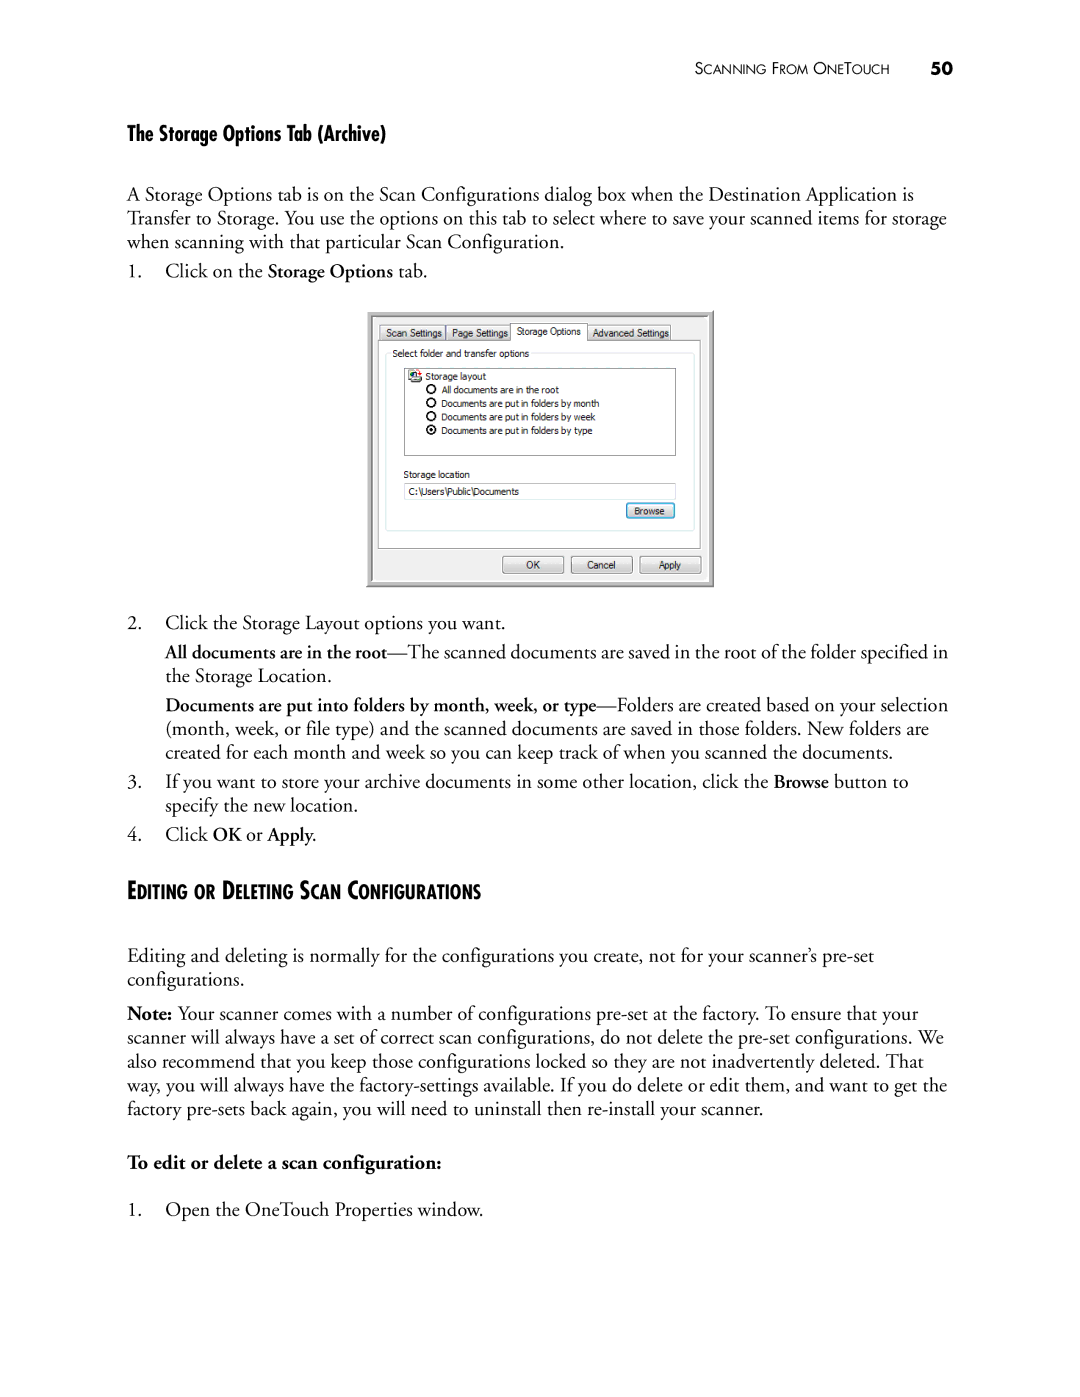
A Storage Options tab is on the Scan Configurations dialog box when the Destination Application is Transfer to Storage. You use the options on this tab to select where to save your scanned items for storage when scanning with that particular Scan Configuration.

1.Click on the Storage Options tab.

2.Click the Storage Layout options you want.

All documents are in the root—The scanned documents are saved in the root of the folder specified in the Storage Location.

Documents are put into folders by month, week, or type—Folders are created based on your selection (month, week, or file type) and the scanned documents are saved in those folders. New folders are created for each month and week so you can keep track of when you scanned the documents.

3.If you want to store your archive documents in some other location, click the Browse button to specify the new location.

4.Click OK or Apply.

EDITING OR DELETING SCAN CONFIGURATIONS

Editing and deleting is normally for the configurations you create, not for your scanner’s pre-set configurations.

Note: Your scanner comes with a number of configurations pre-set at the factory. To ensure that your scanner will always have a set of correct scan configurations, do not delete the pre-set configurations. We also recommend that you keep those configurations locked so they are not inadvertently deleted. That way, you will always have the factory-settings available. If you do delete or edit them, and want to get the factory pre-sets back again, you will need to uninstall then re-install your scanner.

To edit or delete a scan configuration:

1.Open the OneTouch Properties window.
Page 52
Image 52
Visioneer 400 Storage Options Tab Archive, Editing or Deleting Scan Configurations, To edit or delete a scan configuration