Visioneer manual Visioneer Strobe 400 Scanner USER’S Guide

Models: 400

1 118
Download 118 pages 7.32 Kb
Page 93
Image 93

91VISIONEER STROBE 400 SCANNER USERS GUIDE

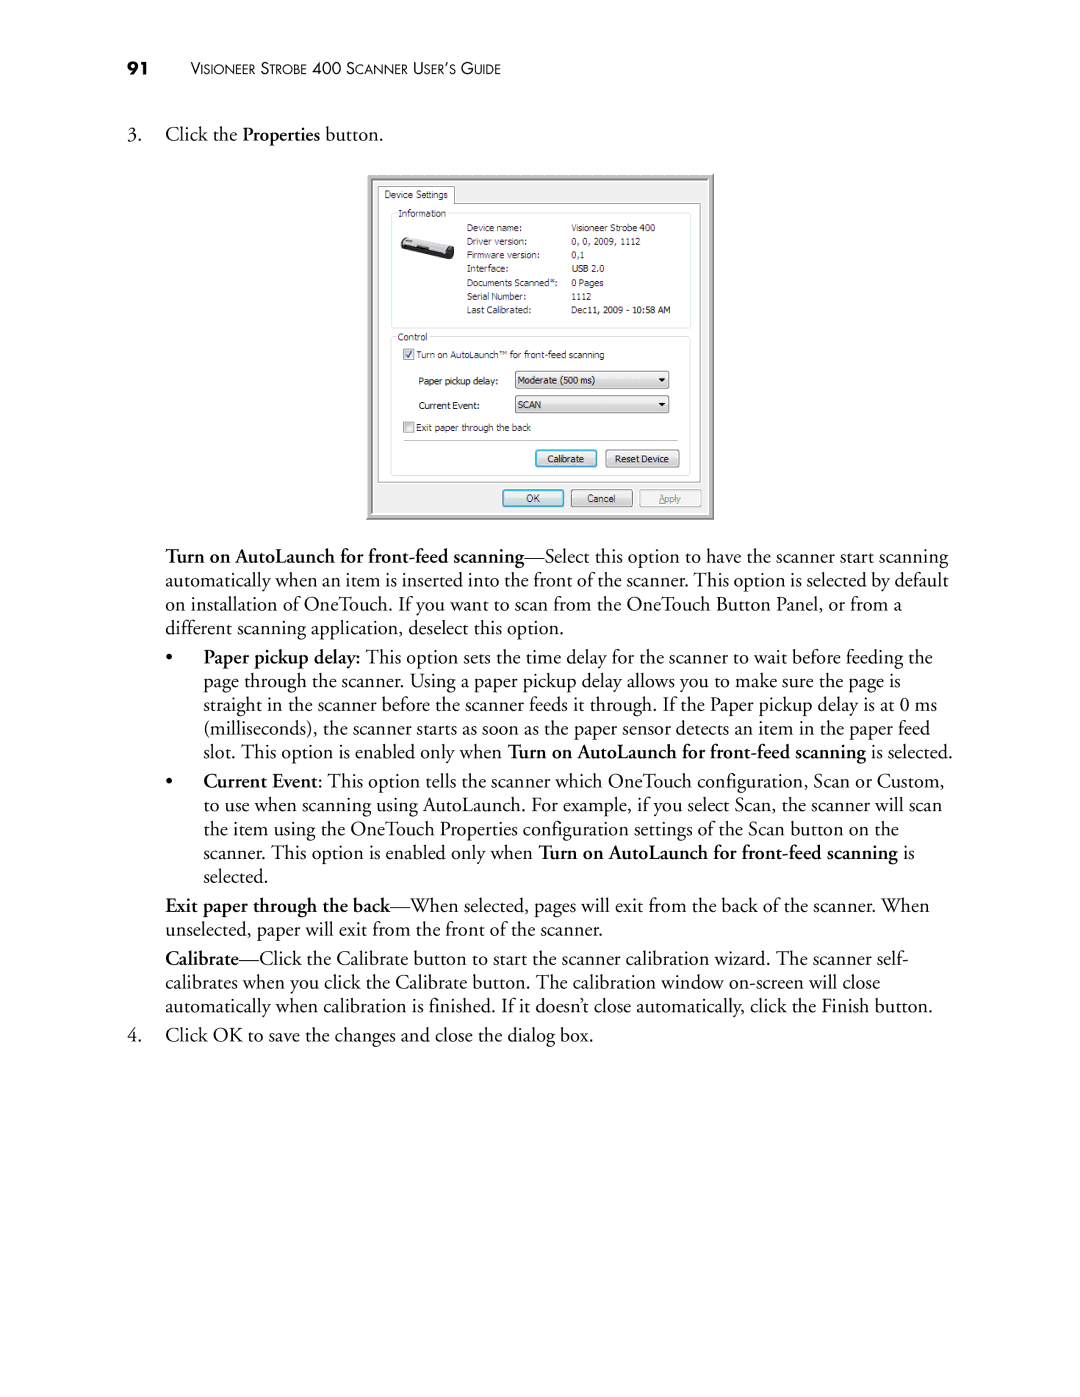
3.Click the Properties button.

Turn on AutoLaunch for front-feedscanning—Select this option to have the scanner start scanning automatically when an item is inserted into the front of the scanner. This option is selected by default on installation of OneTouch. If you want to scan from the OneTouch Button Panel, or from a different scanning application, deselect this option.

Paper pickup delay: This option sets the time delay for the scanner to wait before feeding the page through the scanner. Using a paper pickup delay allows you to make sure the page is straight in the scanner before the scanner feeds it through. If the Paper pickup delay is at 0 ms (milliseconds), the scanner starts as soon as the paper sensor detects an item in the paper feed slot. This option is enabled only when Turn on AutoLaunch for front-feed scanning is selected.

Current Event: This option tells the scanner which OneTouch configuration, Scan or Custom, to use when scanning using AutoLaunch. For example, if you select Scan, the scanner will scan the item using the OneTouch Properties configuration settings of the Scan button on the scanner. This option is enabled only when Turn on AutoLaunch for front-feed scanning is selected.

Exit paper through the back—When selected, pages will exit from the back of the scanner. When unselected, paper will exit from the front of the scanner.

Calibrate—Click the Calibrate button to start the scanner calibration wizard. The scanner self- calibrates when you click the Calibrate button. The calibration window on-screen will close automatically when calibration is finished. If it doesn’t close automatically, click the Finish button.

4.Click OK to save the changes and close the dialog box.

Page 93
Image 93
Visioneer manual Visioneer Strobe 400 Scanner USER’S Guide