Visioneer 400 manual Scan Settings Tab

Models: 400

1 118
Download 118 pages 7.32 Kb
Page 47
Image 47

45VISIONEER STROBE 400 SCANNER USERS GUIDE

The Scan Settings Tab

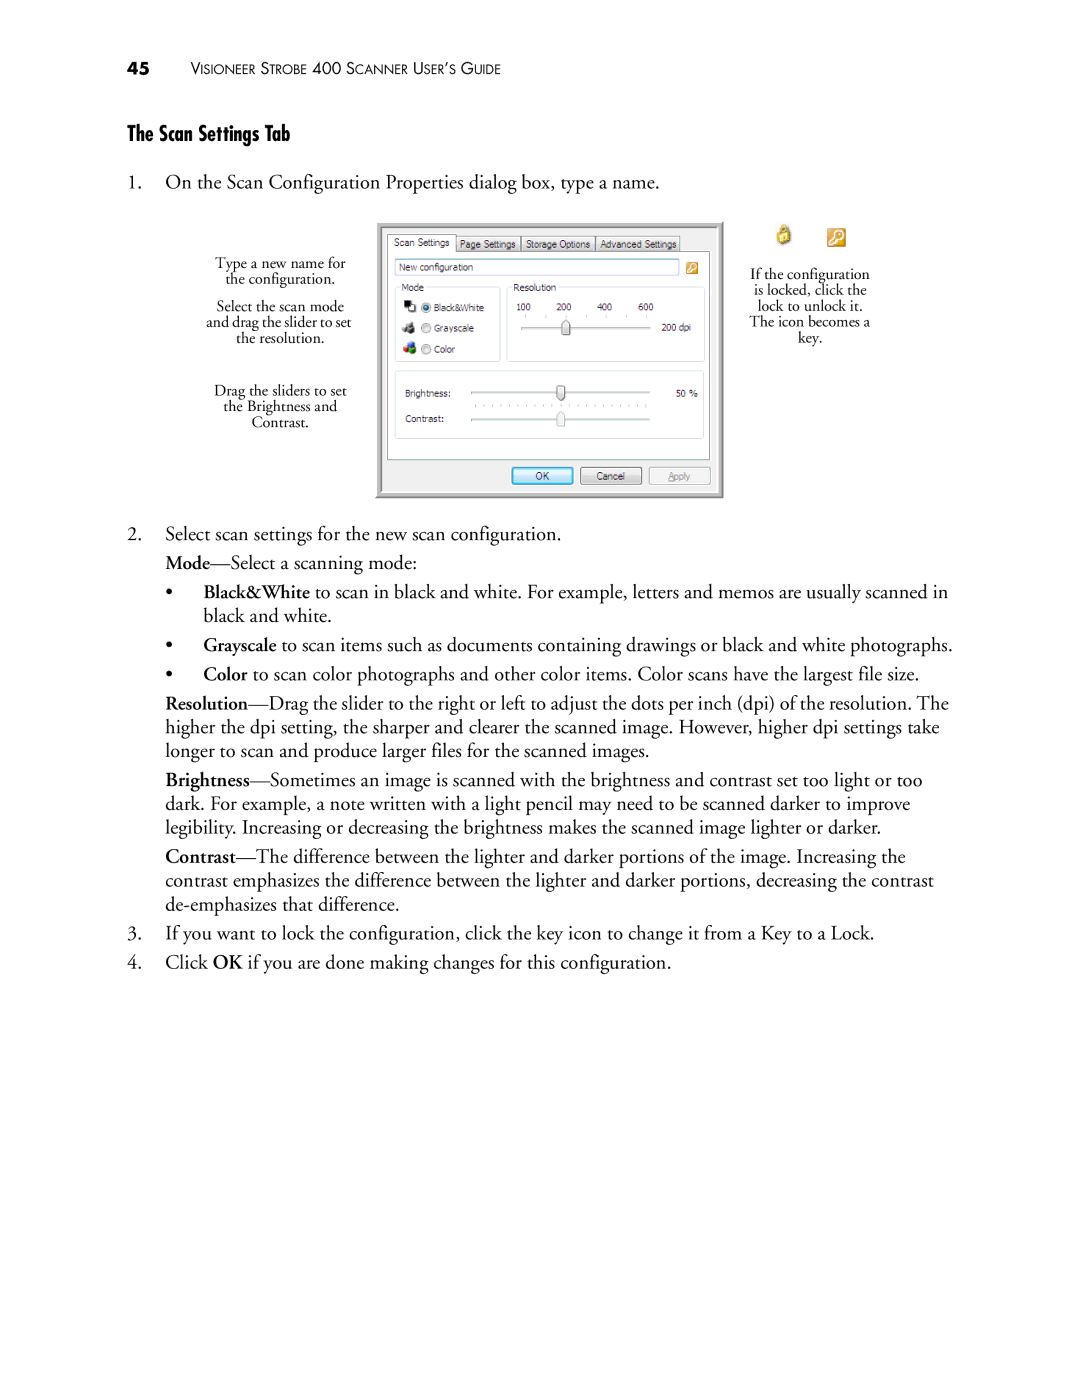
1.On the Scan Configuration Properties dialog box, type a name.

Type a new name for

the configuration.

Select the scan mode and drag the slider to set the resolution.

Drag the sliders to set

the Brightness and

Contrast.

If the configuration is locked, click the lock to unlock it. The icon becomes a key.

2.Select scan settings for the new scan configuration. Mode—Select a scanning mode:

Black&White to scan in black and white. For example, letters and memos are usually scanned in black and white.

Grayscale to scan items such as documents containing drawings or black and white photographs.

Color to scan color photographs and other color items. Color scans have the largest file size.

Resolution—Drag the slider to the right or left to adjust the dots per inch (dpi) of the resolution. The higher the dpi setting, the sharper and clearer the scanned image. However, higher dpi settings take longer to scan and produce larger files for the scanned images.

Brightness—Sometimes an image is scanned with the brightness and contrast set too light or too dark. For example, a note written with a light pencil may need to be scanned darker to improve legibility. Increasing or decreasing the brightness makes the scanned image lighter or darker.

Contrast—The difference between the lighter and darker portions of the image. Increasing the contrast emphasizes the difference between the lighter and darker portions, decreasing the contrast de-emphasizes that difference.

3.If you want to lock the configuration, click the key icon to change it from a Key to a Lock.

4.Click OK if you are done making changes for this configuration.

Page 47
Image 47
Visioneer 400 manual Scan Settings Tab