Visioneer 400 manual Scanning with the Twain Interface, Options in the Twain Interface

Models: 400

1 118
Download 118 pages 7.32 Kb
Page 96
Image 96

SCANNING FROM TWAIN

94

SCANNING WITH THE TWAIN INTERFACE

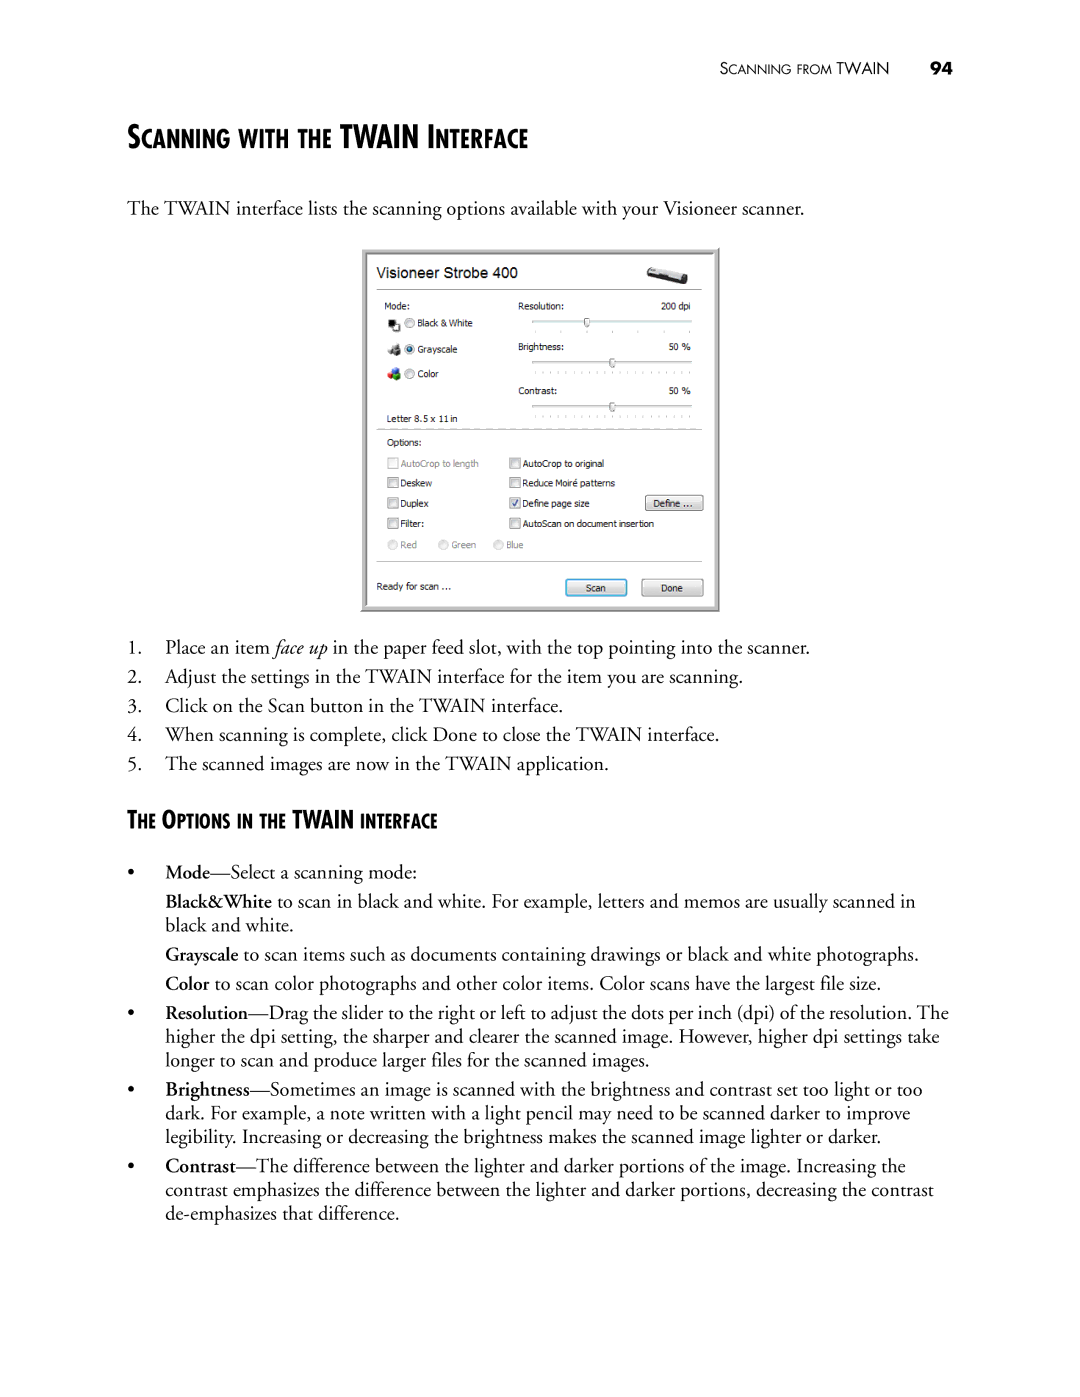
The TWAIN interface lists the scanning options available with your Visioneer scanner.

1.Place an item face up in the paper feed slot, with the top pointing into the scanner.

2.Adjust the settings in the TWAIN interface for the item you are scanning.

3.Click on the Scan button in the TWAIN interface.

4.When scanning is complete, click Done to close the TWAIN interface.

5.The scanned images are now in the TWAIN application.

THE OPTIONS IN THE TWAIN INTERFACE

Mode—Select a scanning mode:

Black&White to scan in black and white. For example, letters and memos are usually scanned in black and white.

Grayscale to scan items such as documents containing drawings or black and white photographs. Color to scan color photographs and other color items. Color scans have the largest file size.

Resolution—Drag the slider to the right or left to adjust the dots per inch (dpi) of the resolution. The higher the dpi setting, the sharper and clearer the scanned image. However, higher dpi settings take longer to scan and produce larger files for the scanned images.

Brightness—Sometimes an image is scanned with the brightness and contrast set too light or too dark. For example, a note written with a light pencil may need to be scanned darker to improve legibility. Increasing or decreasing the brightness makes the scanned image lighter or darker.

Contrast—The difference between the lighter and darker portions of the image. Increasing the contrast emphasizes the difference between the lighter and darker portions, decreasing the contrast de-emphasizes that difference.

Page 96
Image 96
Visioneer 400 manual Scanning with the Twain Interface, Options in the Twain Interface