NOTE: You must select the input signal format according to the camera type or CCD module type that is connected to the remote Video Server / Network Camera series product, regardless of the power line connected is 50 or 60 Hz.
Display Options:
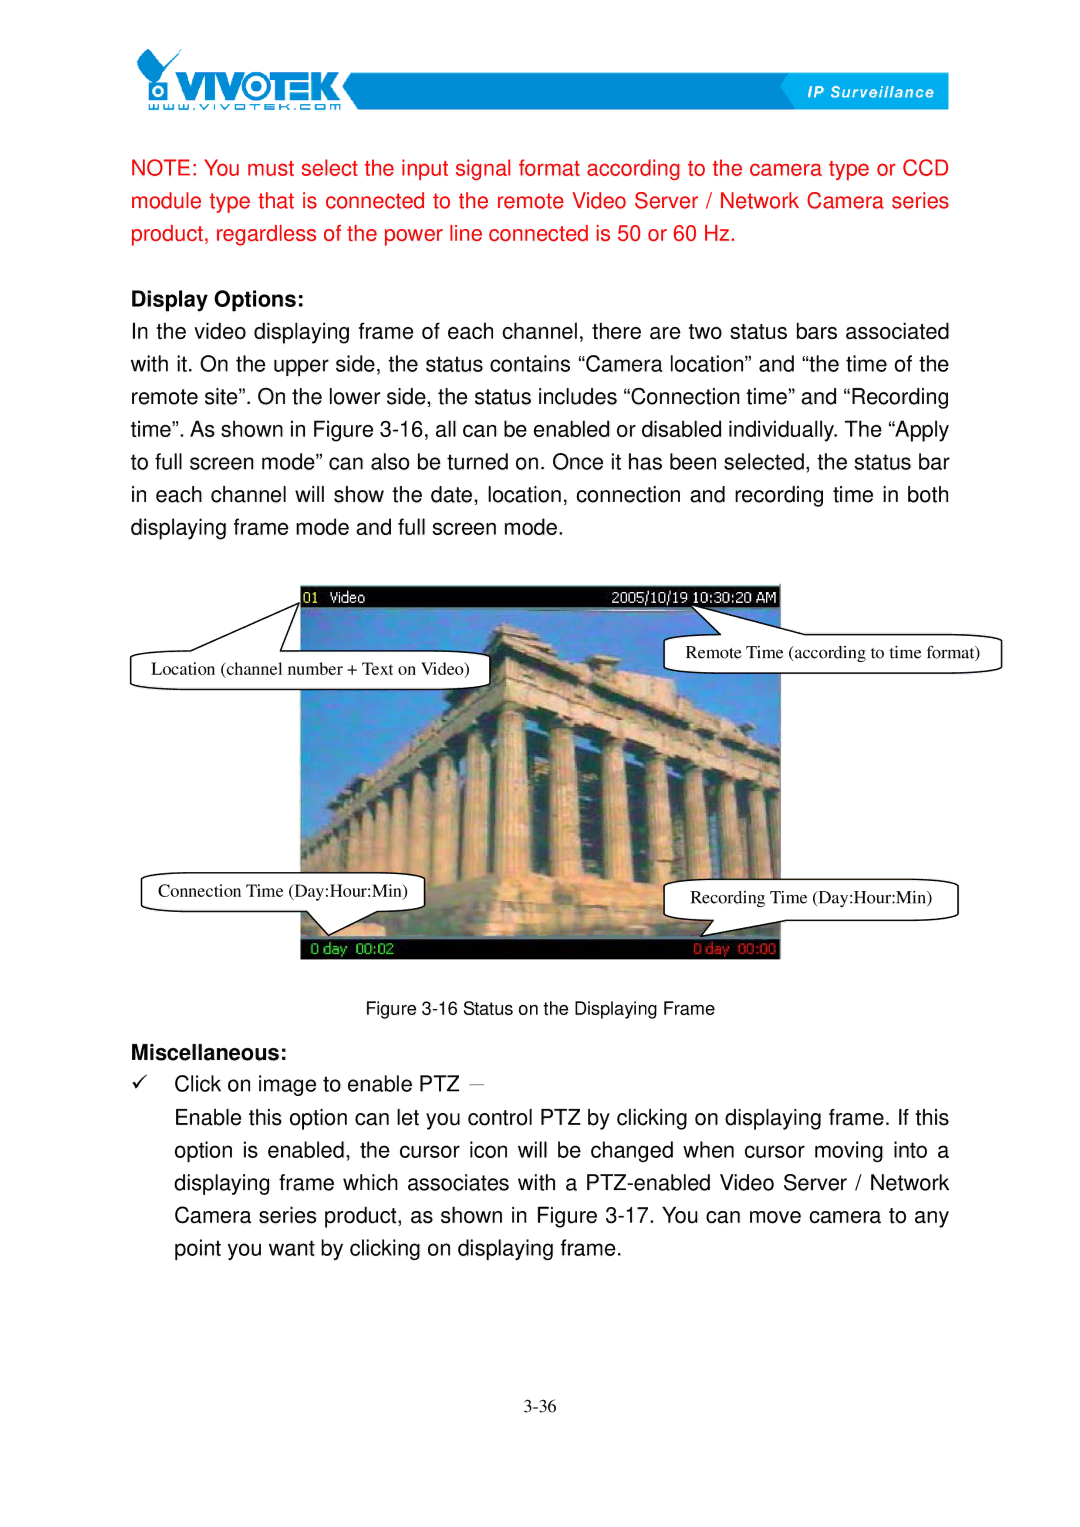
In the video displaying frame of each channel, there are two status bars associated with it. On the upper side, the status contains “Camera location” and “the time of the remote site”. On the lower side, the status includes “Connection time” and “Recording
time”. As shown in FigureX3-16,Xall can be enabled or disabled individually. The “Apply to full screen mode” can also be turned on. Once it has been selected, the status bar in each channel will show the date, location, connection and recording time in both displaying frame mode and full screen mode.
Remote Time (according to time format)
Location (channel number + Text on Video)
Connection Time (Day:Hour:Min) | Recording Time (Day:Hour:Min) |
|
Figure 3-16 Status on the Displaying Frame
Miscellaneous:
9Click on image to enable PTZ -
Enable this option can let you control PTZ by clicking on displaying frame. If this option is enabled, the cursor icon will be changed when cursor moving into a displaying frame which associates with a
Camera series product, as shown in FigureX3-17.XYou can move camera to any point you want by clicking on displaying frame.