REMOVING THE ELECTRONIC CONTROL BOARD
![]() WARNING
WARNING
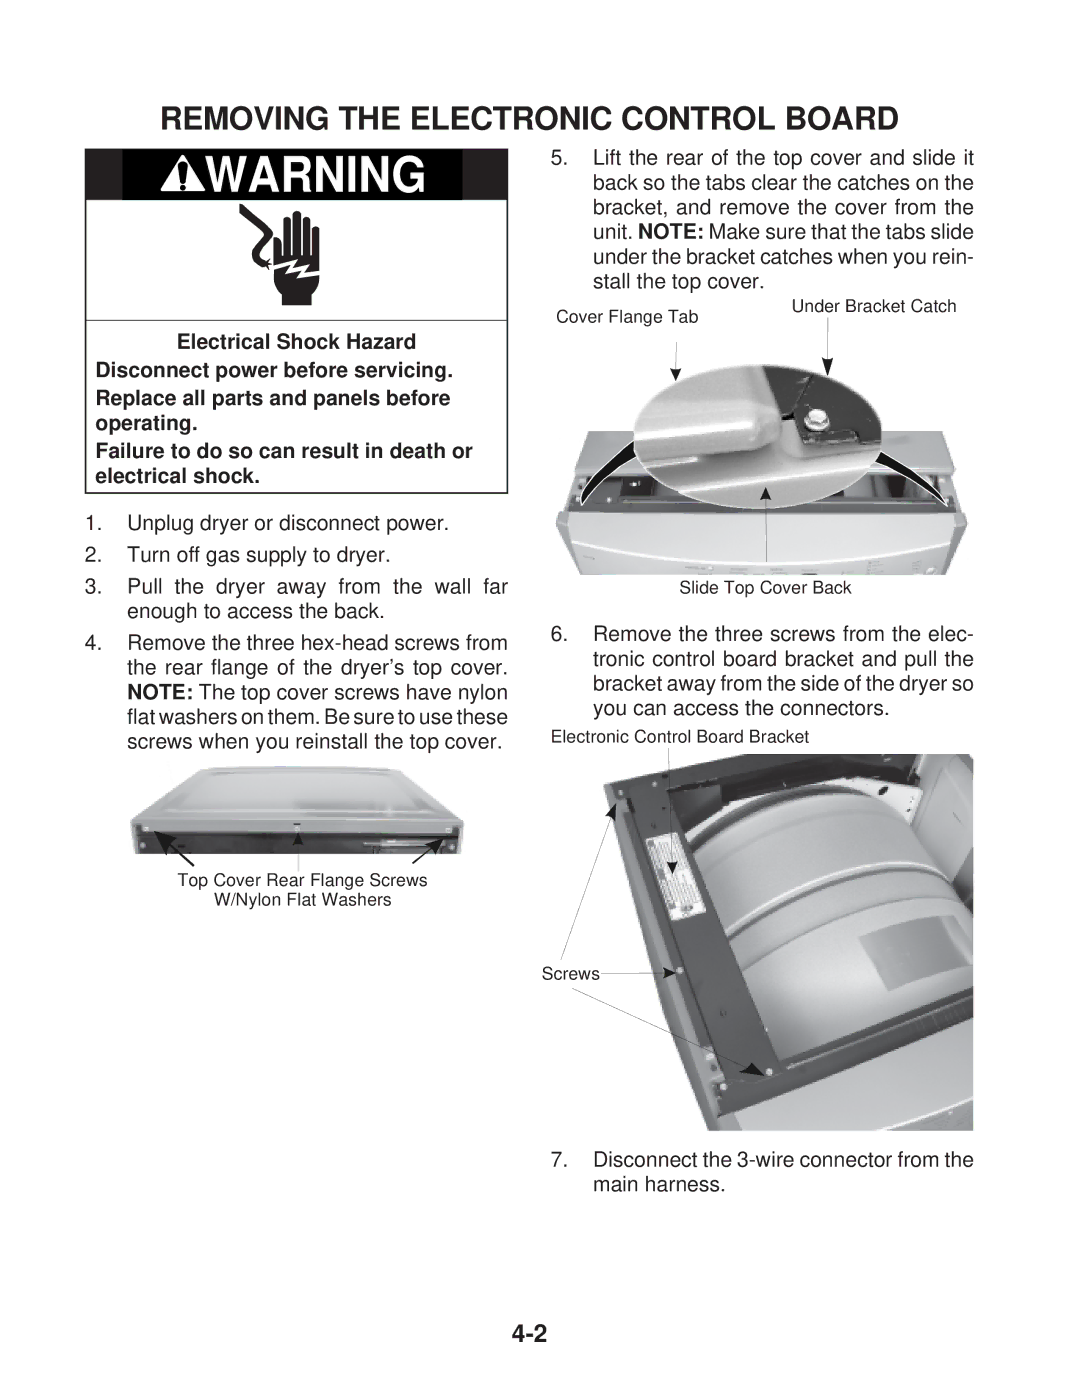
5.Lift the rear of the top cover and slide it back so the tabs clear the catches on the bracket, and remove the cover from the unit. NOTE: Make sure that the tabs slide under the bracket catches when you rein- stall the top cover.
Electrical Shock Hazard Disconnect power before servicing. Replace all parts and panels before operating.
Failure to do so can result in death or electrical shock.
Cover Flange Tab
Under Bracket Catch
1.Unplug dryer or disconnect power.
2.Turn off gas supply to dryer.
3.Pull the dryer away from the wall far enough to access the back.
4.Remove the three
Slide Top Cover Back
6.Remove the three screws from the elec- tronic control board bracket and pull the bracket away from the side of the dryer so you can access the connectors.
Electronic Control Board Bracket
Top Cover Rear Flange Screws
W/Nylon Flat Washers
Screws![]()
7.Disconnect the