•If belt switch is okay and there is still an open circuit, check and repair the wir- ing harness.
•If the Start winding is in question and the resistance is much greater than 4 ohms, replace the motor.
9.Door switch problems can be found using the Diagnostic Tests on page
10.Connect the ohmmeter test leads to the electronic control board at
With the door closed, the ohmmeter should indicate a closed circuit (0 to 2 Ω). If not, replace the door switch assembly.
TEST #3: HEATER TEST
This test is performed when either of the fol- lowing situations occur:
•Dryer does not heat
•Heat will not shut off
This test checks the components making up the heating circuit. The following items are part of this system:
•Harness/connection
•Heater relay
•Thermal fuse (gas dryer only)
•Thermal cutoff (electric dryer only)
•
•Gas burner assembly (gas dryer only)
•Heat element assembly (electric dryer only)
•Centrifugal switch
•Thermistor
•Electronic control board
•Console electronics & housing
•Gas supply (gas dryer only)
Dryer does not heat:
1.Unplug dryer or disconnect power.
2.Remove the toe panel to access the ther- mal components.
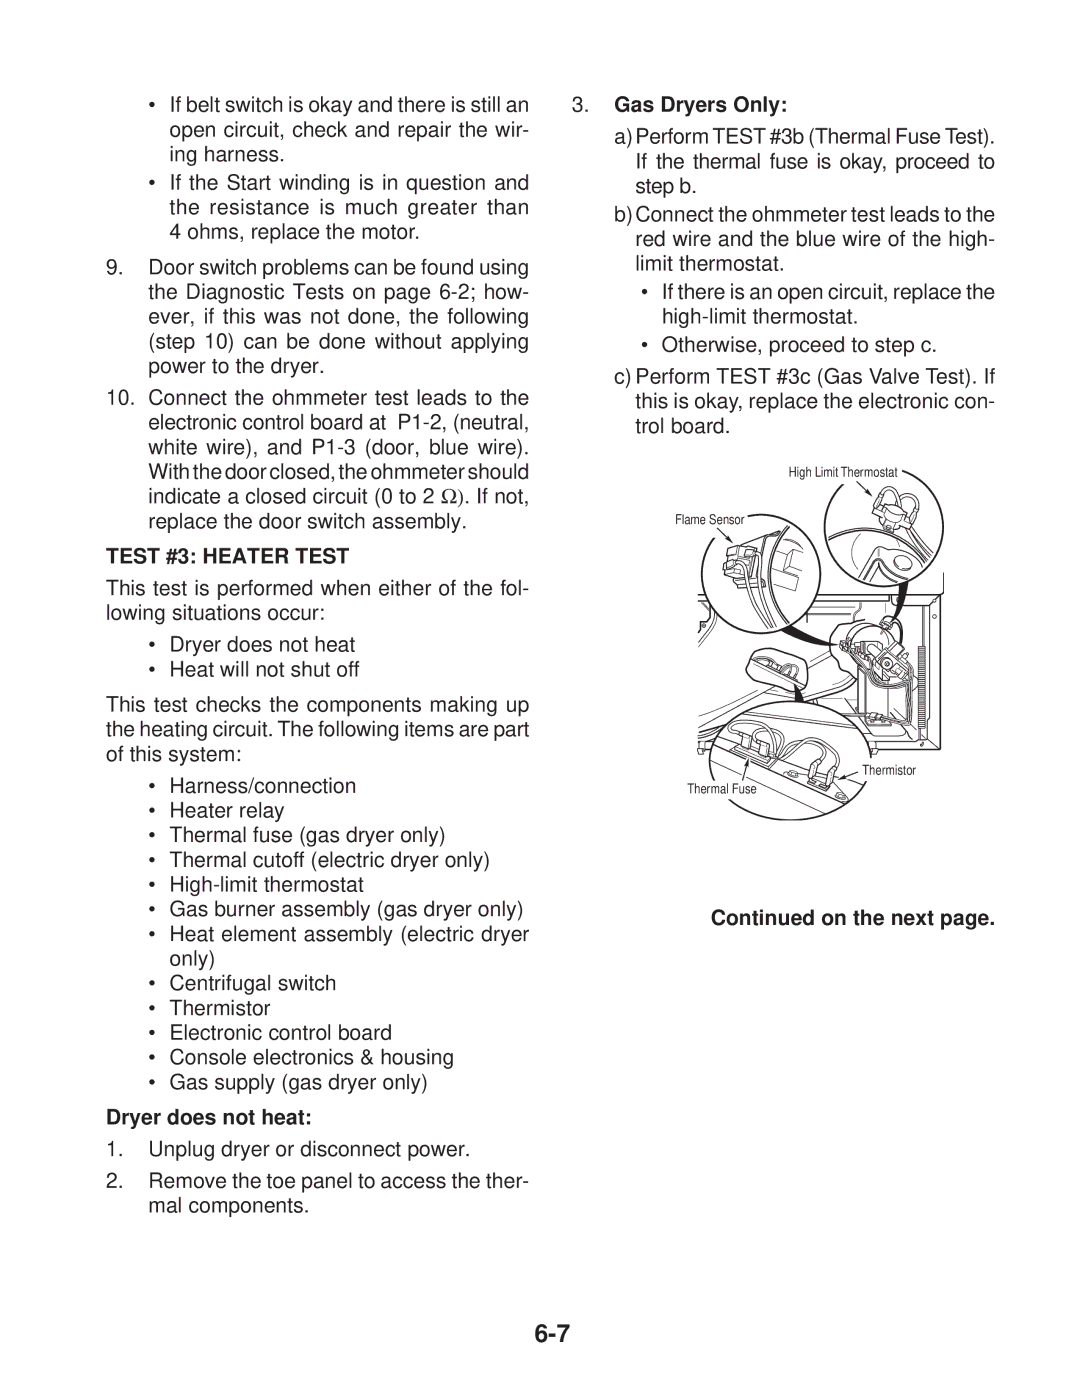
3.Gas Dryers Only:
a)Perform TEST #3b (Thermal Fuse Test). If the thermal fuse is okay, proceed to step b.
b)Connect the ohmmeter test leads to the red wire and the blue wire of the high- limit thermostat.
•If there is an open circuit, replace the
•Otherwise, proceed to step c.
c)Perform TEST #3c (Gas Valve Test). If this is okay, replace the electronic con- trol board.
High Limit Thermostat
Flame Sensor
![]() Thermistor
Thermistor
Thermal Fuse