Hints and Tips
Perform a trace
To start the trace, perform the following:
1.Login as Administrator.
2.Select [System - Online Manager].
3.Select:
4.Channel Gateway - Enable
5.Input Device - Online
6.Input Control - Start
7.Submit a job from the host.
8.After the job is completely received by the Controller, select Input Control - End.
9.Open a Terminal window.
10.Type cd /opt/XRXnps/XRXgrpset/bin and press <Enter>.
11.Type ./dspTrc > FileName.txt and press <Enter>.
12.Type ls
13.If the file size is greater than 1.44 MB, type compress FileName.txt and press <Enter>. If the file size is less than 1.44 MB, go to “Export the trace file to floppy”.
Export the trace file to floppy
To export the trace file to a floppy, perform the following:
1.Insert a blank, formatted floppy into the floppy drive.
2.Type volrmmount
3.If you used the “compress” command above, type cp FileName.txt.Z /floppy/floppy0 and press <Enter>. If you did not use the “compress” command above, type cp FileName.txt /floppy/floppy0 and press <Enter>.
4.Type eject and press <Enter>.
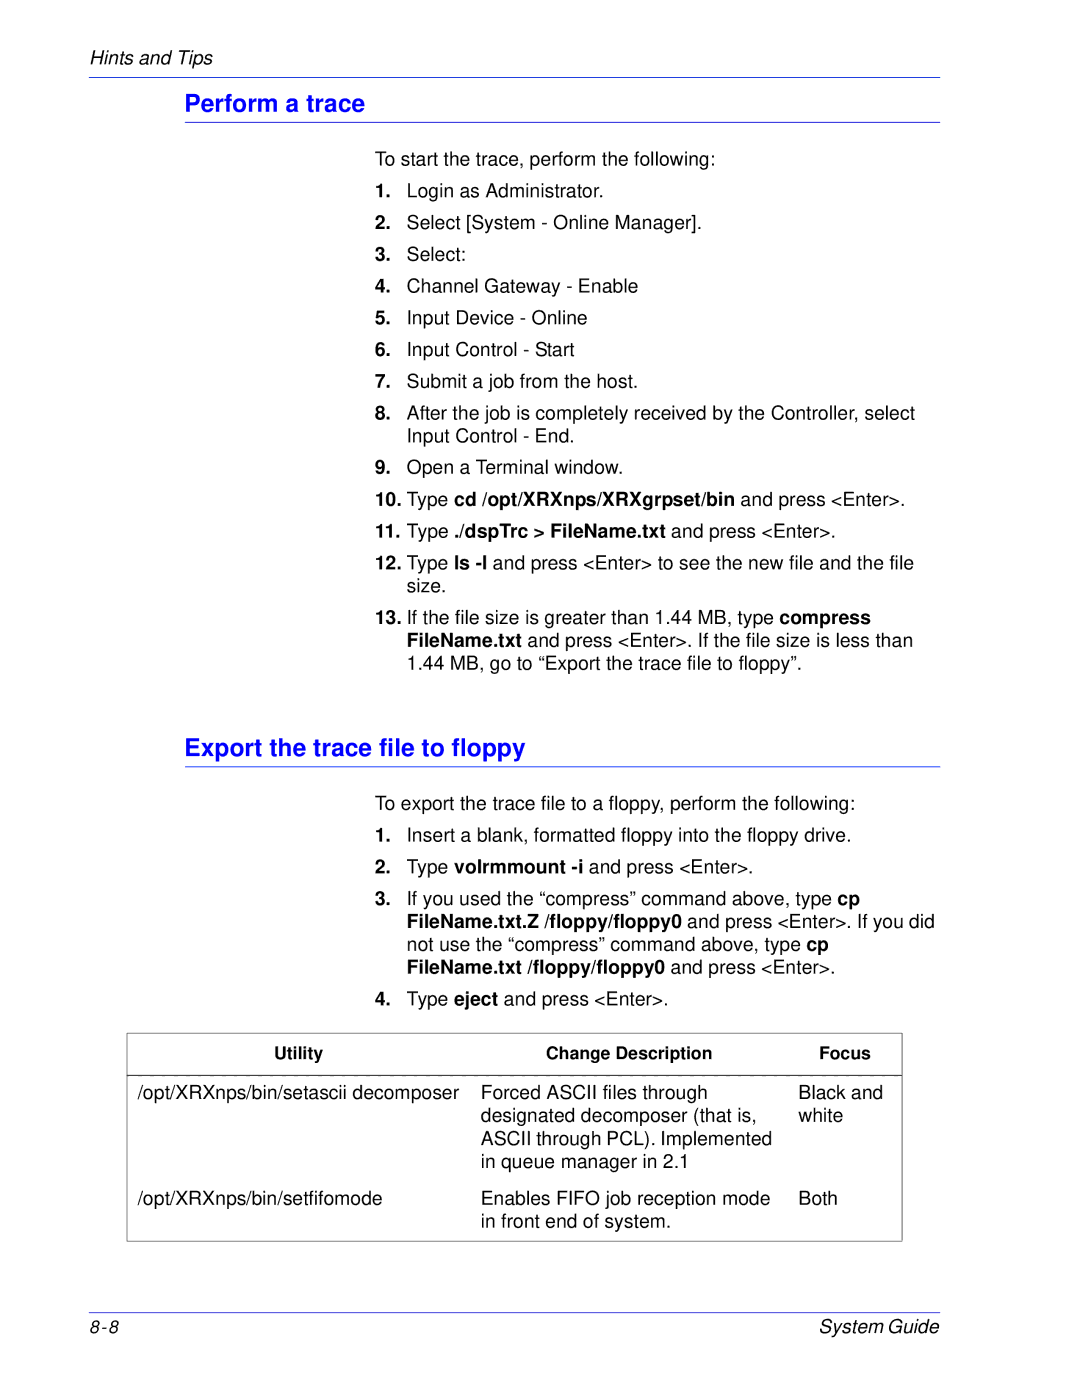
Utility | Change Description | Focus |
|
|
|
/opt/XRXnps/bin/setascii decomposer | Forced ASCII files through | Black and |
| designated decomposer (that is, | white |
| ASCII through PCL). Implemented |
|
| in queue manager in 2.1 |
|
/opt/XRXnps/bin/setfifomode | Enables FIFO job reception mode | Both |
| in front end of system. |
|
|
|
|
System Guide |