4Using Windows Offload Features
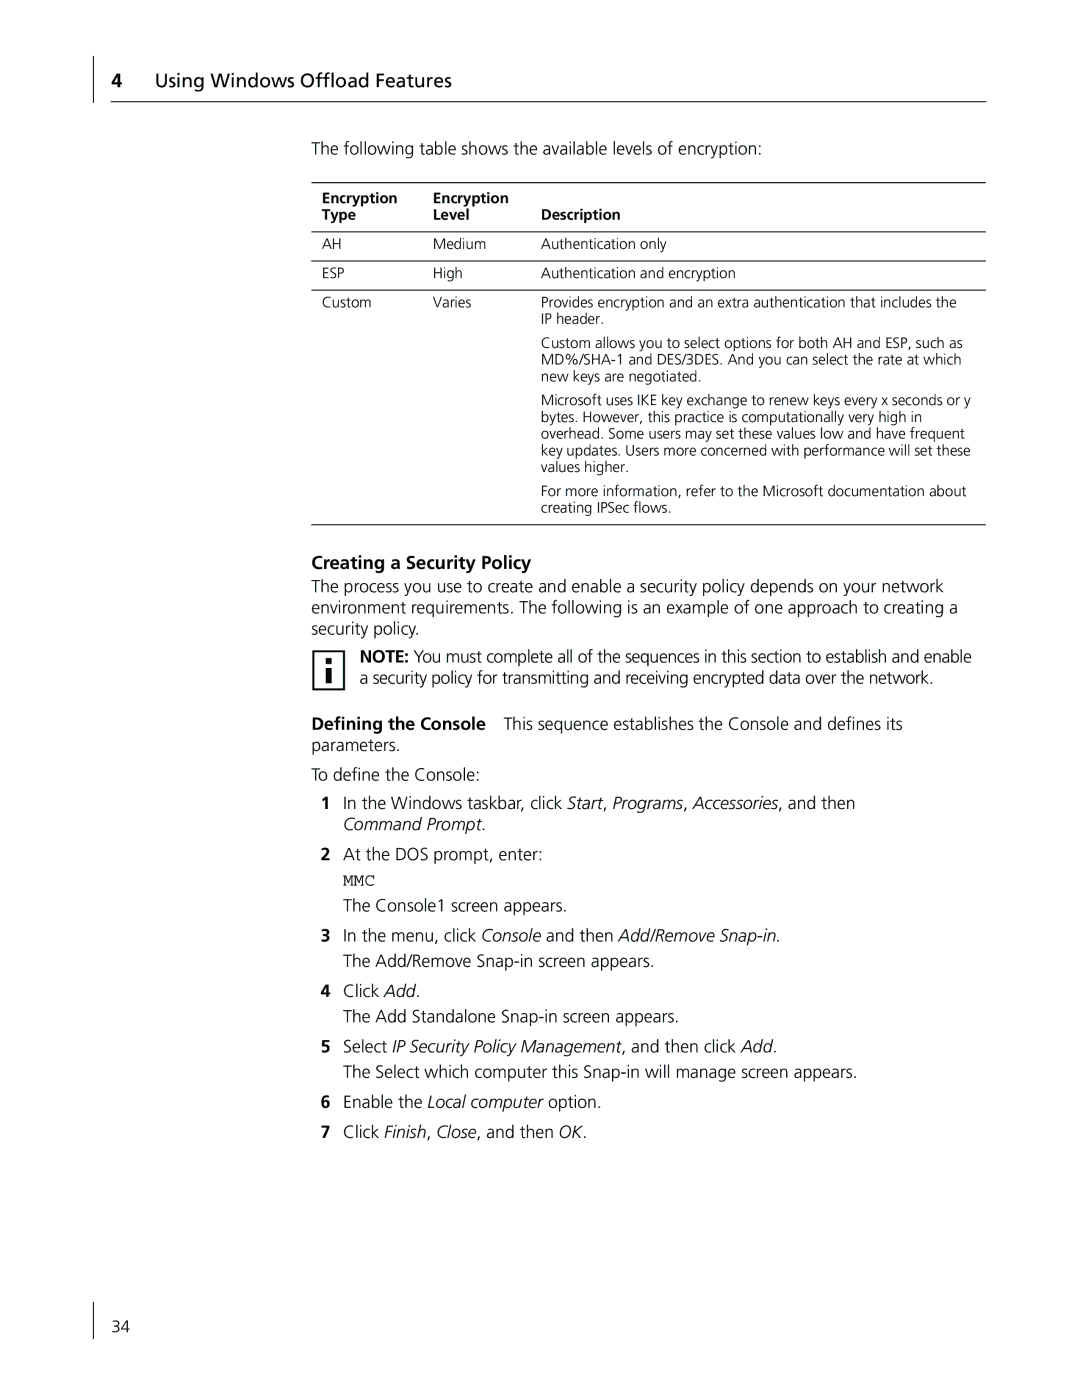
The following table shows the available levels of encryption:
Encryption | Encryption |
|
Type | Level | Description |
|
|
|
AH | Medium | Authentication only |
|
|
|
ESP | High | Authentication and encryption |
|
|
|
Custom | Varies | Provides encryption and an extra authentication that includes the |
|
| IP header. |
|
| Custom allows you to select options for both AH and ESP, such as |
|
| |
|
| new keys are negotiated. |
|
| Microsoft uses IKE key exchange to renew keys every x seconds or y |
|
| bytes. However, this practice is computationally very high in |
|
| overhead. Some users may set these values low and have frequent |
|
| key updates. Users more concerned with performance will set these |
|
| values higher. |
|
| For more information, refer to the Microsoft documentation about |
|
| creating IPSec flows. |
|
|
|
Creating a Security Policy
The process you use to create and enable a security policy depends on your network environment requirements. The following is an example of one approach to creating a security policy.
NOTE: You must complete all of the sequences in this section to establish and enable a security policy for transmitting and receiving encrypted data over the network.
Defining the Console This sequence establishes the Console and defines its parameters.
To define the Console:
1In the Windows taskbar, click Start, Programs, Accessories, and then Command Prompt.
2At the DOS prompt, enter:
MMC
The Console1 screen appears.
3In the menu, click Console and then Add/Remove
4Click Add.
The Add Standalone
5Select IP Security Policy Management, and then click Add.
The Select which computer this
6Enable the Local computer option.
7Click Finish, Close, and then OK.
34