Chapter 2 Installing and Configuring the Cisco Physical Access Gateway
Configuring and Managing the Gateway Using a Direct Connection
Upgrading the Gateway Firmware Using a Direct Connection
Tip You can also upgrade the firmware for a single Gateway, or all Gateways, over the network using the Cisco PAM desktop software. For instructions, see the Cisco Physical Access Manager User Guide.
Procedure
To upgrade the Gateway firmware from a PC directly connected to the module, do the following:
Step 1 Log on to the Gateway administration tool, as described in the “Connecting a PC to the Gateway” section on page
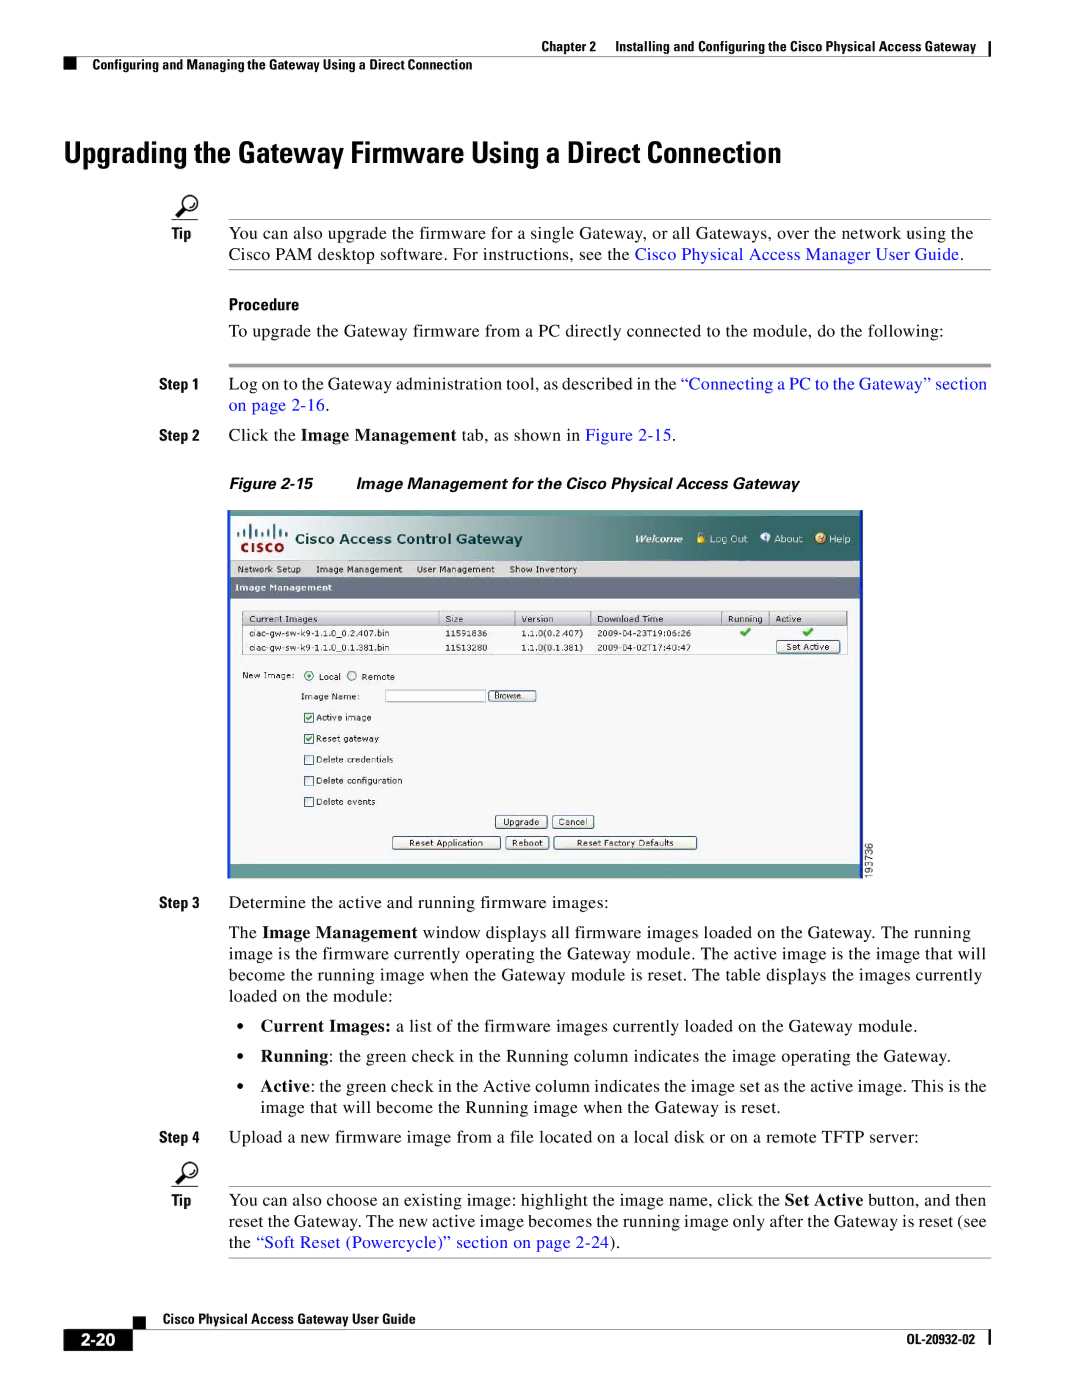
Step 2 Click the Image Management tab, as shown in Figure
Figure 2-15 Image Management for the Cisco Physical Access Gateway
Step 3 Determine the active and running firmware images:
The Image Management window displays all firmware images loaded on the Gateway. The running image is the firmware currently operating the Gateway module. The active image is the image that will become the running image when the Gateway module is reset. The table displays the images currently loaded on the module:
•Current Images: a list of the firmware images currently loaded on the Gateway module.
•Running: the green check in the Running column indicates the image operating the Gateway.
•Active: the green check in the Active column indicates the image set as the active image. This is the image that will become the Running image when the Gateway is reset.
Step 4 Upload a new firmware image from a file located on a local disk or on a remote TFTP server:
Tip You can also choose an existing image: highlight the image name, click the Set Active button, and then reset the Gateway. The new active image becomes the running image only after the Gateway is reset (see the “Soft Reset (Powercycle)” section on page
| Cisco Physical Access Gateway User Guide |
|
