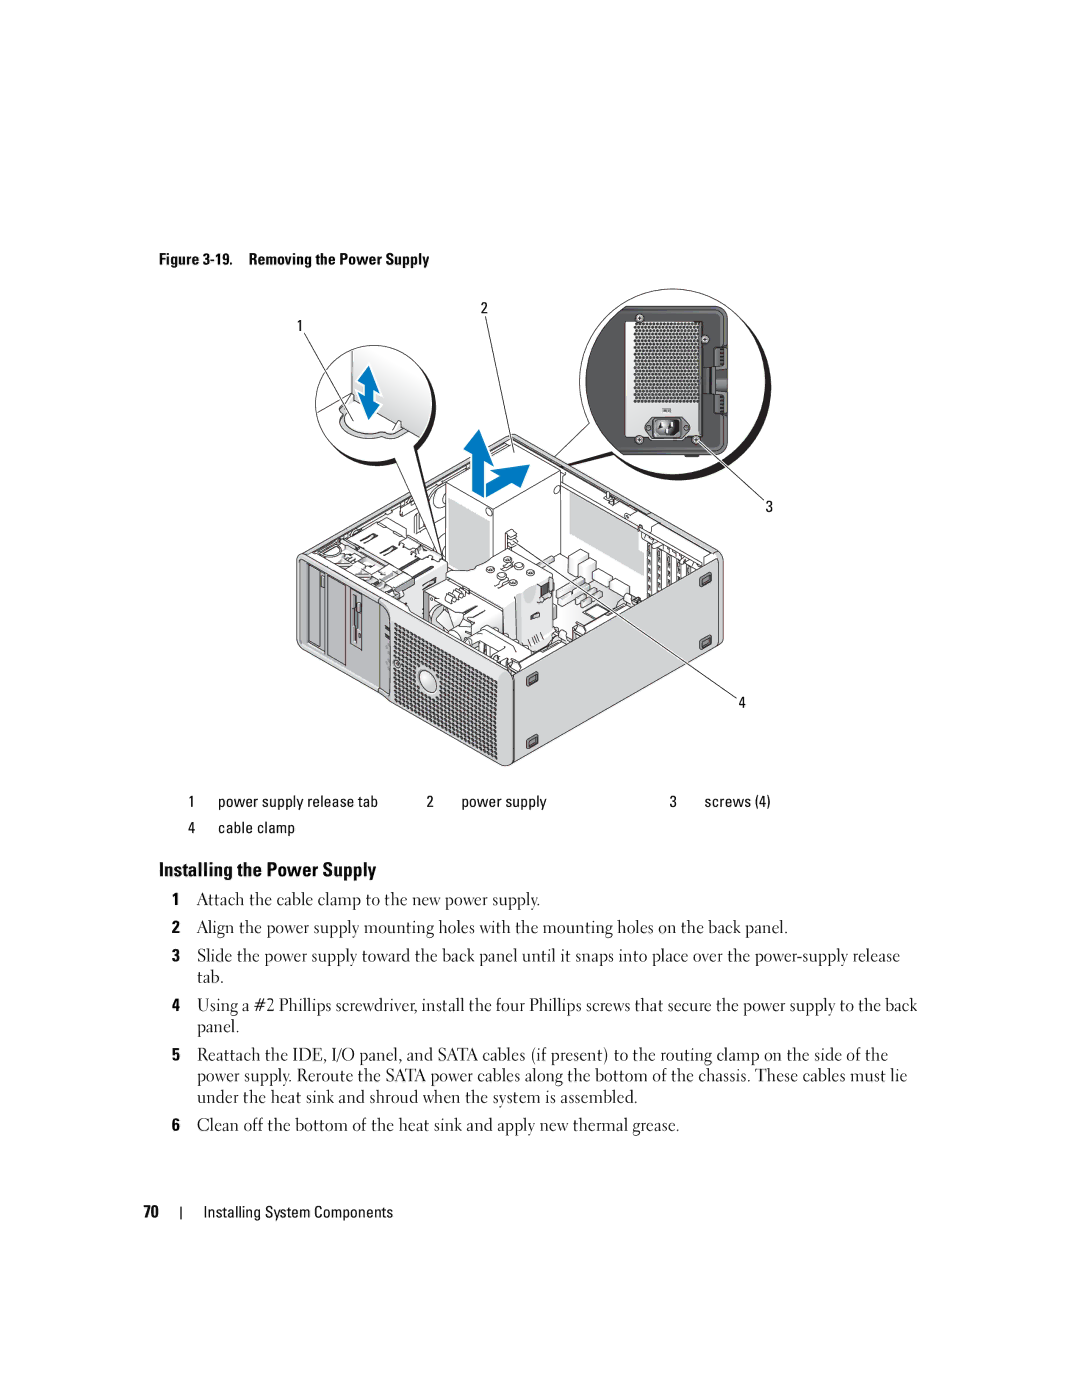
Figure 3-19. Removing the Power Supply
2
1
3
4
1 | power supply release tab | 2 | power supply | 3 | screws (4) |
4 | cable clamp |
|
|
|
|
Installing the Power Supply
1Attach the cable clamp to the new power supply.
2Align the power supply mounting holes with the mounting holes on the back panel.
3Slide the power supply toward the back panel until it snaps into place over the
4Using a #2 Phillips screwdriver, install the four Phillips screws that secure the power supply to the back panel.
5Reattach the IDE, I/O panel, and SATA cables (if present) to the routing clamp on the side of the power supply. Reroute the SATA power cables along the bottom of the chassis. These cables must lie under the heat sink and shroud when the system is assembled.
6Clean off the bottom of the heat sink and apply new thermal grease.
70