Removing the I/O Panel Assembly
1Turn off the system and attached peripherals, and disconnect the system from the electrical outlet.
2Open the system. See "Opening the System" on page 41.
3Remove the heat sink and shroud assembly. See "Removing the Processor" on page 62. Do not remove the processor, however.
4Remove the processor cooling fan. See "Removing the Cooling Fans" on page 65.
5Remove the front bezel. See "Removing the Bezel" on page 73.
NOTICE: Carefully note the routing of each cable before you disconnect it, so that you are sure to
6Disconnect the I/O panel ribbon cable from the I/O panel connector by pulling the yellow cable loop.
7Remove the mounting screw holding the I/O panel assembly to the front chassis. See Figure
8Lift the I/O panel assembly out of the system.
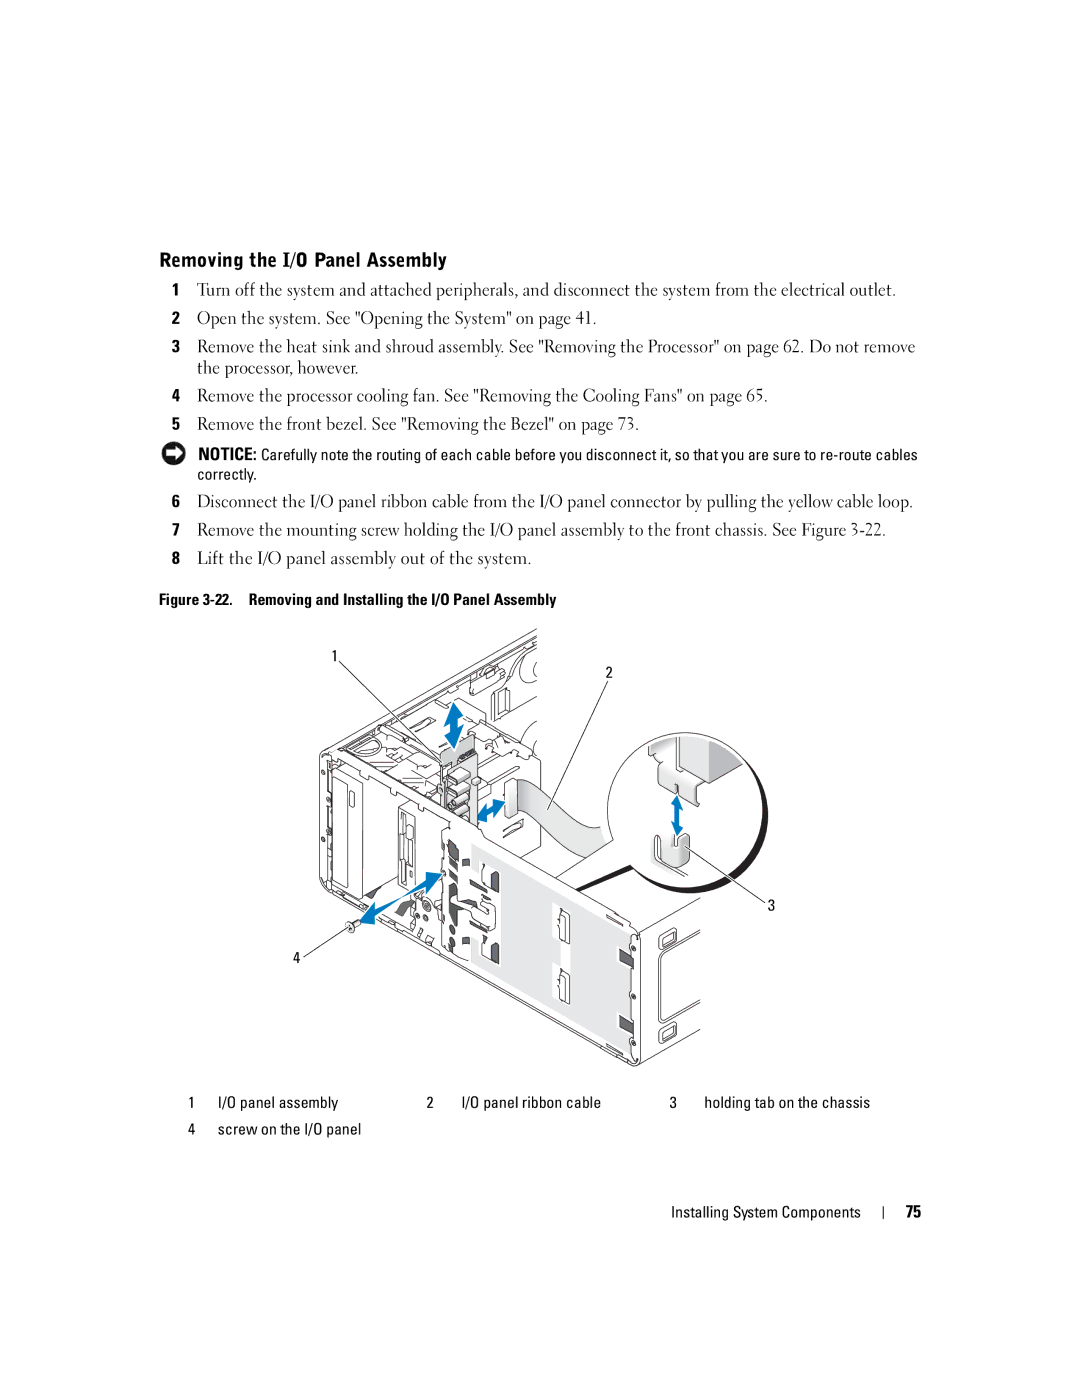
Figure 3-22. Removing and Installing the I/O Panel Assembly
1
2
3
4 ![]()
1 | I/O panel assembly | 2 | I/O panel ribbon cable | 3 | holding tab on the chassis |
4 | screw on the I/O panel |
|
|
|
|
Installing System Components
75