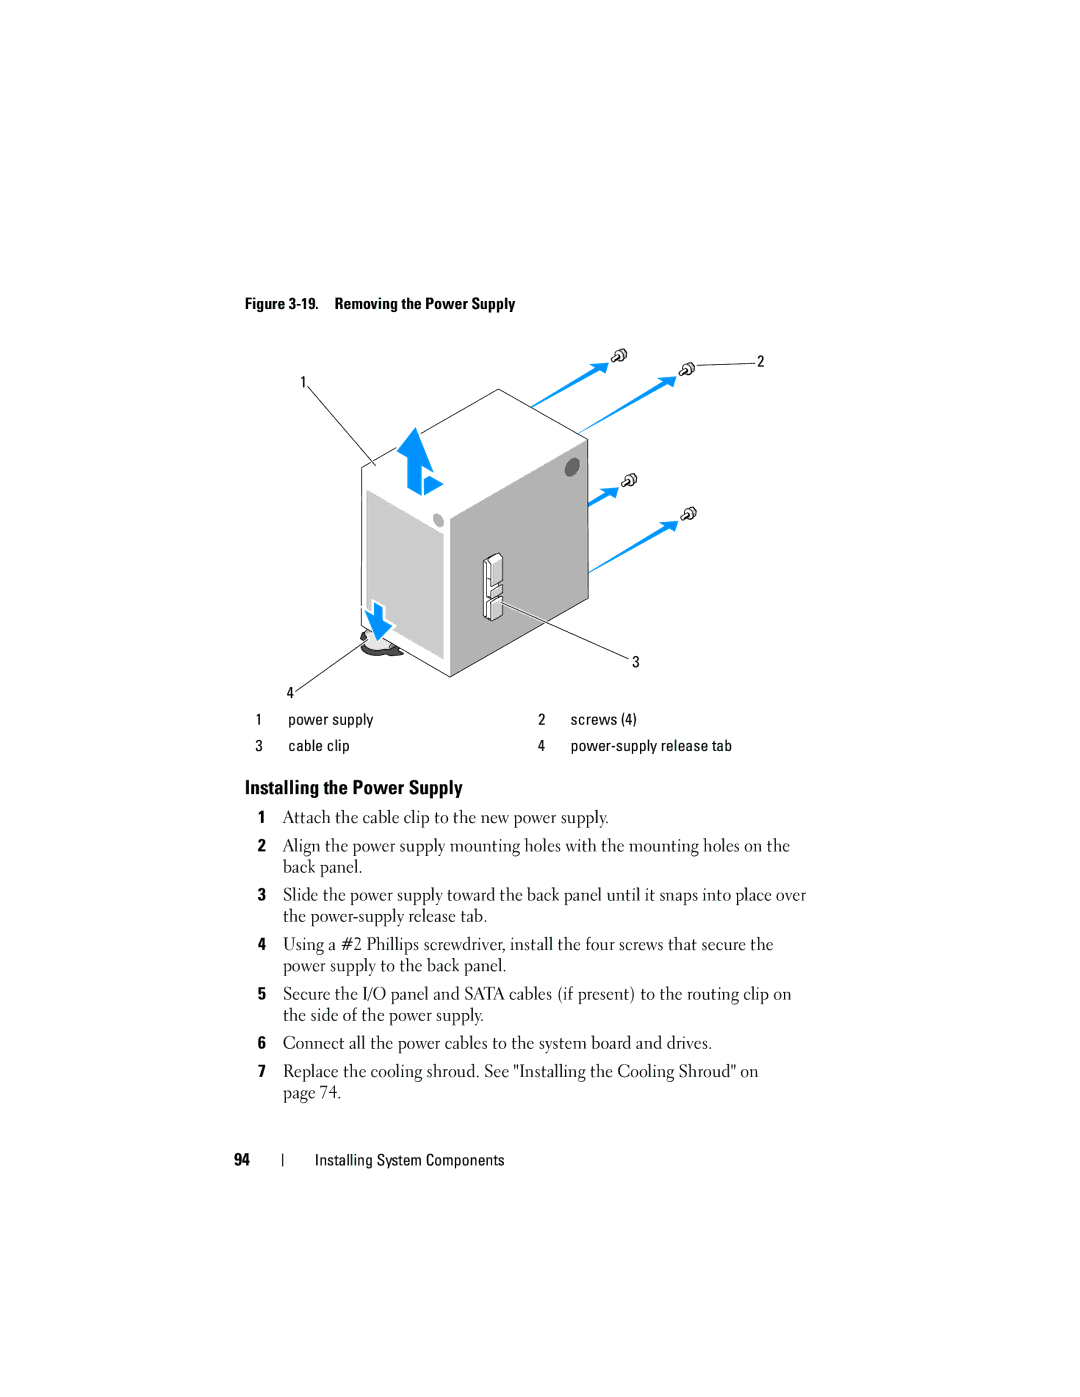
Figure 3-19. Removing the Power Supply
![]()
![]()
![]() 2
2
1
|
|
| 3 |
| 4 |
|
|
1 | power supply | 2 | screws (4) |
3 | cable clip | 4 |
Installing the Power Supply
1Attach the cable clip to the new power supply.
2Align the power supply mounting holes with the mounting holes on the back panel.
3Slide the power supply toward the back panel until it snaps into place over the
4Using a #2 Phillips screwdriver, install the four screws that secure the power supply to the back panel.
5Secure the I/O panel and SATA cables (if present) to the routing clip on the side of the power supply.
6Connect all the power cables to the system board and drives.
7Replace the cooling shroud. See "Installing the Cooling Shroud" on page 74.
94
