Chapter 4
Installation Instructions
Azimuth:
Elevation:
2.Make sure the check mark is next to the satellite your dish will be pointed toward.
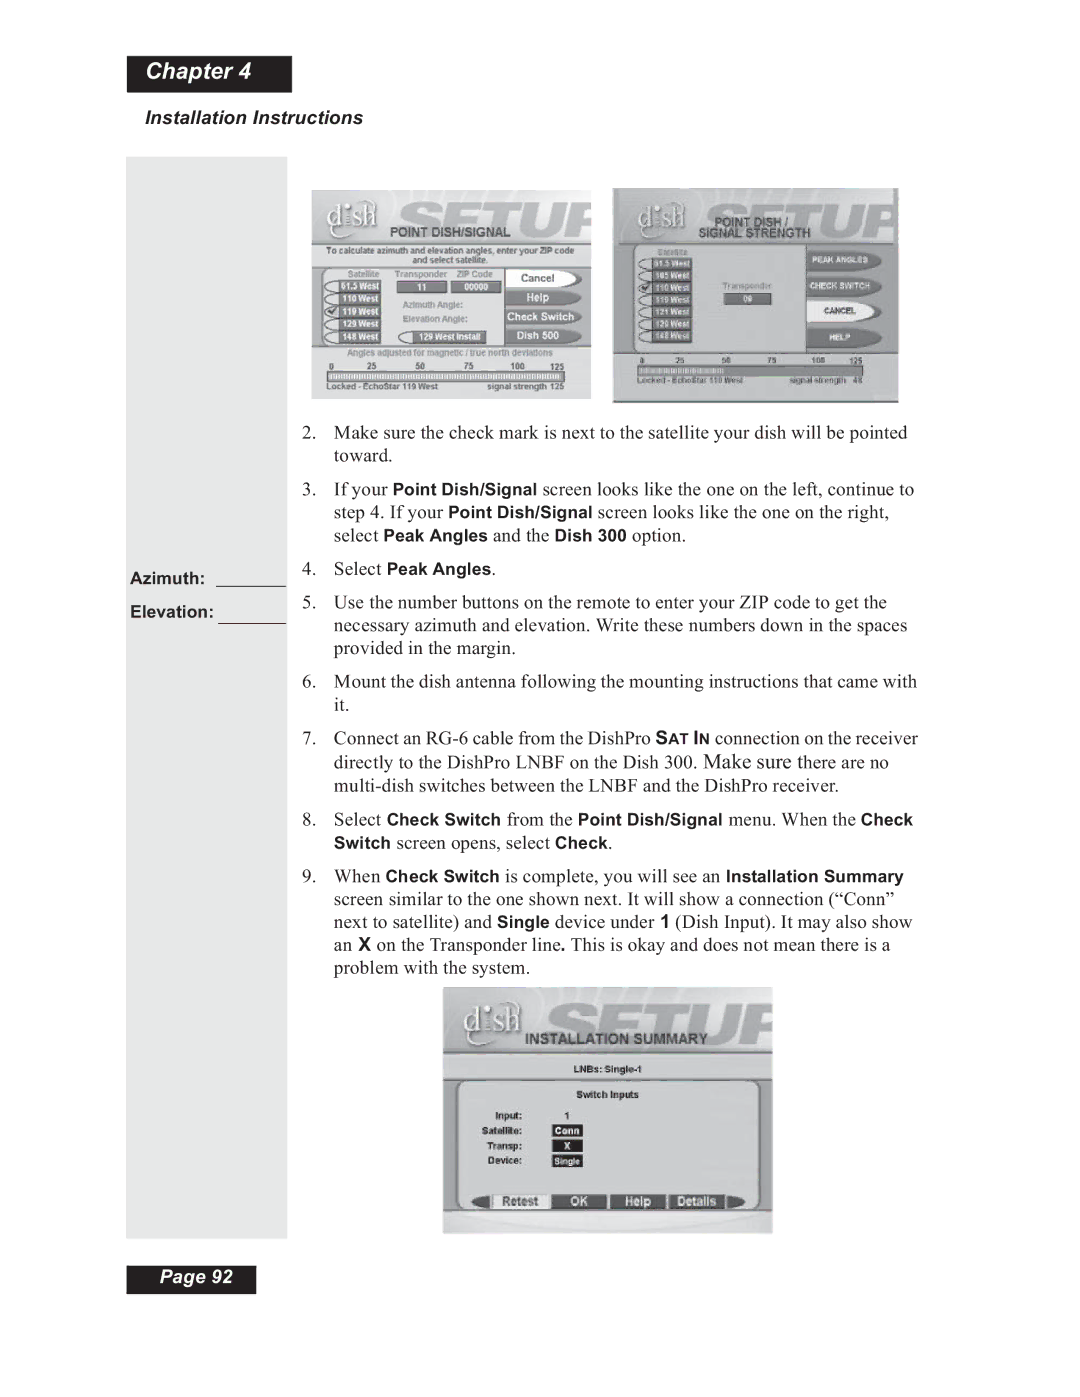
3.If your Point Dish/Signal screen looks like the one on the left, continue to step 4. If your Point Dish/Signal screen looks like the one on the right, select Peak Angles and the Dish 300 option.
4.Select Peak Angles.
5.Use the number buttons on the remote to enter your ZIP code to get the necessary azimuth and elevation. Write these numbers down in the spaces provided in the margin.
6.Mount the dish antenna following the mounting instructions that came with it.
7.Connect an
8.Select Check Switch from the Point Dish/Signal menu. When the Check Switch screen opens, select Check.
9.When Check Switch is complete, you will see an Installation Summary screen similar to the one shown next. It will show a connection (“Conn” next to satellite) and Single device under 1 (Dish Input). It may also show an X on the Transponder line. This is okay and does not mean there is a problem with the system.
Page 92