Installing the Chassis into a Rack
Installing the Chassis Directly to the Rack
Caution: Read Chapter 2 before completing the following procedure to ensure that all installation guidelines are met.
Precaución: Antes de llevar a cabo el siguiente procedimiento, lea Chapter 2 para y asegúrese de cumplir con todos los requisitos de instalación.
To install the Enterasys Matrix N1 Chassis, proceed as follows:
Warning: To help prevent personal injury, at least two people are required to lift the chassis into the rack.
Advertencia: Para ayudar a prevenir alguna lesión personal, al menos dos personas son requeridas para levantar el chasis y meterlo al rack.
Warnhinweis: Zum Schutz vor körperlichen Schäden, sollten sie mit min. zwei Personen das
Chassis in das Rack heben.
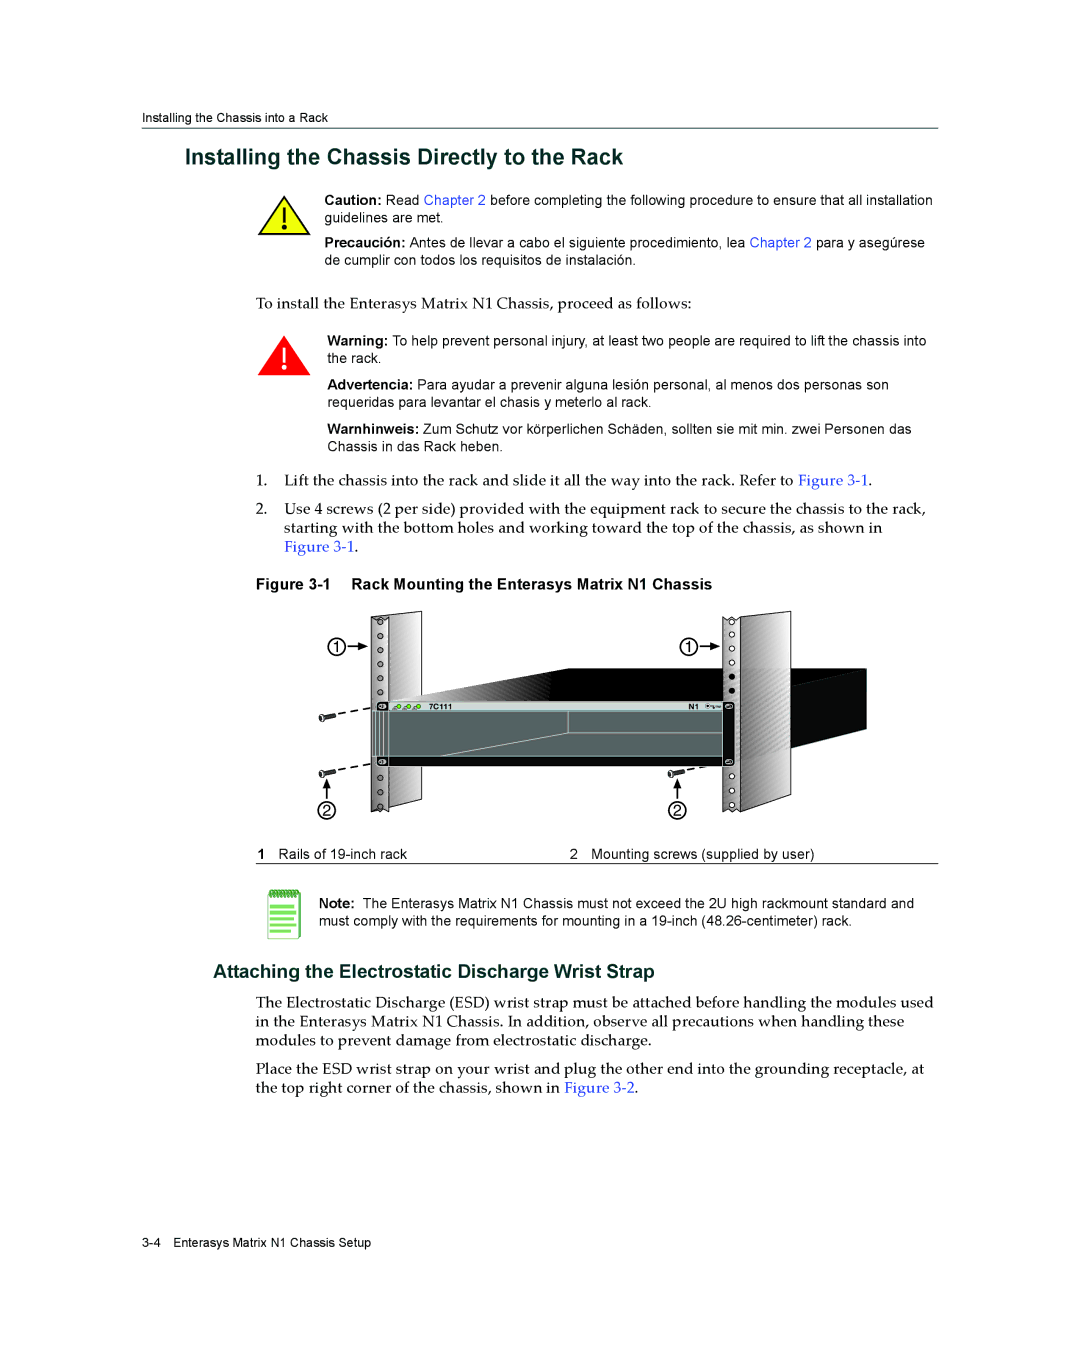
1.Lift the chassis into the rack and slide it all the way into the rack. Refer to Figure 3‐1.
2.Use 4 screws (2 per side) provided with the equipment rack to secure the chassis to the rack, starting with the bottom holes and working toward the top of the chassis, as shown in Figure 3‐1.
Figure 3-1 Rack Mounting the Enterasys Matrix N1 Chassis
1 | 1 |
7C111 | N1 |
2 | 2 |
1 Rails of | 2 Mounting screws (supplied by user) |
Note: The Enterasys Matrix N1 Chassis must not exceed the 2U high rackmount standard and must comply with the requirements for mounting in a
Attaching the Electrostatic Discharge Wrist Strap
The Electrostatic Discharge (ESD) wrist strap must be attached before handling the modules used in the Enterasys Matrix N1 Chassis. In addition, observe all precautions when handling these modules to prevent damage from electrostatic discharge.
Place the ESD wrist strap on your wrist and plug the other end into the grounding receptacle, at the top right corner of the chassis, shown in Figure 3‐2.