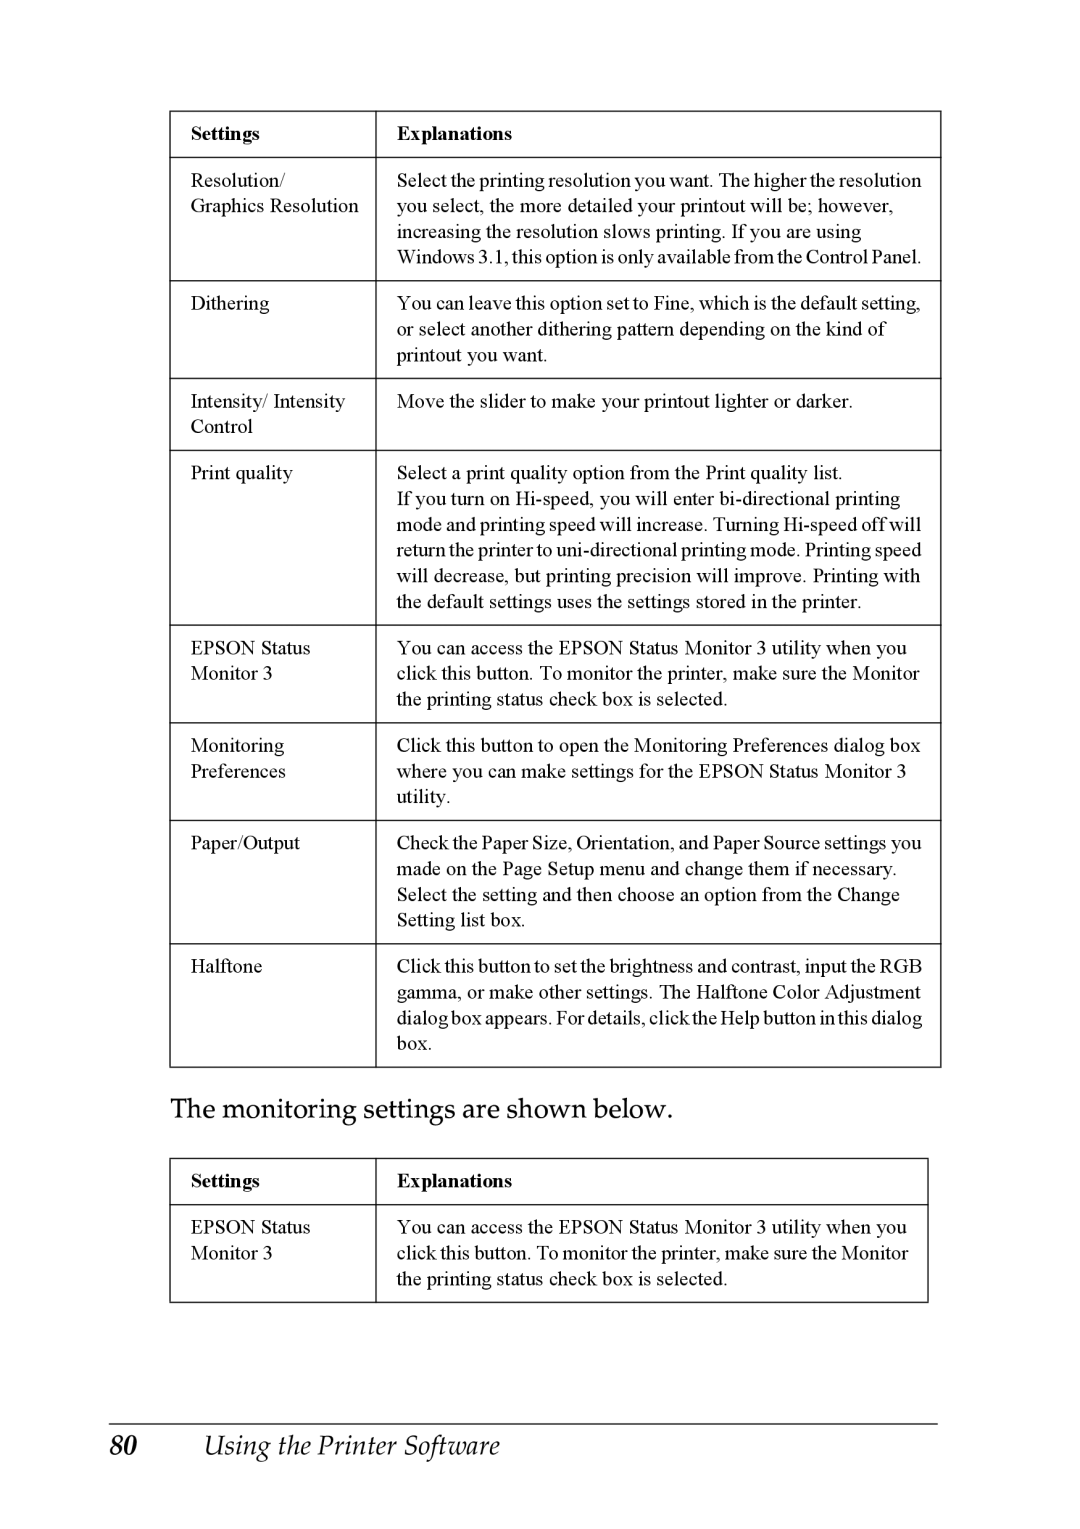
Settings | Explanations |
|
|
Resolution/ | Select the printing resolution you want. The higher the resolution |
Graphics Resolution | you select, the more detailed your printout will be; however, |
| increasing the resolution slows printing. If you are using |
| Windows 3.1, this option is only available from the Control Panel. |
|
|
Dithering | You can leave this option set to Fine, which is the default setting, |
| or select another dithering pattern depending on the kind of |
| printout you want. |
|
|
Intensity/ Intensity | Move the slider to make your printout lighter or darker. |
Control |
|
|
|
Print quality | Select a print quality option from the Print quality list. |
| If you turn on |
| mode and printing speed will increase. Turning |
| return the printer to |
| will decrease, but printing precision will improve. Printing with |
| the default settings uses the settings stored in the printer. |
|
|
EPSON Status | You can access the EPSON Status Monitor 3 utility when you |
Monitor 3 | click this button. To monitor the printer, make sure the Monitor |
| the printing status check box is selected. |
|
|
Monitoring | Click this button to open the Monitoring Preferences dialog box |
Preferences | where you can make settings for the EPSON Status Monitor 3 |
| utility. |
|
|
Paper/Output | Check the Paper Size, Orientation, and Paper Source settings you |
| made on the Page Setup menu and change them if necessary. |
| Select the setting and then choose an option from the Change |
| Setting list box. |
|
|
Halftone | Click this button to set the brightness and contrast, input the RGB |
| gamma, or make other settings. The Halftone Color Adjustment |
| dialog box appears. For details, click the Help button in this dialog |
| box. |
|
|
The monitoring settings are shown below. | |
Settings | Explanations |
|
|
EPSON Status | You can access the EPSON Status Monitor 3 utility when you |
Monitor 3 | click this button. To monitor the printer, make sure the Monitor |
| the printing status check box is selected. |
|
|
