HDD extension box | Accessible drives and LSD/LSP |
7.4.1.1Installing Multibay 2
When installing Multibay 2, proceed in a similar way as for installing Multibay 1. See section "Installing Multibay 1" on page 64 on how to connect the SATA cable to the DVD drive and connect the PSU adapter cable to the power cable.
ÊPush Multibay 2 fully into bays 2 and 3 until the EasyClick rails lock in place. Ensure that no damage is caused to the cables.
ÊRemove the fan carrier as described in the chapter "Preparation" on page 27.
ÊRemove the cable cover as described on page 85.
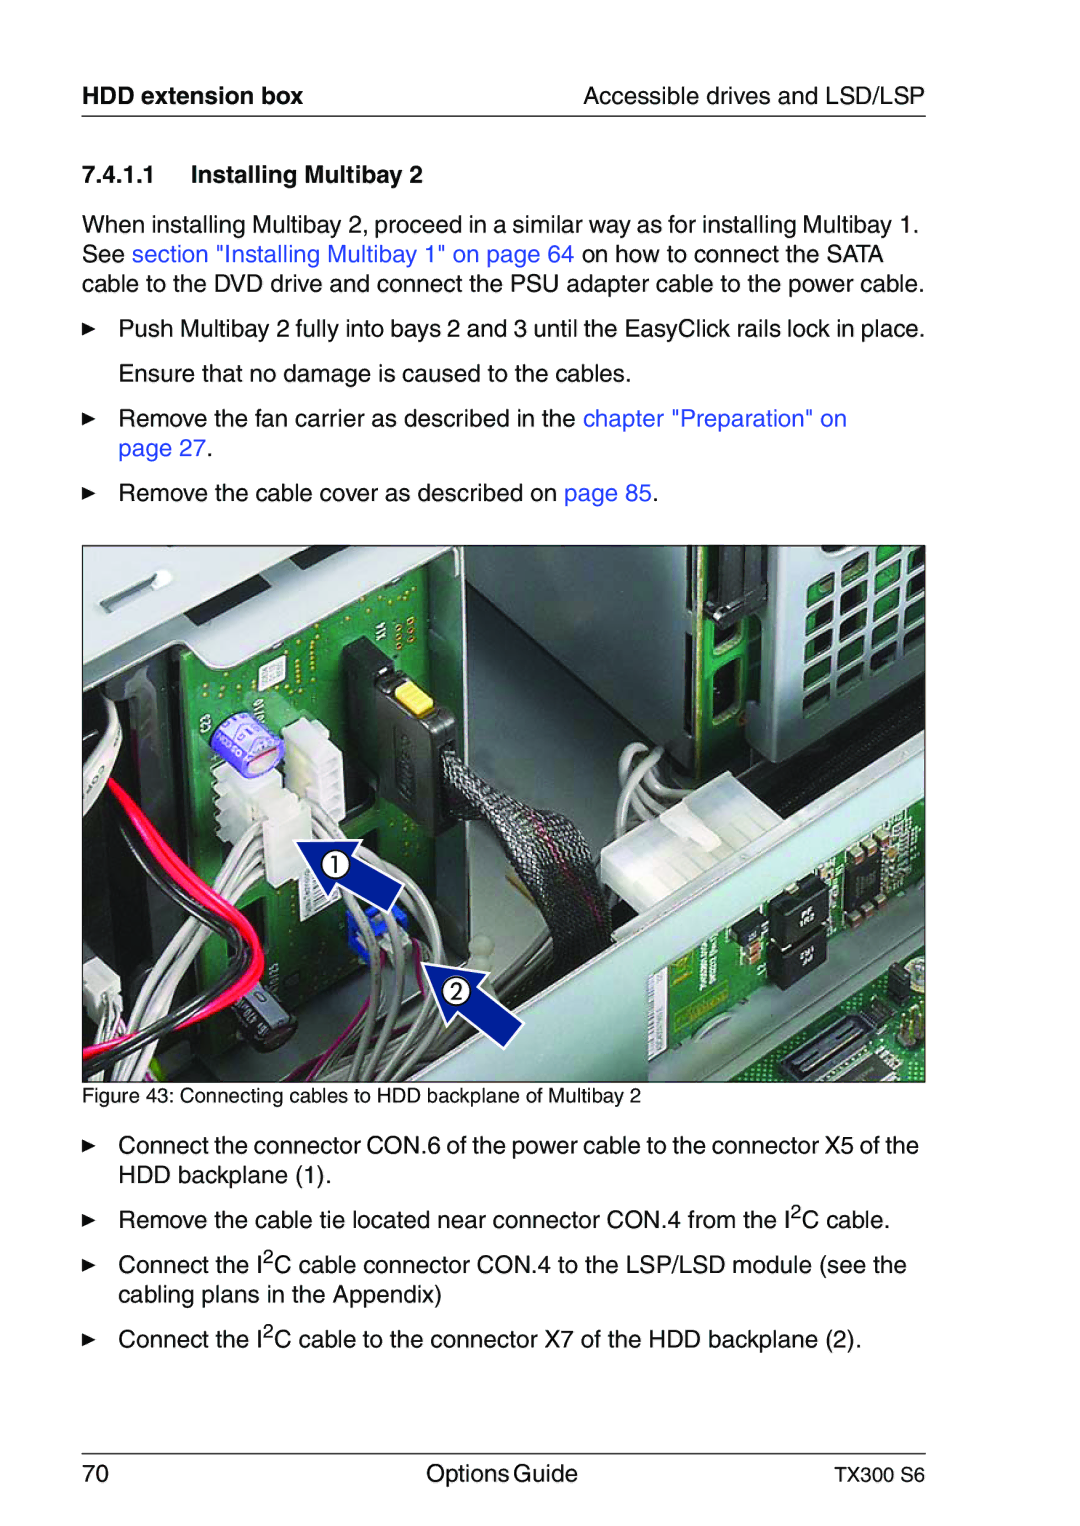
Figure 43: Connecting cables to HDD backplane of Multibay 2
ÊConnect the connector CON.6 of the power cable to the connector X5 of the HDD backplane (1).
ÊRemove the cable tie located near connector CON.4 from the I2C cable.
ÊConnect the I2C cable connector CON.4 to the LSP/LSD module (see the cabling plans in the Appendix)
ÊConnect the I2C cable to the connector X7 of the HDD backplane (2).
70 | Options Guide | TX300 S6 |