Chapter
10.Remove the two (2) ground straps (not shown in Photo
11.Remove the two (2) hex bolts on the left and right side of the Arc Lamp assembly that attach the Arc Lamp assembly to the mounting rails (lower front of the Arc Lamp assembly). When removing the hex bolts, also remove the ground straps and leave them attached to the Relay Lens bracket.
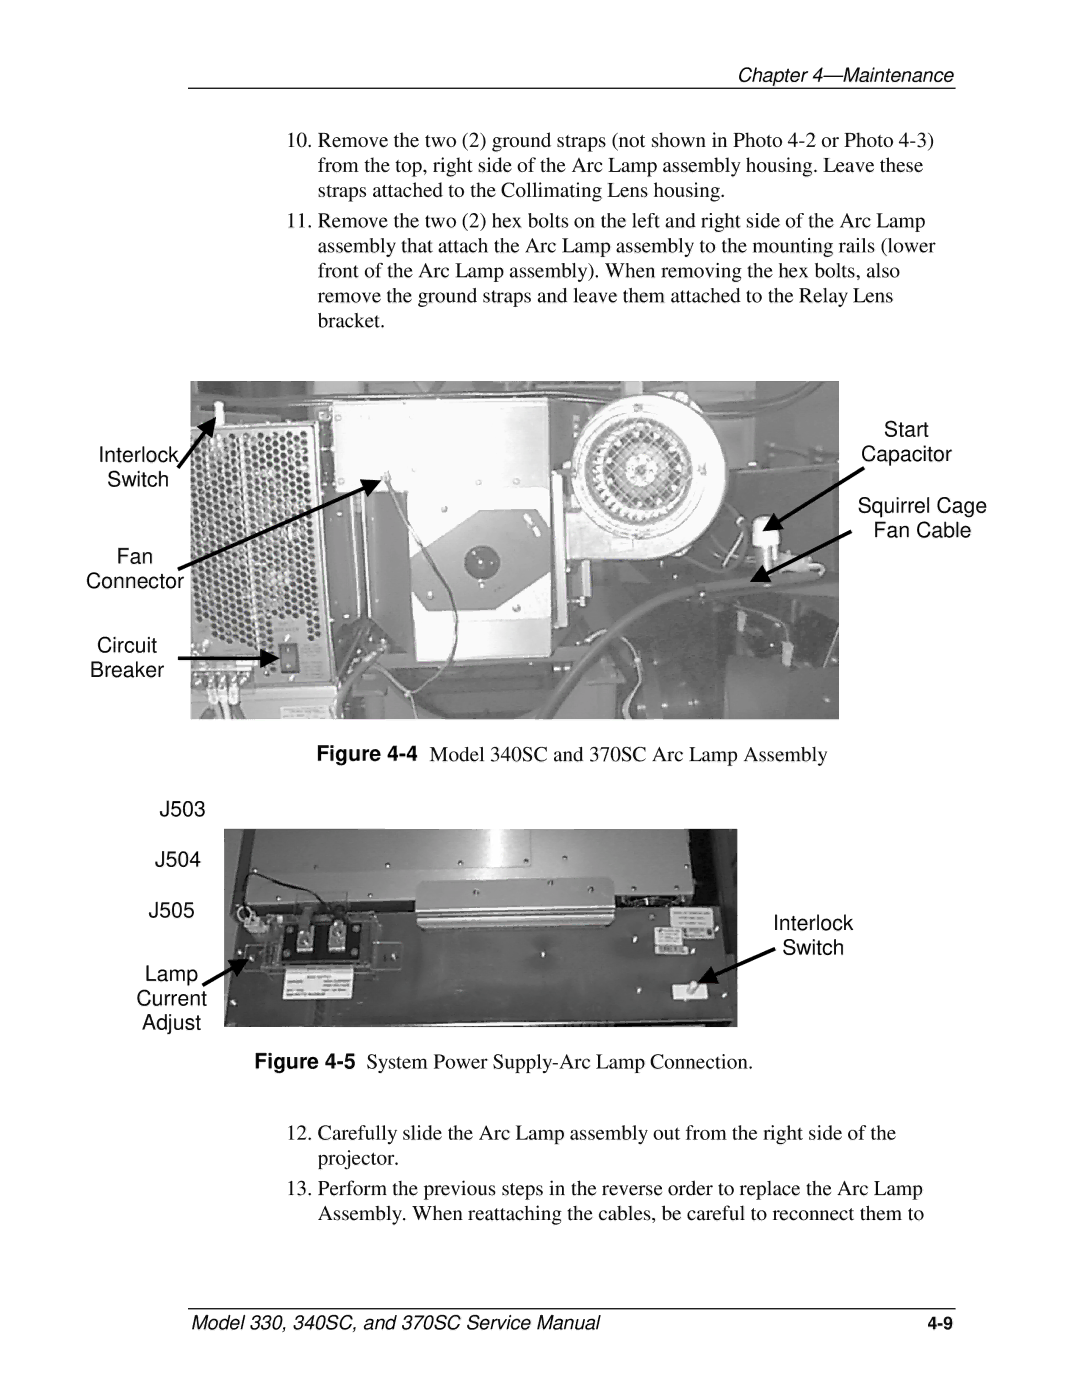
Interlock
Switch
Fan
Connector
Circuit
Breaker
Figure 4-4 Model 340SC and 370SC Arc Lamp Assembly
J503
J504
J505
Interlock
Switch
Lamp ![]()
Current
Adjust
Figure 4-5 System Power Supply-Arc Lamp Connection.
Start
Capacitor
Squirrel Cage
Fan Cable
12.Carefully slide the Arc Lamp assembly out from the right side of the projector.
13.Perform the previous steps in the reverse order to replace the Arc Lamp Assembly. When reattaching the cables, be careful to reconnect them to
Model 330, 340SC, and 370SC Service Manual |