Chapter
their correct terminals in accordance with the way they were labeled above. Be sure that the connections are tightened securely.
NOTE: Whenever an Arc Lamp is replaced the Collimating Lens may need to
be readjusted to obtain maximum brightness. Follow the Collimating Lens Adjustment procedure in Section 4.4.3 to accomplish this.
NOTE: The Arc Lamp current must also be reset when an Arc Lamp is replaced. The procedure for adjusting the Arc Lamp current and verifying power output is in Section 3.12 (Model 340SC is 2000W ±25W and Model 370SC is 3000W ±25W).

![]() CAUTION! Make adjustments in very small increments to insure lamp integrity (lamp overheating may occur if current is abruptly increased). Do not increase the current beyond the amount specified in Table
CAUTION! Make adjustments in very small increments to insure lamp integrity (lamp overheating may occur if current is abruptly increased). Do not increase the current beyond the amount specified in Table
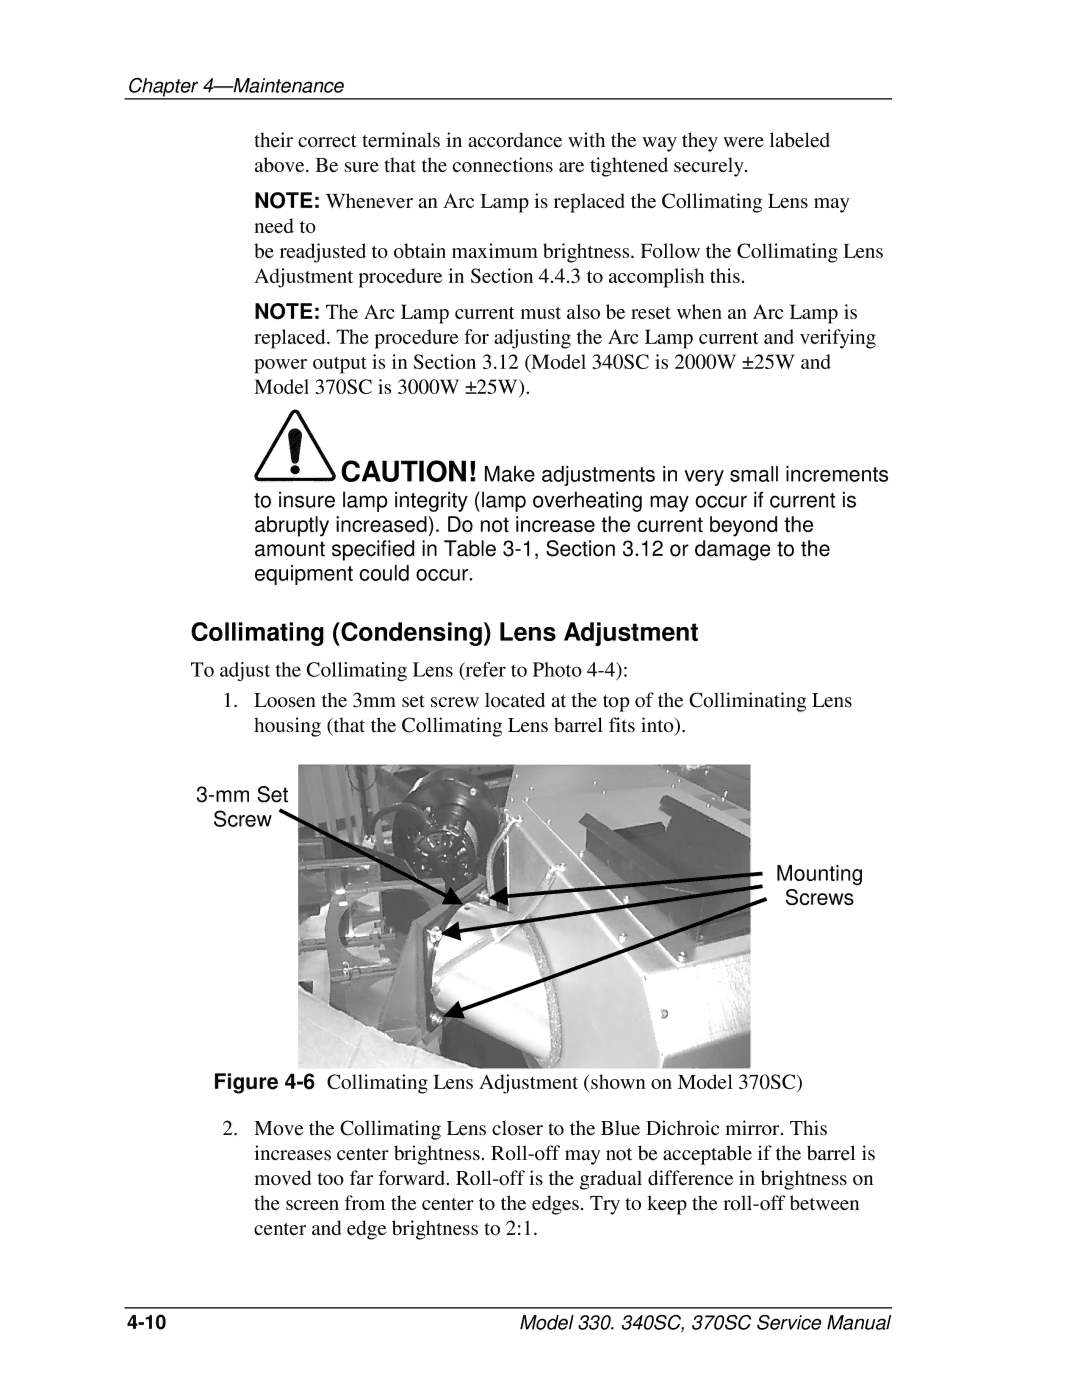
Collimating (Condensing) Lens Adjustment
To adjust the Collimating Lens (refer to Photo
1.Loosen the 3mm set screw located at the top of the Colliminating Lens housing (that the Collimating Lens barrel fits into).
3-mm Set
Screw
Mounting
Screws
Figure 4-6 Collimating Lens Adjustment (shown on Model 370SC)
2.Move the Collimating Lens closer to the Blue Dichroic mirror. This increases center brightness. Roll-off may not be acceptable if the barrel is moved too far forward. Roll-off is the gradual difference in brightness on the screen from the center to the edges. Try to keep the roll-off between center and edge brightness to 2:1.
Model 330. 340SC, 370SC Service Manual |