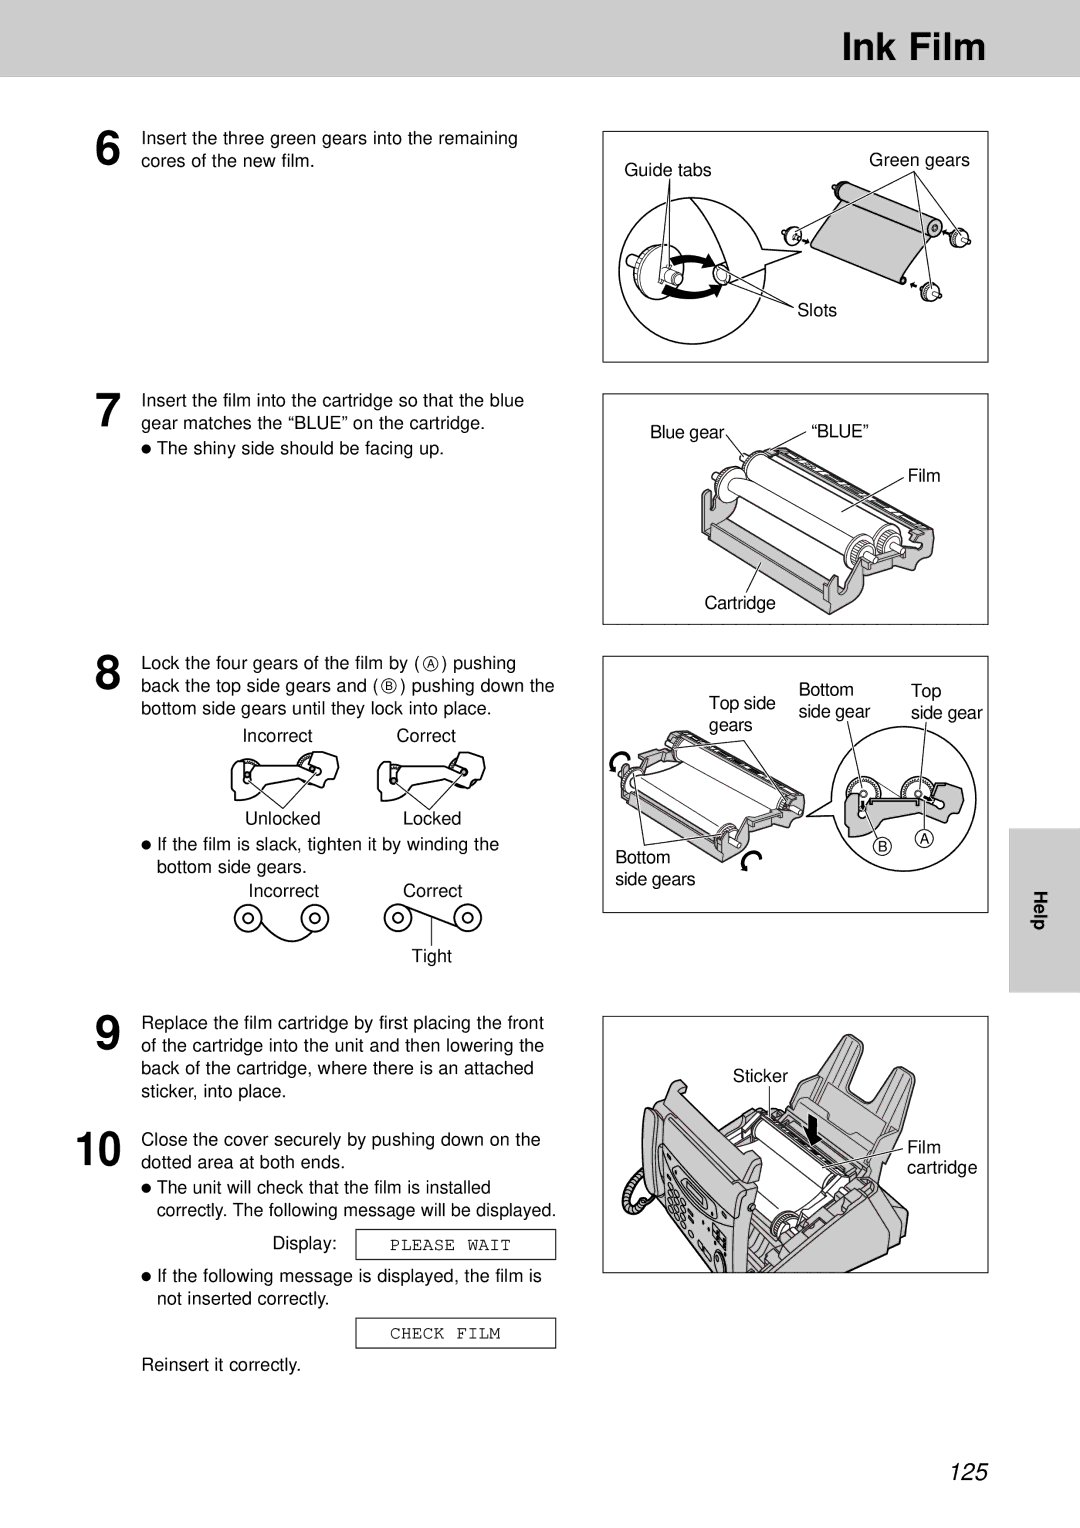
6 | Insert the three green gears into the remaining |
cores of the new film. |
7 | Insert the film into the cartridge so that the blue |
gear matches the “BLUE” on the cartridge. |
● The shiny side should be facing up.
8 | Lock the four gears of the film by ( A ) pushing | |
back the top side gears and ( B ) pushing down the | ||
| bottom side gears until they lock into place. | |
| Incorrect | Correct |
Unlocked Locked
●If the film is slack, tighten it by winding the bottom side gears.
Incorrect Correct
Tight
Ink Film
Guide tabs | Green gears |
| |
| Slots |
Blue gear | “BLUE” |
Film
Cartridge |
|
|
|
Top side | Bottom |
| Top |
side gear |
| side gear | |
gears |
| ||
|
|
| |
Bottom |
| B | A |
|
| ||
|
|
| |
side gears |
|
| Help |
|
|
|
9 | Replace the film cartridge by first placing the front | |
of the cartridge into the unit and then lowering the | ||
| back of the cartridge, where there is an attached | |
| sticker, into place. |
|
10 | Close the cover securely by pushing down on the | |
dotted area at both ends. |
| |
| ● The unit will check that the film is installed | |
| correctly. The following message will be displayed. | |
| Display: |
|
| PLEASE WAIT | |
|
|
|
| ● If the following message is displayed, the film is | |
| not inserted correctly. |
|
CHECK FILM
Reinsert it correctly.
Sticker![]()
![]()
![]()
Film cartridge
