ENGLISH
ESPAÑOL
Advanced Recording | Grabación avanzada |
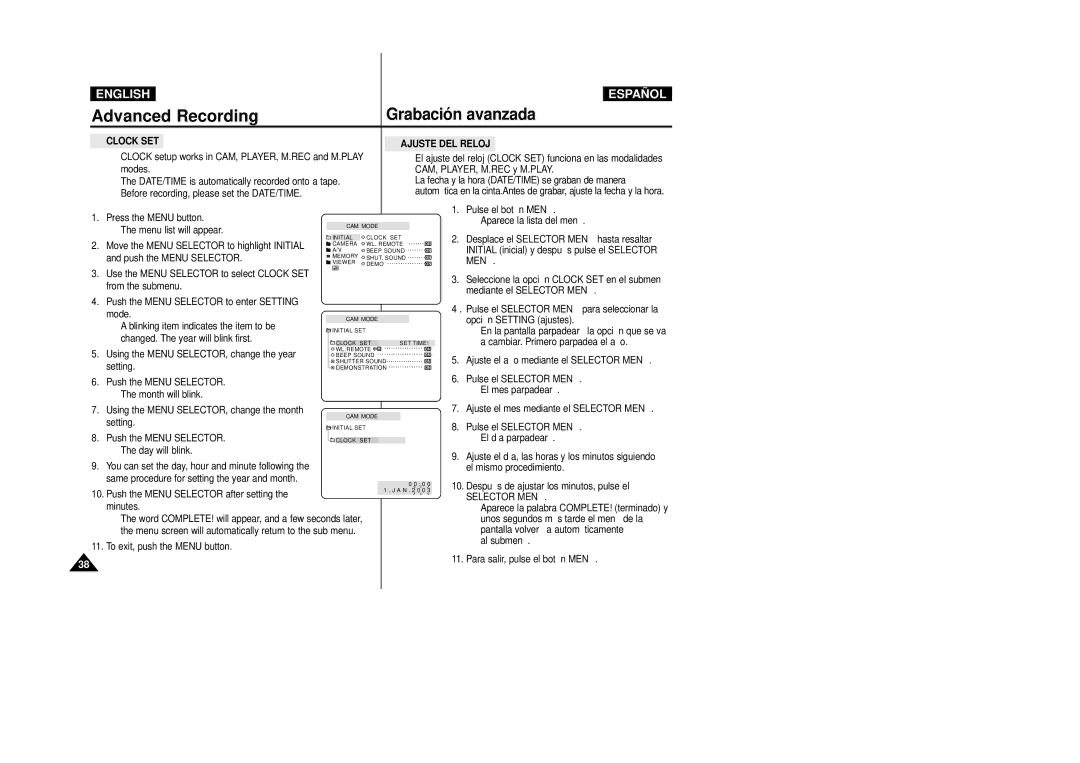
●CLOCK SET
✤CLOCK setup works in CAM, PLAYER, M.REC and M.PLAY modes.
✤The DATE/TIME is automatically recorded onto a tape. Before recording, please set the DATE/TIME.
1.Press the MENU button.
■ The menu list will appear. | CAM MODE |
|
●AJUSTE DEL RELOJ
✤El ajuste del reloj (CLOCK SET) funciona en las modalidades CAM, PLAYER, M.REC y M.PLAY.
✤La fecha y la hora (DATE/TIME) se graban de manera automática en la cinta.Antes de grabar, ajuste la fecha y la hora.
1.Pulse el botón MENÚ .
■ Aparece la lista del menú.
2. Move the MENU SELECTOR to highlight INITIAL | INITIAL | CLOCK SET | |
CAMERA | WL. REMOTE | ||
A/V | BEEP SOUND | ||
and push the MENU SELECTOR. | MEMORY | SHUT. SOUND | |
VIEWER | |||
| DEMO | ||
|
|
2. Desplace el SELECTOR MENÚ hasta resaltar |
INITIAL (inicial) y después pulse el SELECTOR |
MENÚ . |
3.Use the MENU SELECTOR to select CLOCK SET from the submenu.
4.Push the MENU SELECTOR to enter SETTING mode.
■A blinking item indicates the item to be changed. The year will blink first.
5.Using the MENU SELECTOR, change the year setting.
6.Push the MENU SELECTOR.
■The month will blink.
CAM MODE
INITIAL SET |
|
CLOCK SET | SET TIME! |
WL.REMOTE |
|
BEEP SOUND |
|
SHUTTER SOUND |
|
DEMONSTRATION |
|
3. Seleccione la opción CLOCK SET en el submenú |
mediante el SELECTOR MENÚ . |
4 . Pulse el SELECTOR MENÚ para seleccionar la opción SETTING (ajustes).
| ■ | En la pantalla parpadeará la opción que se va |
|
| a cambiar. Primero parpadea el año. |
5. | Ajuste el año mediante el SELECTOR MENÚ . | |
6. | Pulse el SELECTOR MENÚ . | |
| ■ | El mes parpadeará. |
7.Using the MENU SELECTOR, change the month setting.
8.Push the MENU SELECTOR.
■ The day will blink.
9.You can set the day, hour and minute following the same procedure for setting the year and month.
CAM MODE
![]() INITIAL SET
INITIAL SET
![]() CLOCK SET
CLOCK SET
7. | Ajuste el mes mediante el SELECTOR MENÚ . |
8. | Pulse el SELECTOR MENÚ . |
| ■ El día parpadeará. |
9. | Ajuste el día, las horas y los minutos siguiendo |
| el mismo procedimiento. |
10.Push the MENU SELECTOR after setting the minutes.
■The word COMPLETE! will appear, and a few seconds later, the menu screen will automatically return to the sub menu.
11.To exit, push the MENU button.
0 0 : 0 0 1 . J A N . 2 0 0 3
10. Después de ajustar los minutos, pulse el |
SELECTOR MENÚ . |
■ Aparece la palabra COMPLETE! (terminado) y |
unos segundos más tarde el menú de la |
pantalla volverá a automáticamente |
al submenú. |
11. Para salir, pulse el botón MENÚ . |
38
