CONNECTING THE USB CABLE

USB-KABEL ANSCHLIESSEN

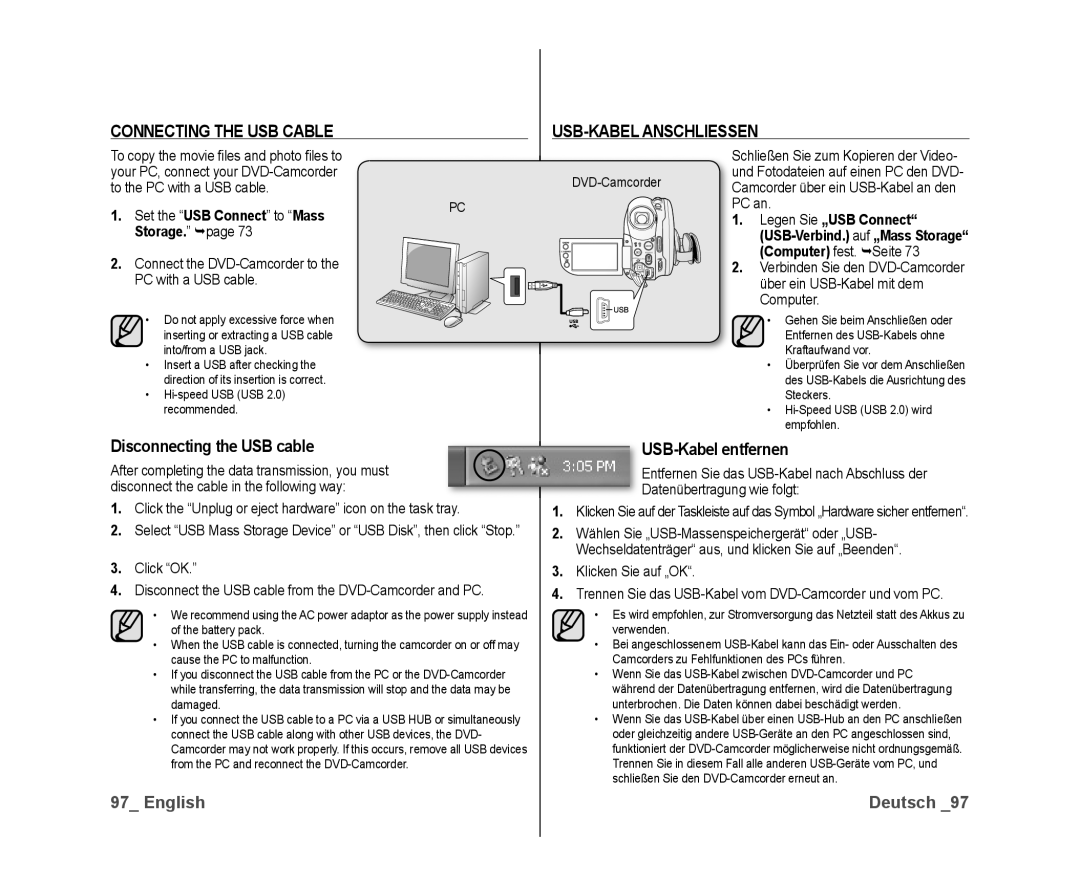
To copy the movie fi les and photo fi les to your PC, connect your DVD-Camcorder to the PC with a USB cable.

1.

Set the “USB Connect” to “Mass

PC


Storage.page 73


2.

Connect the DVD-Camcorder to the


PC with a USB cable.


• Do not apply excessive force when inserting or extracting a USB cable into/from a USB jack.

Insert a USB after checking the direction of its insertion is correct.

Hi-speed USB (USB 2.0) recommended.

DVD-Camcorder

����

�����

����������

����� ���

Schließen Sie zum Kopieren der Video- und Fotodateien auf einen PC den DVD- Camcorder über ein USB-Kabel an den PC an.

1.Legen Sie „USB Connect“ (USB-Verbind.) auf „Mass Storage“ (Computer) fest. Seite 73

2.Verbinden Sie den DVD-Camcorder über ein USB-Kabel mit dem Computer.

Gehen Sie beim Anschließen oder Entfernen des USB-Kabels ohne Kraftaufwand vor.

Überprüfen Sie vor dem Anschließen des USB-Kabels die Ausrichtung des Steckers.

Hi-Speed USB (USB 2.0) wird empfohlen.

Disconnecting the USB cable

After completing the data transmission, you must disconnect the cable in the following way:

1.Click the “Unplug or eject hardware” icon on the task tray.

2.Select “USB Mass Storage Device” or “USB Disk”, then click “Stop.”

3.Click “OK.”

4.Disconnect the USB cable from the DVD-Camcorder and PC.

We recommend using the AC power adaptor as the power supply instead of the battery pack.

When the USB cable is connected, turning the camcorder on or off may cause the PC to malfunction.

If you disconnect the USB cable from the PC or the DVD-Camcorder while transferring, the data transmission will stop and the data may be damaged.

If you connect the USB cable to a PC via a USB HUB or simultaneously connect the USB cable along with other USB devices, the DVD- Camcorder may not work properly. If this occurs, remove all USB devices from the PC and reconnect the DVD-Camcorder.

USB-Kabel entfernen

Entfernen Sie das USB-Kabel nach Abschluss der

Datenübertragung wie folgt:

1.Klicken Sie auf der Taskleiste auf das Symbol „Hardware sicher entfernen“.

2.Wählen Sie „USB-Massenspeichergerät“ oder „USB- Wechseldatenträger“ aus, und klicken Sie auf „Beenden“.

3.Klicken Sie auf „OK“.

4.Trennen Sie das USB-Kabel vom DVD-Camcorder und vom PC.

Es wird empfohlen, zur Stromversorgung das Netzteil statt des Akkus zu verwenden.

Bei angeschlossenem USB-Kabel kann das Ein- oder Ausschalten des Camcorders zu Fehlfunktionen des PCs führen.

Wenn Sie das USB-Kabel zwischen DVD-Camcorder und PC während der Datenübertragung entfernen, wird die Datenübertragung unterbrochen. Die Daten können dabei beschädigt werden.

Wenn Sie das USB-Kabel über einen USB-Hub an den PC anschließen oder gleichzeitig andere USB-Geräte an den PC angeschlossen sind, funktioniert der DVD-Camcorder möglicherweise nicht ordnungsgemäß. Trennen Sie in diesem Fall alle anderen USB-Geräte vom PC, und schließen Sie den DVD-Camcorder erneut an.

97_ English

Deutsch _97

Page 103
Image 103
Samsung VP-DX10H/MEA Connecting the USB Cable USB-KABEL Anschliessen, Disconnecting the USB cable, USB-Kabel entfernen

VP-DX10/HAC, VP-DX10/XER, VP-DX10/KNT, VP-DX10/UMG, VP-DX10H/XEF specifications

The Samsung VP-DX10 is a compact, versatile camcorder that represents an ideal blend of technological innovation and user-friendly design. This model caters to both novice and experienced videographers, offering an impressive assortment of features that enhance the recording experience.

One of the standout characteristics of the VP-DX10 is its ability to record in high-quality MPEG-2 format, ensuring that videos maintain excellent clarity and detail. The device supports DVD-RW/-R and -R DL formats, giving users flexibility in choosing their recording media. With a storage capacity of up to 8 hours and the ability to easily transfer videos to DVD, it streamlines the process of archiving memories.

In terms of imaging performance, the VP-DX10 is equipped with a 1/6-inch CCD sensor, providing a resolution of up to 800,000 pixels for clear and vibrant footage. The 34x optical zoom lens amplifies the camcorder’s capabilities, allowing for dynamic shooting from various distances. Alongside its optical prowess, the VP-DX10 incorporates digital image stabilization technology that minimizes shakiness, making it easier to capture smooth video even during movement.

The device's user-centered design includes a bright, swivel LCD screen, making it convenient to frame shots and play back recordings. Additionally, it features easy-to-navigate menus, enabling quick access to various settings and functions. The built-in USB connectivity allows for direct downloads to computers, facilitating hassle-free editing and sharing of videos.

Moreover, the VP-DX10 incorporates various shooting modes, including sports, portrait, and night modes, each tailored to specific scenarios, enhancing overall recording quality. The presence of a built-in flash and an advanced microphone improves audio-visual recordings, ensuring rich sound quality.

From intelligent battery management to enhanced connectivity options, the Samsung VP-DX10 is designed to meet the demands of modern videographers. Its combination of reliable performance and innovative features makes it a noteworthy choice in the compact camcorder market, appealing to users seeking both portability and quality.