UX-B800SE
About the Telephone Consumer Protection ACT
Table of Contents
Introduction
Specifications
Operating temperature
Scanning Resolution
Power requirements
Power consumption
Important safety information
COPY/HELP key
Look at the Operation Panel
Number keys Use to dial numbers
Letter keys
Setup
Installation
Unpacking Checklist
Unpacking Checklist
Legal size 100 sheets
Loading Paper
Loading Paper
Maximum number of sheets
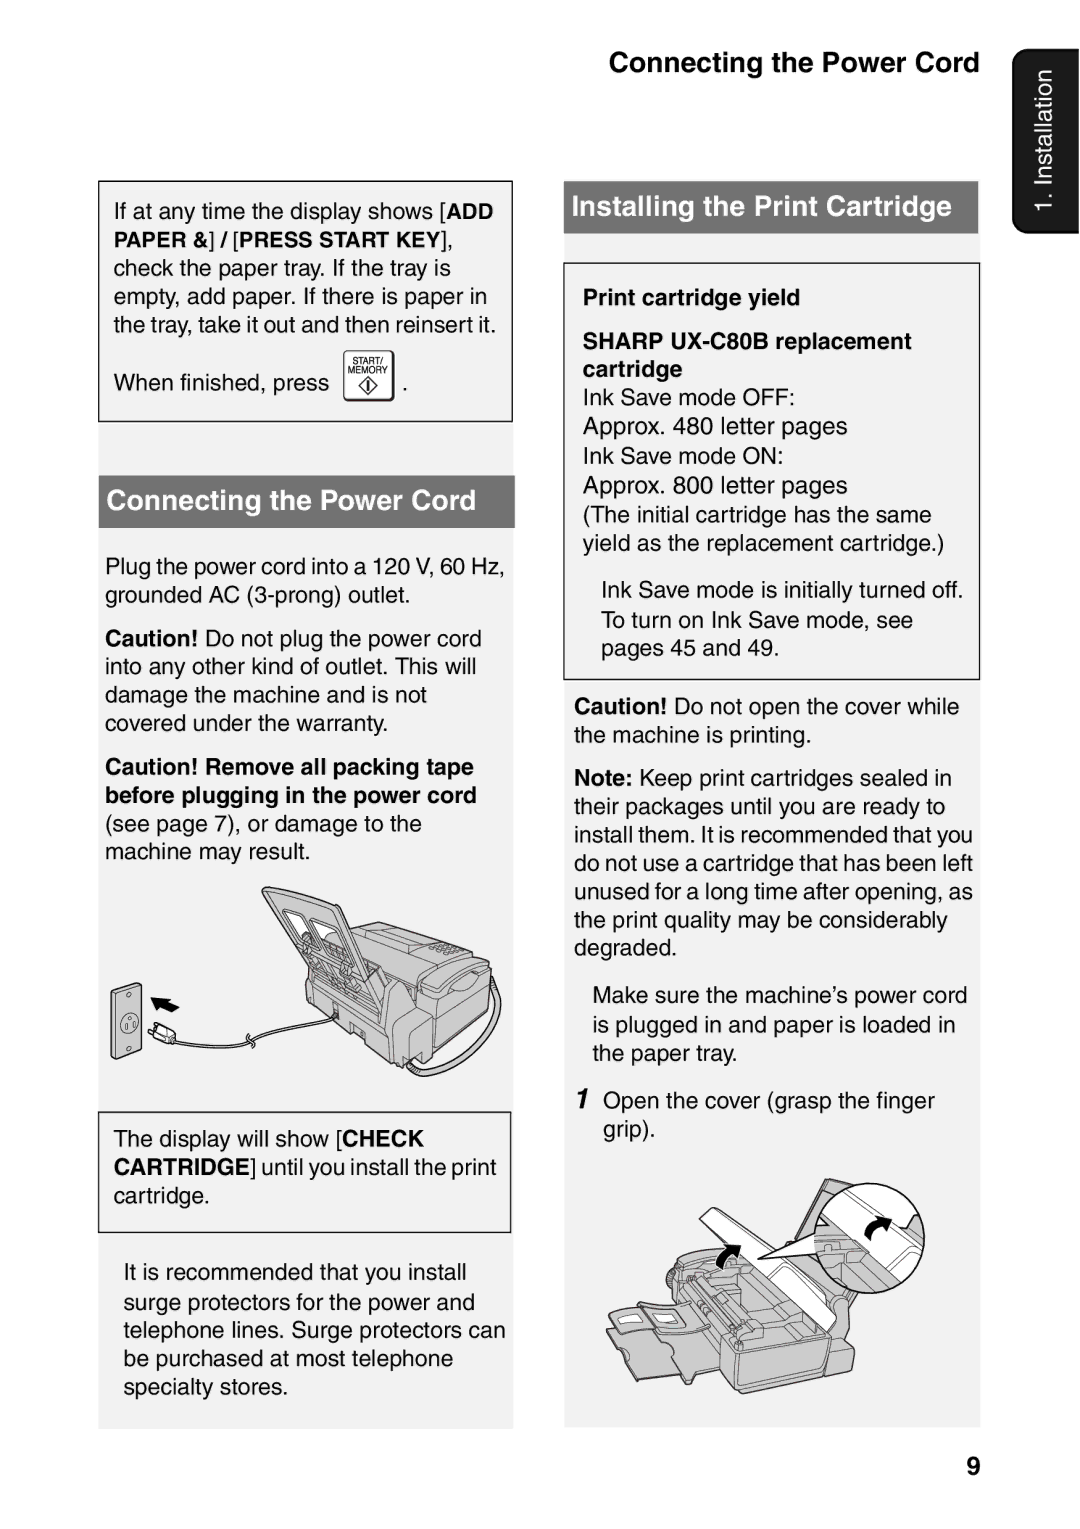
Print cartridge yield Sharp UX-C80B replacement cartridge
Connecting the Power Cord
Connecting the Power Cord
Installing the Print Cartridge
Make sure all Tape is removed Do not touch
Installing the Print Cartridge
Press NEW if the cartridge you installed is new
Remove only the tape from the new cartridge
Press , then until
Connecting the Phone Line
Connecting the Phone Line
Name and Fax Number
Press to select A.M. or to select P.M
Setting the Date and Time
Setting the Date and Time
Press to exit
Volume Adjustment
Setting the Reception Mode
Setting the Reception Mode
Requirements
Connecting the Machine
Connecting the Machine
Fax to E-mail
Press , then to show
If NOW Connecting / Check
IP address
Checking your IP address and the connection
If the machine is unable to Communicate
Accessing the machine’s Web
Mail Settings
Mail Settings
Initial setting Tiff
Mail settings
Setting Description
Or C key, or press
Storing E-mail Addresses
Storing E-mail Addresses
Storing an e-mail address
Display 1=EDIT, 2=CLEAR
Fax to E-mail Transmission
Fax to E-mail Transmission
Editing and clearing stored e- mail addresses
Press or until the name
When finished, press File Format Press for Tiff
Press , press
To search for a stored address, press
Sending a message only
Error messages
Can show images in the selected format
Initializing the network settings
Network Settings
Network Settings
Loading the Document
Sending Faxes
Transmittable Documents
Transmittable Documents
Contrast settings
Resolution and Contrast
Resolution and Contrast
Resolution settings
With Normal Dialing, you pick up
Sending a Fax Normal Dialing
Storing fax and phone numbers
Display FAX # Mode
Sending a Fax Auto Dialing
Sending a Fax Auto Dialing
Another number, or press to exit
Editing and clearing auto-dial numbers
Number, or press to exit
Press or until Number appears and press
Search Dialing Press or
Using an auto-dial number to send a fax
Automatic redialing, press
Sending a fax by Direct Keypad Dialing
Redial
Automatic redialing
Sending a Fax From Memory
Batch Page Numbering
Batch Page Numbering
Receiving Faxes
Using Auto Mode
Using Auto Mode
Using Manual Mode
Putting a call on hold
TEL/FAX Mode
TEL/FAX Mode
Reception to Memory
If Memory Full appears
Making Copies
Sorting copies
Enlarge/reduce Press or
Broadcasting
Special Functions
Broadcasting
Storing destinations in Group Keys
Broadcasting using a Group Key
If the memory becomes full
Until Then
Caller ID Requires Service
To delete a destination, press when it appears
When you have finished entering Destinations, press
Number
Display messages
Caller ID list
Deleting calls from the list
Blocking voice calls
Distinctive Ring Requires Service
Duplex Scanning
Blocking Unwanted Faxes
Blocking Unwanted Faxes
Receiving Faxes to E-mail
Receiving Faxes to E-mail
Press Press to select on To turn off Receive Fax to E-mail
Activating and deactivating Receive Fax to E-mail
Printing forwarded faxes
Printing a report
Activating Secure Receive
Setting a secure code
Secure Receive
Secure Receive
Clearing the secure code
Deactivating Secure Receive
Initial setting no Standard
Option Settings and Print Settings
Option Settings
Option Settings
Initial setting OFF Setting
Initial setting Error only
Initial setting Tone
Initial setting 15 seconds
Initial setting no
Initial setting YES
Press YES to have the machine verify the presence of a
Print Settings
Print Settings
Initial setting English
Not satisfactory after aligning the print cartridge. See
Initial setting Letter
Initial setting OFF
Press to print the list
Printing Lists
Headings in the Transaction Report
Transaction Report
Transaction Report
Cleaning the scanning glass and rollers
Maintenance
Cleaning the Machine
Cleaning the Machine
Improving Print Quality
Cleaning the housing
Cleaning the print cartridge nozzles
Improving Print Quality
Wiping the print nozzles and contacts
Wipe the part indicated below with a
Cleaning the cartridge holder
About the lithium battery
Dirty print cartridge holder may cause
Line error
Troubleshooting
Problems and Solutions
Problems and Solutions
Responding you should hear a fax tone
Reception and copying problems
Receiving machine manually and make sure that it is
Transmission or copying
General problems
Printing paper comes
Ability
Messages and Signals
Messages and Signals
Ink remains
Persists, see Line error on
Print cartridge is installed correctly, and then close
Paper jam may have occurred. Follow the procedure
Server Error
Audible signals
Clearing jammed printing paper
Clearing Paper Jams
Clearing Paper Jams
Clearing a jammed document
Part distribution centers
Ordering Parts
Ordering Parts
FCC Regulatory Information
A R P
Material Safety Data Sheet 2/3
Material Safety Data Sheet 3/3
Quick Reference Guide
Cómo enviar un fax por marcación normal
Guía de referencia rápida
Index
Index
Index
Web page in machine
Limited Warranty
Sharp Plaza, Mahwah, New Jersey
Sharp Corporation